Hi GPODers!
Over the past couple of weeks, Cherry Ong in Richmond, British Columbia has recounted the process of removing a small but stunning garden bed from her yard to make space for the gorgeous greenhouse of her dreams (if you missed those posts, be sure to check out Part 1 and Part 2 of this series). As most of you have noted in the comments, it feels like a huge sacrifice to say goodbye to such beautiful plantings, but todays post is a bit of a turning point! The garden sacrifices are over and the greenhouse construction is underway. Cherry dives deep into the process of building one of these prefabricated greenhouses, and gives lots of helpful tips and advice for anyone looking to make a similar addition to their garden.
Picking up and the DIY Build
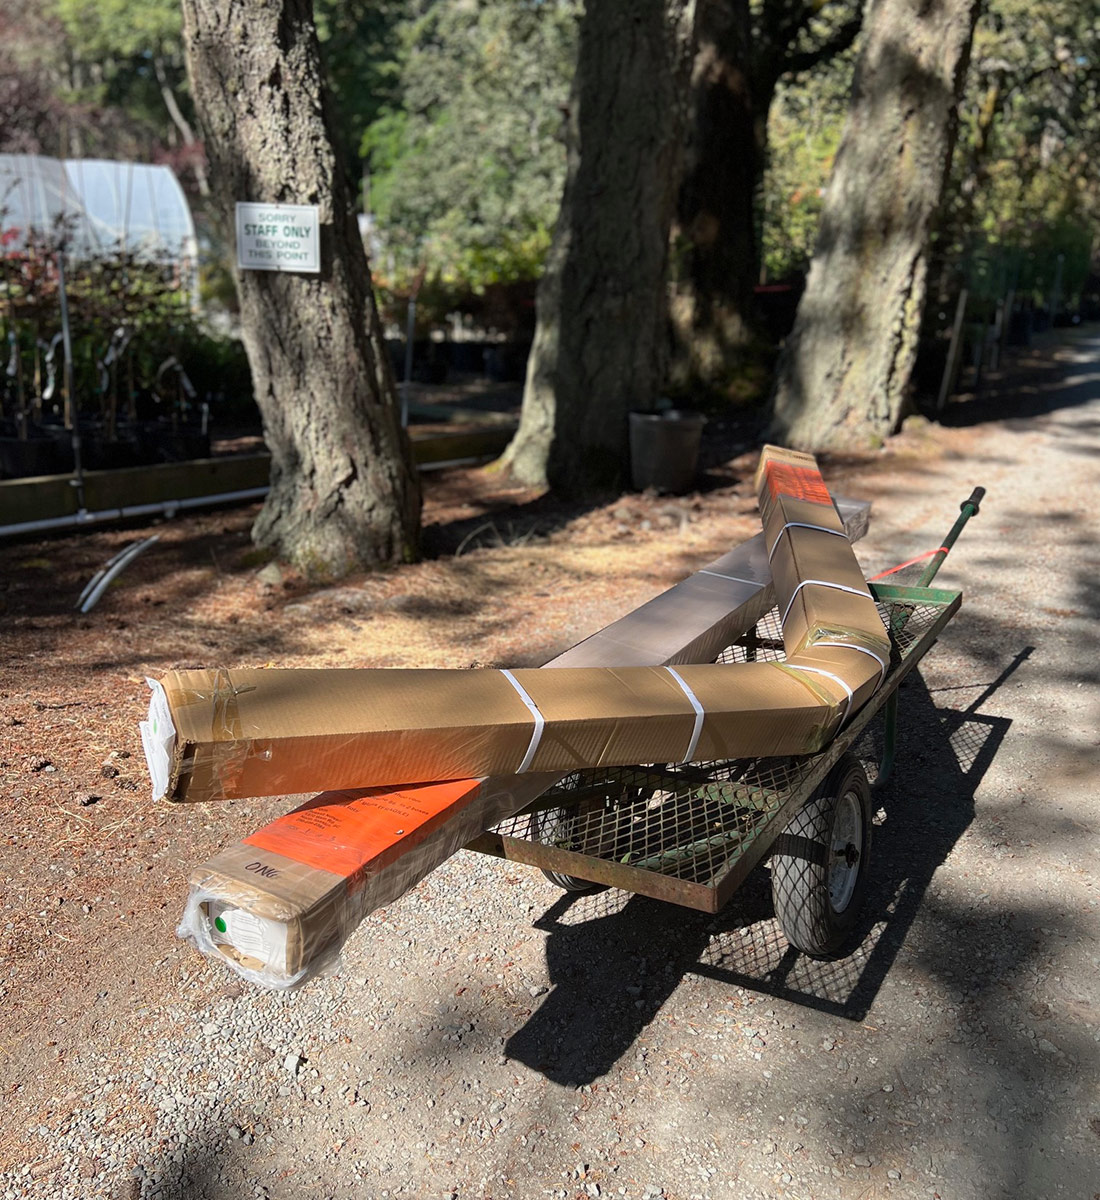
In the fall, we rented a cube van from Home Depot, hopped on a ferry to pick up our greenhouse from the nursery. Russell Nursery’s (@russellnursery) website videos (hallsgreenhousesbc.com/instructional-videos) and verbal advice provided the best support for the DIY Build. Installation took up a weekend, this included the aluminum plant stands.
Tips for those who plan on doing this: take extra care in handling the glass panels. They were shipped in a crate which requires a deposit. We suggest you handle one glass pane at a time when moving them. Keep them dry.
 Pick up at Russell Nursery.
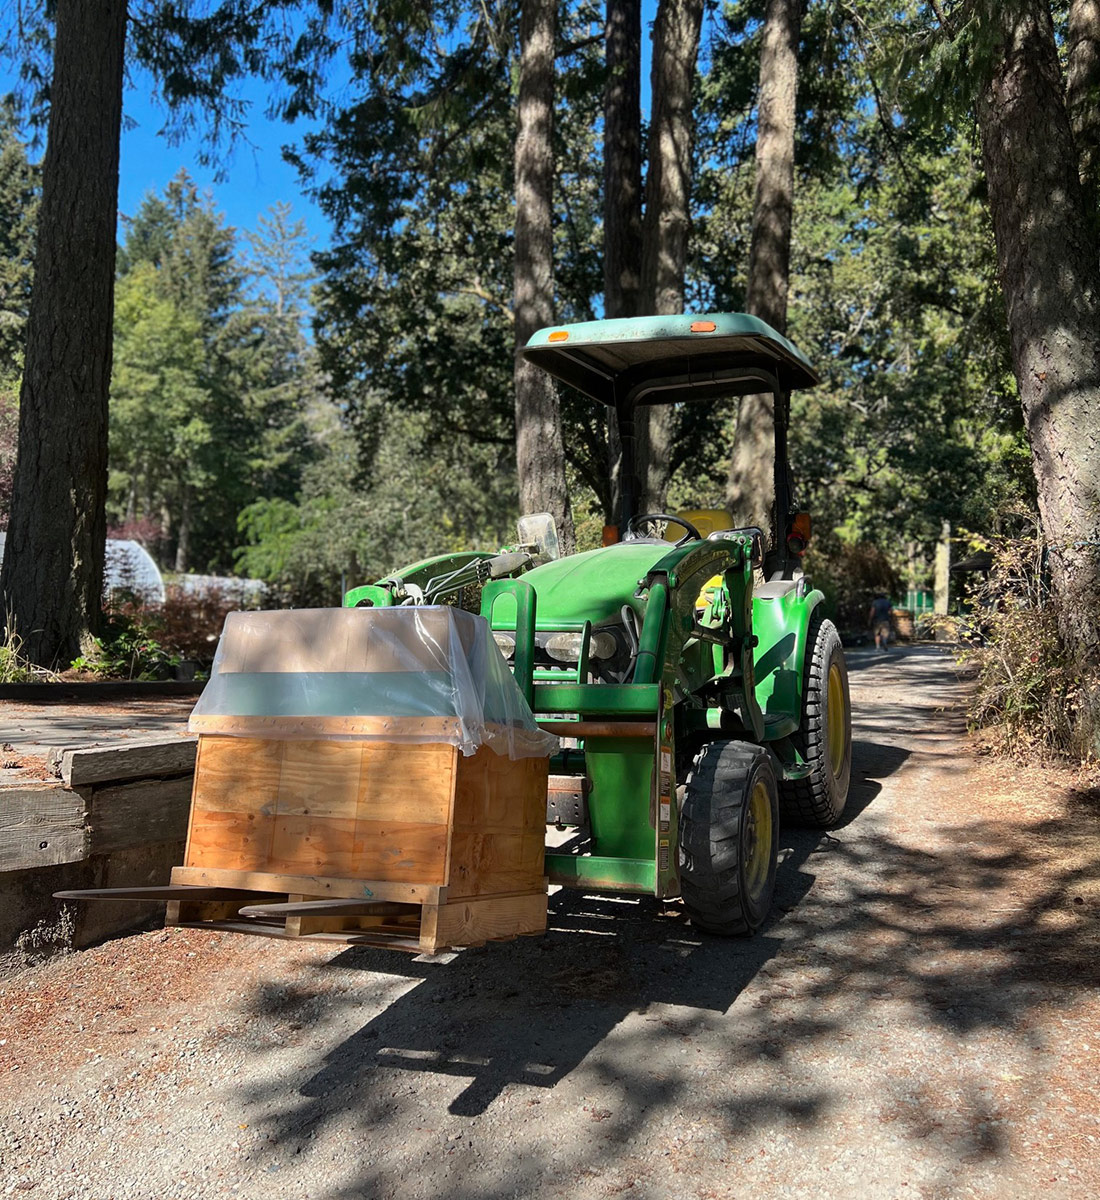 The wooden crate with the glass panels was too heavy for one person to carry. We estimate it weighed 300 lbs.
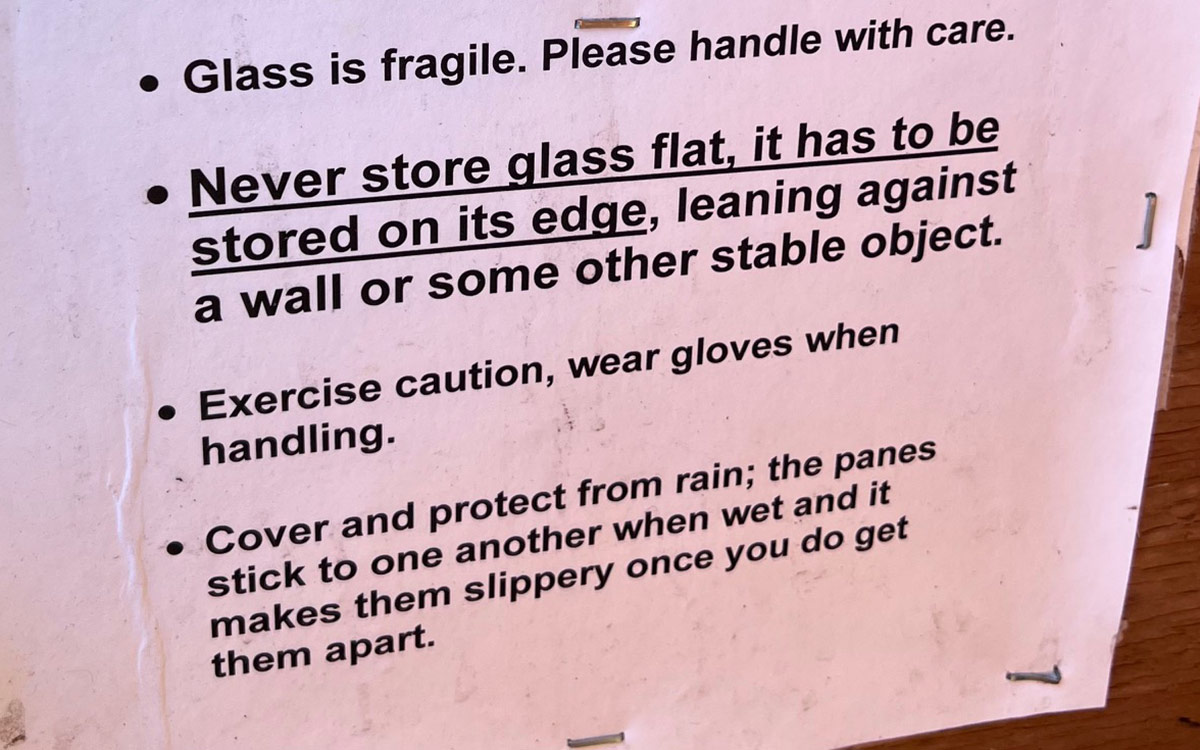 The glass panels came with various warnings to help you ensure successful transportation, handling, and storage. After a sizable investment and lots of preparation work, the last thing you need is being set back by broken panels.
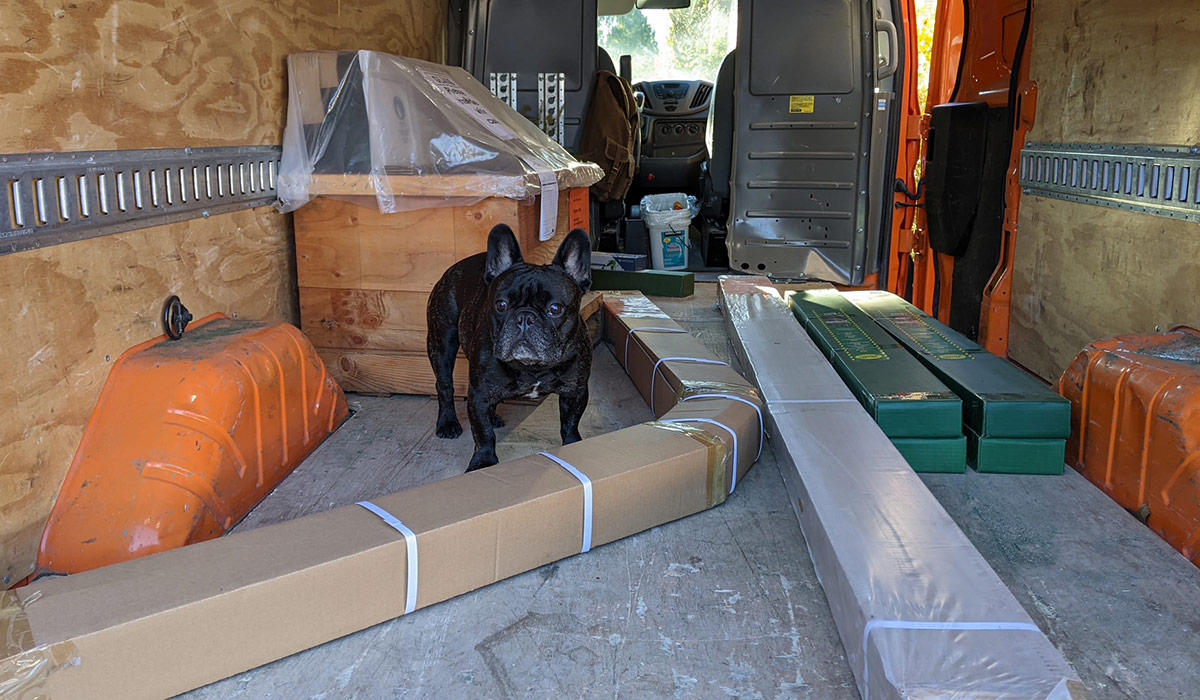 Brocc inspecting the cube van.
Challenges in The Build and Troubleshooting Them
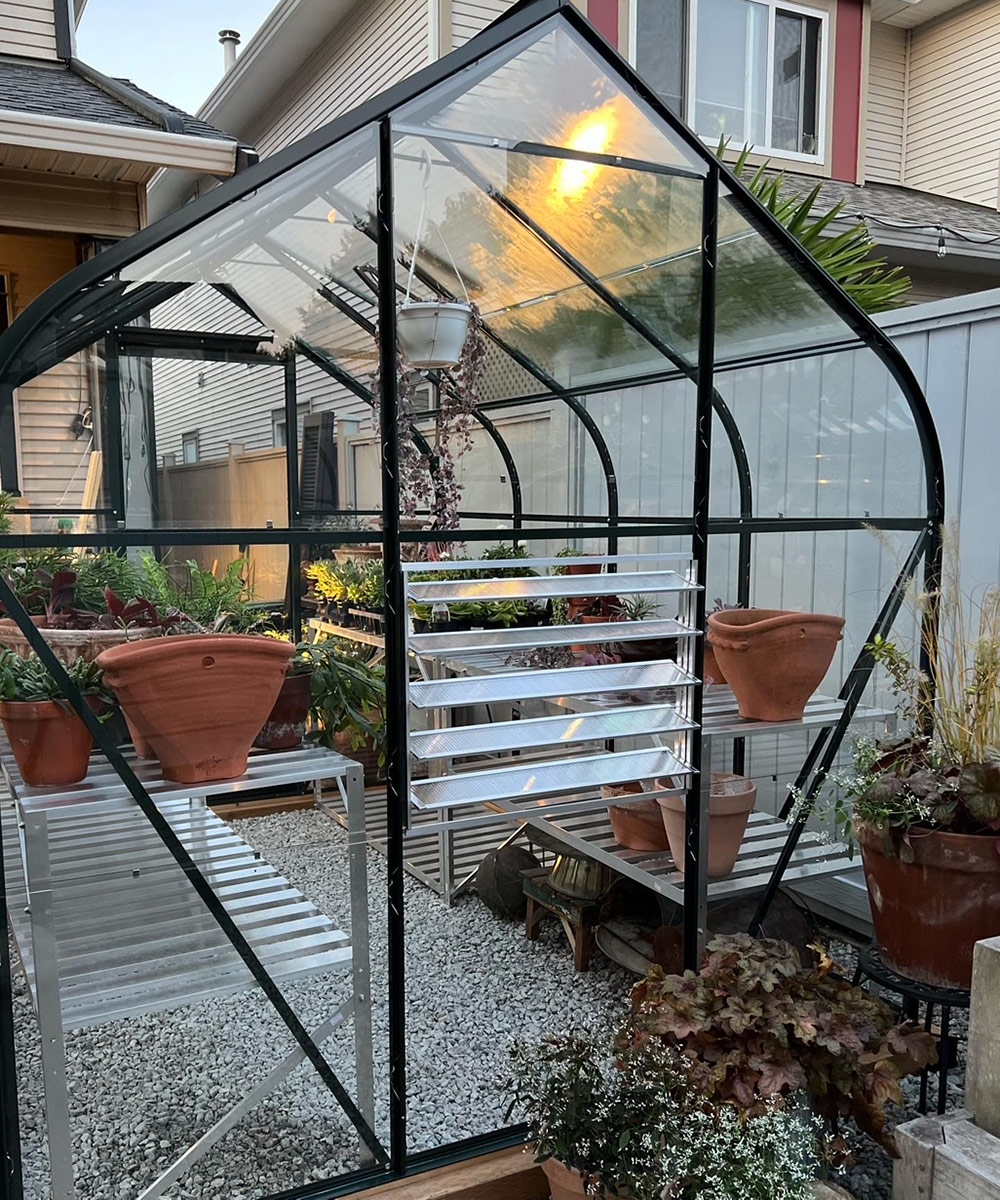
The greenhouse is oriented north to south. The door is located on the north side. It isn’t plumbed. We use a nearby electrical outlet to power the heater and exhaust fan. The plant stands are aluminum and sold separately. They were hand assembled to prevent stripping of the screws.
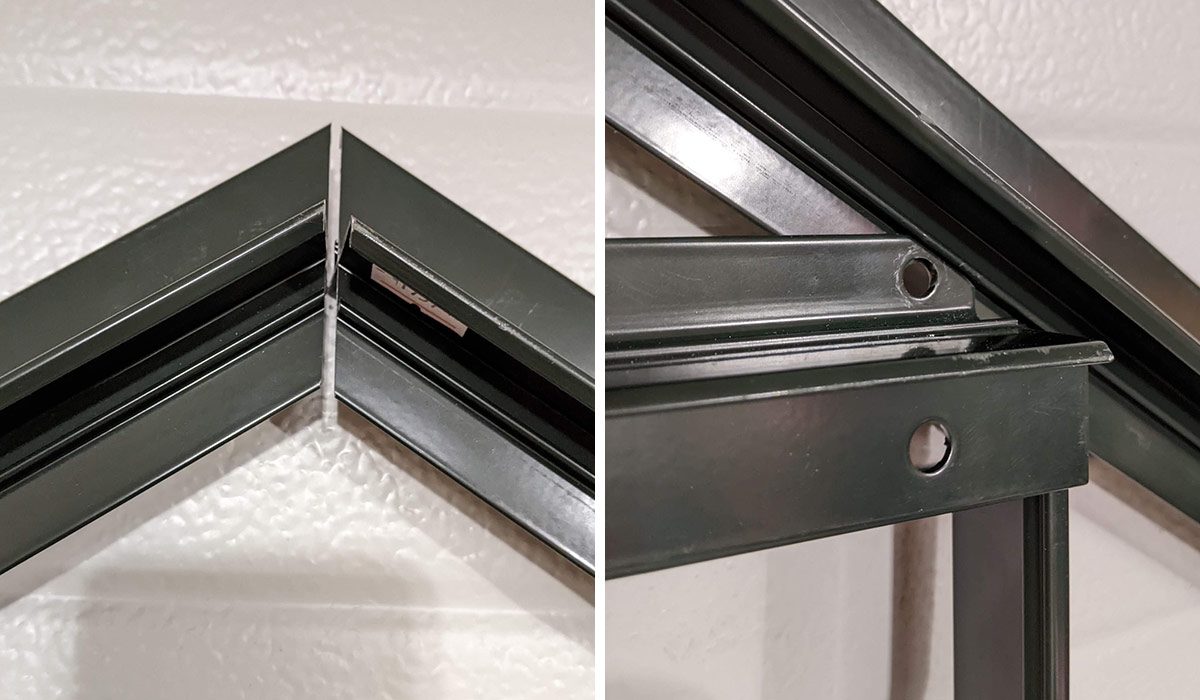 Initial build and fitting was done in the garage. As you can see from the photos, certain parts didn’t line up and required some adjustments. This constituted about 1% of the entire structure so it’s a minor concern.
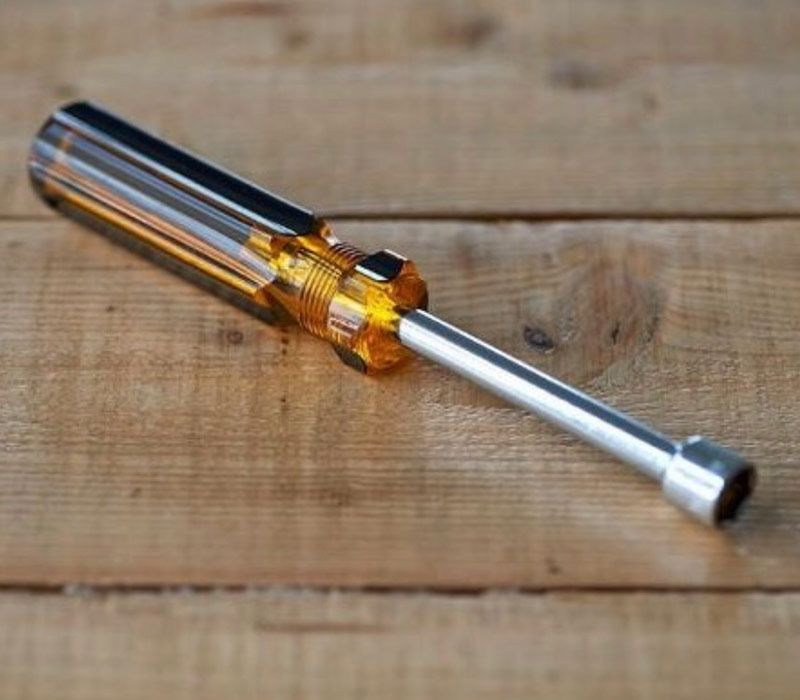 Tip from Nathan: a 10 mm spanner (also known as a socket wrench) with handle is handy for Halls nuts and bolts. (Photo courtesy of Russell Nursery’s website)
 Russell’s best advise? Take the time to look it all over before you start and take a very methodical approach. Diving in and reading the directions later is NOT recommended!!
 Brocc’s FOMO (fear of missing out) has struck again!
 From Russell Nursery: “Halls greenhouses are low-tech and designed to be easily assembled with simple tools. The pieces are labelled and the kits are organized so that the pieces needed for each step are bundled together. The instructions consist mostly of diagrams and photos, with minimal text, but are supplemented with helpful installation tips, compiled by our own installers. Be sure to read them before you start–you’ll save yourself time and effort!! Please also take the time to check out the handy instructional videos to help make the installation process go a little smoother.
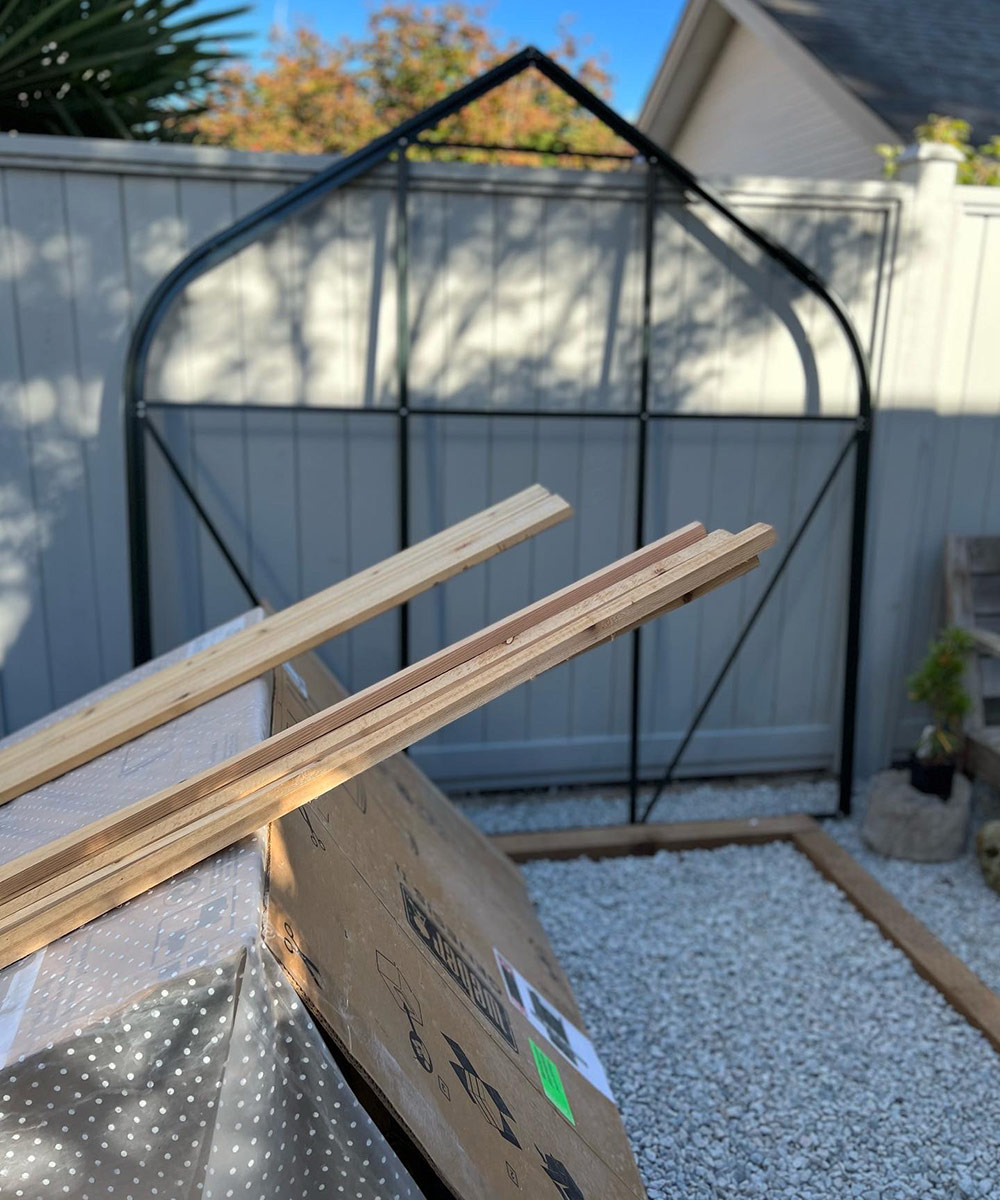
Panels
My husband said the most challenging step was attaching the connectors between the polycarbonate and glass panels as the connectors were quite tight.
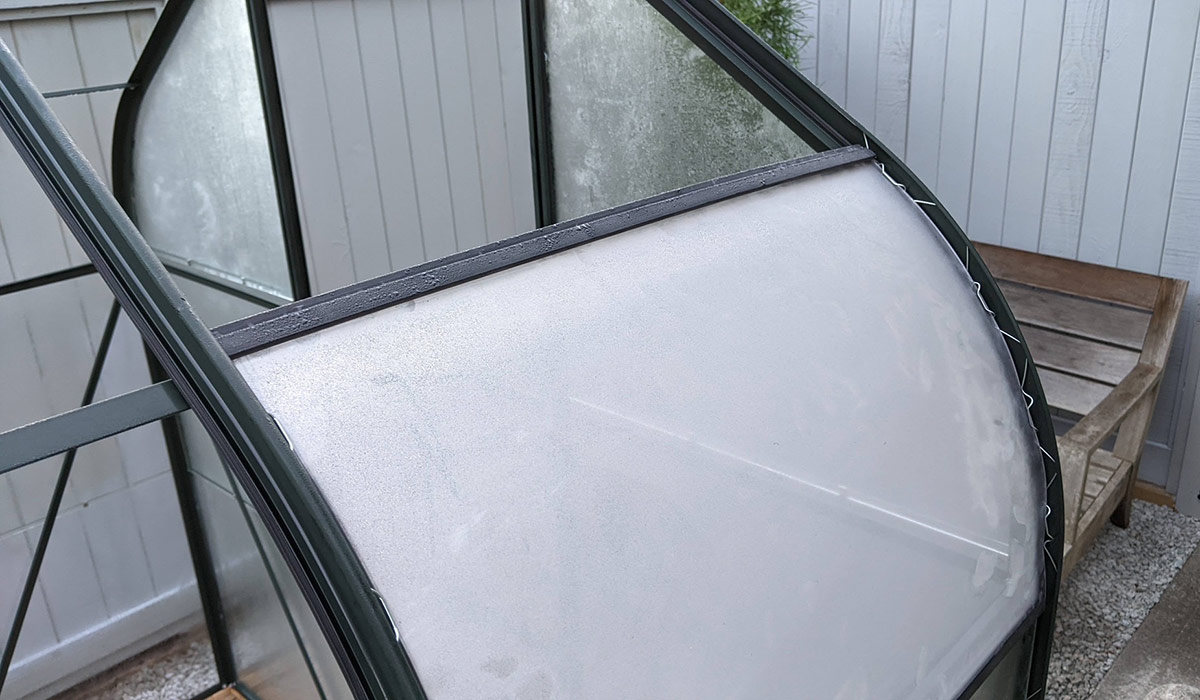 Polycarbonate panel with protective coating while being attached.
The Automatic Roof Vent Opener and The Roof Vent
We also obtained the Ventomax Automatic Roof Opener for fully automatic greenhouse ventilation. It works by means of solar energy. It automatically opens and closes by means of preset temperatures.
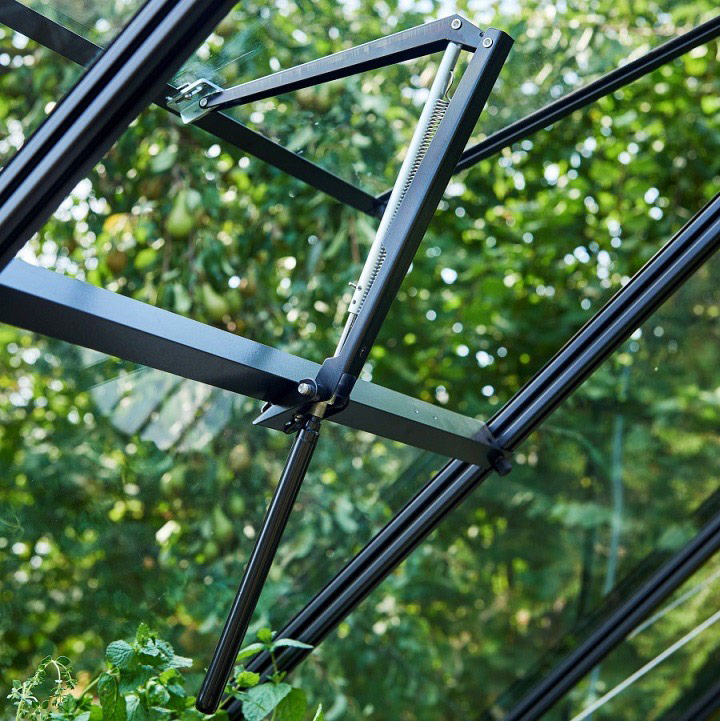 Ventomax Automatic Roof Opener (Photo courtesy of Russell Nursery’s website)
Instructions to attach the gas strut to the vent panel on the roof were not very clear so we recommend to seek advice from Nathan. Make sure the part that attaches to the frame does not touch the glass. What Hubby ended up doing was putting a piece of rubber between the attachment point and the glass to create a seal.
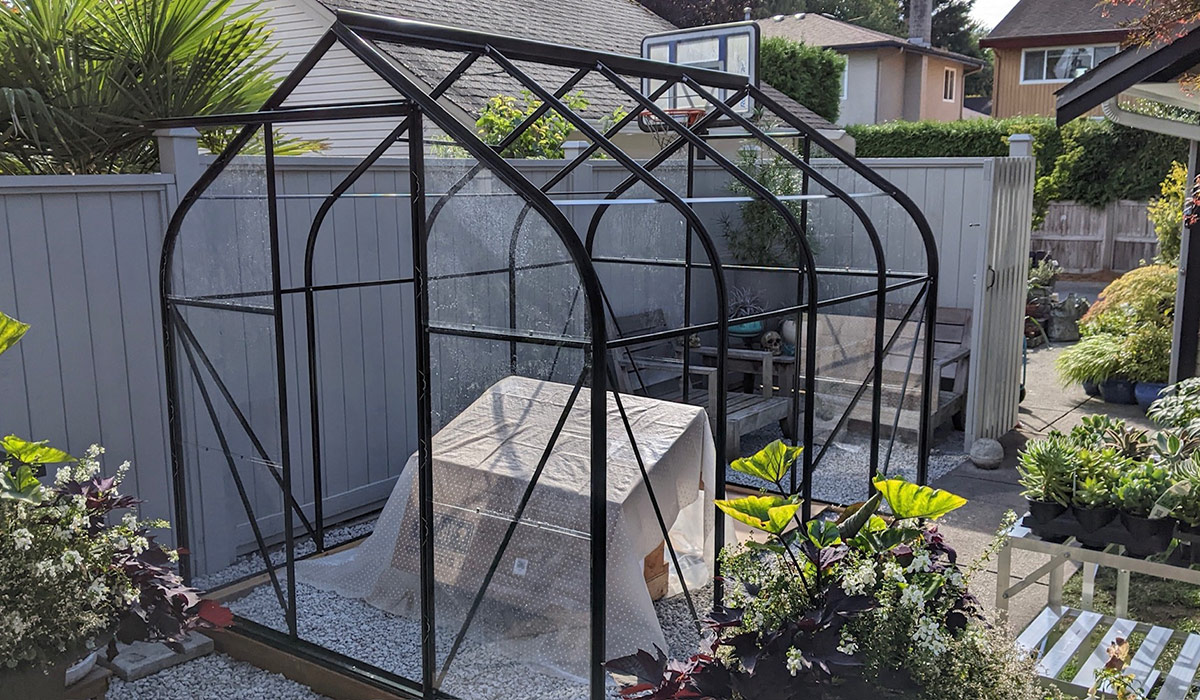
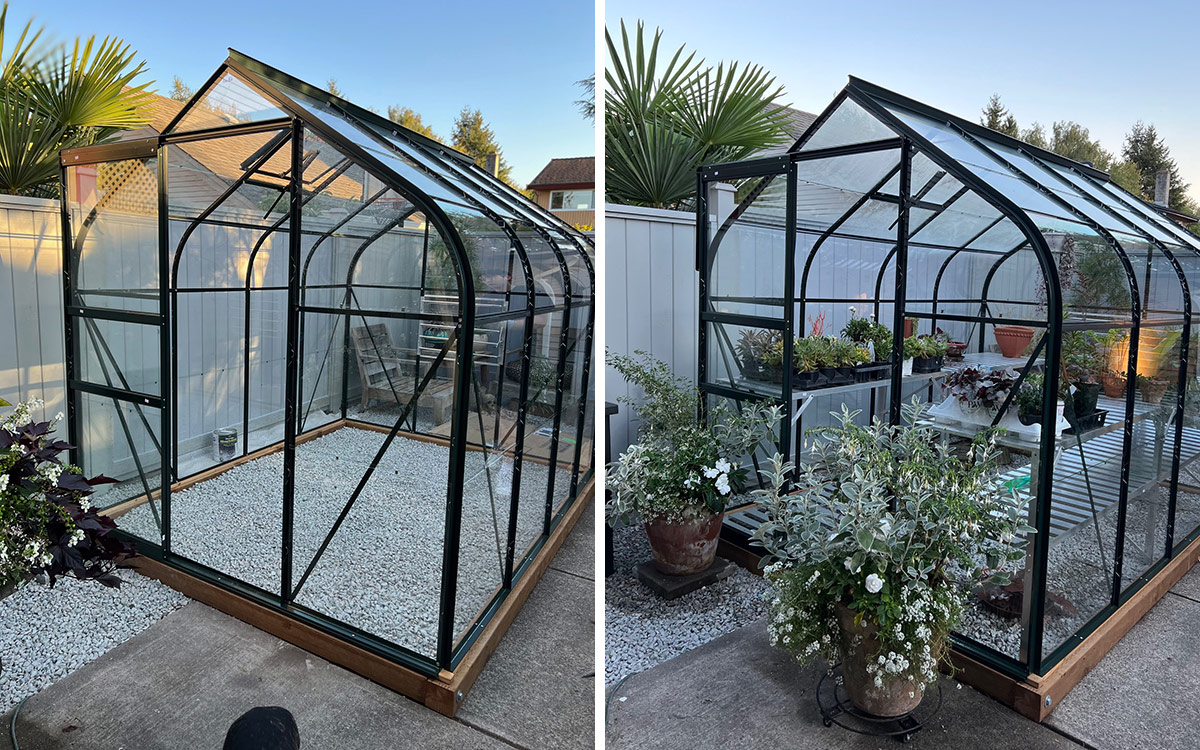 The greenhouse complete! Cherry made an amazing choice in her greenhouse selection, the structure is beautiful even when it isn’t filled with plants. But of course, Cherry has already put it to good use and has all kinds of garden treasures inside and around.
Greenhouse Louvre Windows
 Louvres were extra and were made of polycarbonate. They are needed for cross ventilation. We were warned that it would be difficult to open and close.
Thank you for sharing this very timely series with us, Cherry! Though we have a few more installments in this series where you share more helpful insights, I’m already feeling very inspired to make some garden changes (even if that involves some sacrifices along the way).
What garden changes are you planning this spring? Let us know in the comments below, and don’t forget to take photos of the process to share with the blog. Follow the directions below to submit photos via email, or send me a DM on Instagram: @agirlherdogandtheroad. And have a fabulous weekend, everyone!
Have a garden you’d like to share?
Have photos to share? We’d love to see your garden, a particular collection of plants you love, or a wonderful garden you had the chance to visit!
To submit, send 5-10 photos to [email protected] along with some information about the plants in the pictures and where you took the photos. We’d love to hear where you are located, how long you’ve been gardening, successes you are proud of, failures you learned from, hopes for the future, favorite plants, or funny stories from your garden.
Have a mobile phone? Tag your photos on Facebook, Instagram or Twitter with #FineGardening!
Do you receive the GPOD by email yet? Sign up here.
Fine Gardening Recommended Products

Buffalo-Style Gardens: Create a Quirky, One-of-a-Kind Private Garden with Eye-Catching Designs
Fine Gardening receives a commission for items purchased through links on this site, including Amazon Associates and other affiliate advertising programs.
Buffalo-Style Gardens is a one-of-a-kind, offbeat garden design book that showcases the wildly inventive gardens and gardeners of Buffalo – and offers readers “the best of the best” ideas to use in their own small-space gardens.
The Crevice Garden: How to make the perfect home for plants from rocky places
Fine Gardening receives a commission for items purchased through links on this site, including Amazon Associates and other affiliate advertising programs.
A crevice garden replicates the environmental conditions of mountain tops, deserts, coastlines, and other exposed or rocky places on earth. These striking garden features provide perfect conditions for the plants native to these far-off places, bringing the cultivation of these precious gems within everybody’s reach.