
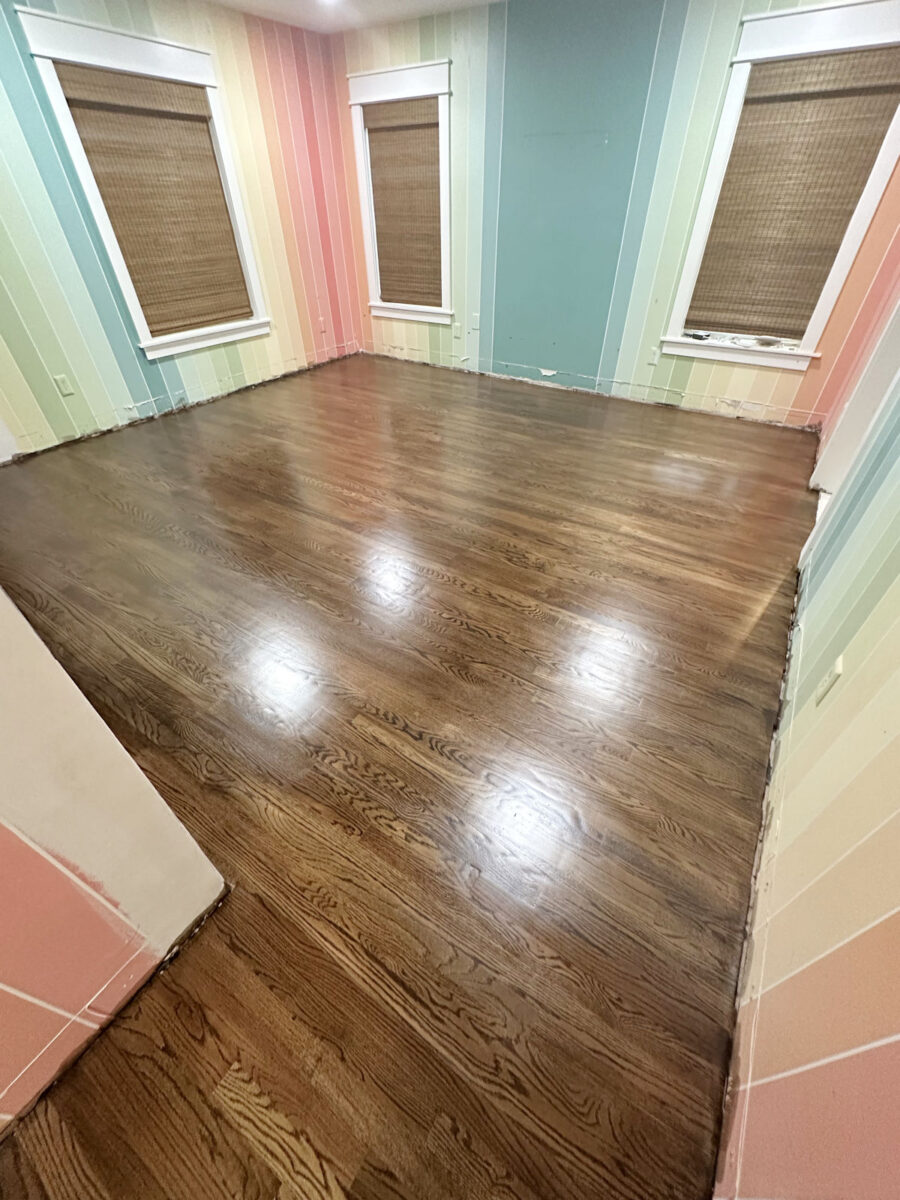
I’m still not quite finished with the floors in our bedroom suite, but I’m one step closer to having them finished. And I’m so excited with how they’re turning out! Since I agonized over my decision about what to use on my red oak hardwood floors and how to finish them to get a natural look, I wanted to show y’all what the floors look like as of this morning after using the Bona Natural Seal on them last night before I went to bed.
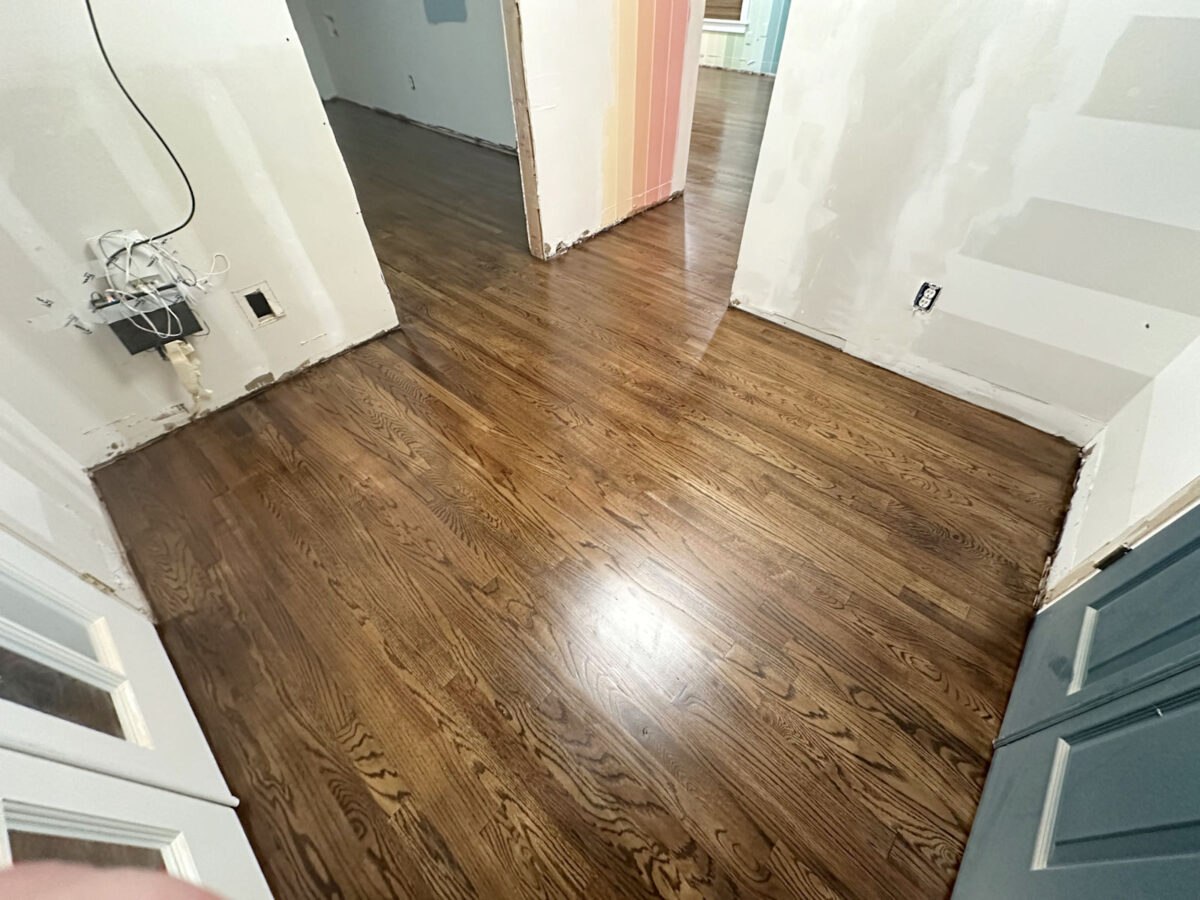
First, let me back up a bit and explain the whole process. If you’ll remember, right after these floors were installed about 2.5 months ago, I decided to match them to the rest of the house. So I proceeded to stain them a dark color (a 50/50 mixture of Minwax dark walnut and special walnut stain), and then polyurethane them. They turned out like this…
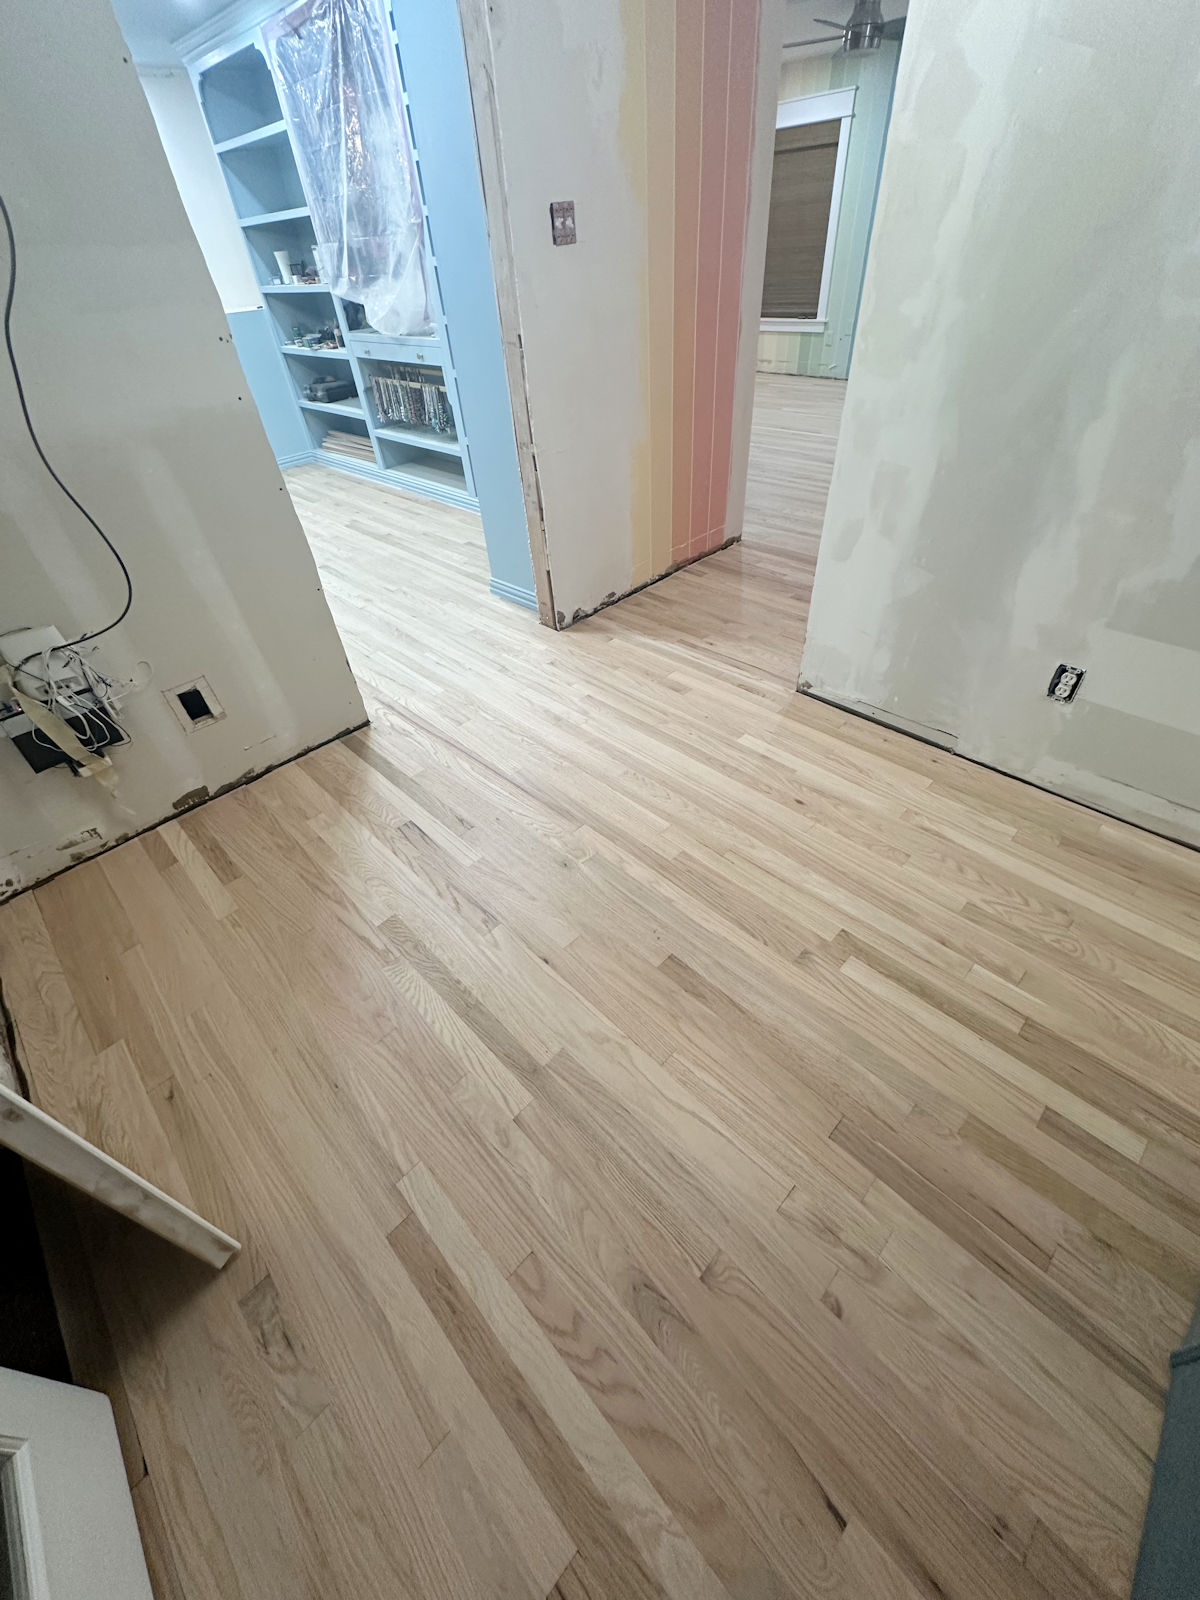
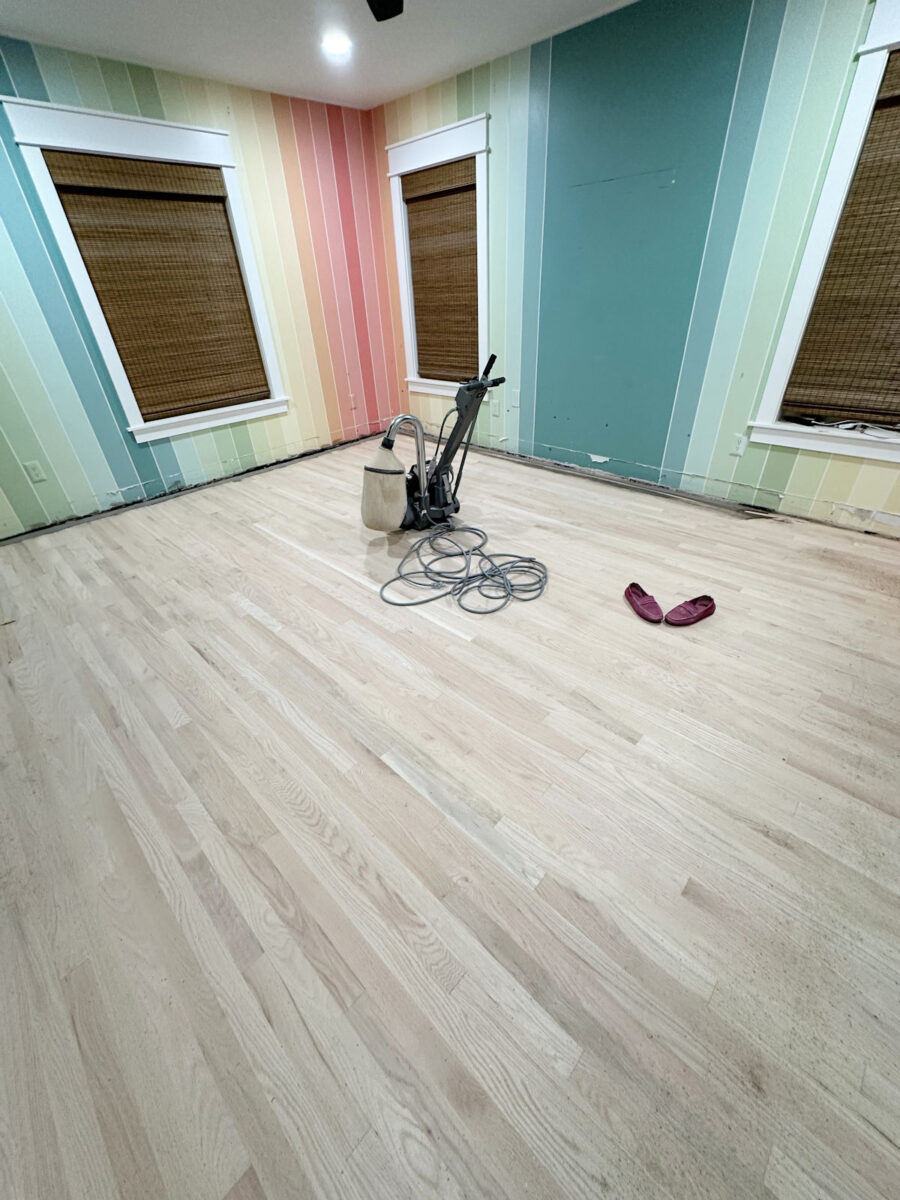
Then I changed my mind and decided that I wanted light, natural wood floors. So last Thursday, I rented a drum sander and an edge sander from Home Depot, and I spent the next two days sanding the floors. I started with 36-grit sandpaper to get all of that dark finish off of the floors, and then I used 60-grit, 80-grit, and finished with 100-grit, and that’s where I stopped based on the instructions that I found on the Bona website.
When I finished the sanding, the floors looked like this…
It took a lot of work and a lot of sanding to get all of the dark stain out of the grain of the wood, but I didn’t want any of that stain left behind. Red oak hardwood flooring doesn’t have really dark grain, so if you can still see dark grain after sanding, that’s stain that has been left behind, and it needs to be sanded more.
After taking off on Saturday and Sunday (because I was so incredibly sore from that edge sander, and because I pulled a muscle in my hip and back when I very stupidly tried to lift and move the heavy drum sander by myself), I finished up with the detail sanding yesterday. I didn’t feel the need to fill in all of the cracks and gaps in the floor because wood contracts and expands throughout the different seasons of the year, but I did have some pretty large gaps, a few knots, and a few areas where the edges of some boards looked splintered, so I used some red oak wood filler (this is the one I used – affiliate link) to fill in those areas, and then I used my 5-inch rotary sander with 100-grit sandpaper to sand those down. I also used a scraper to scrape the remaining stain off the floors in the corners and around the door jambs where the floor sanders couldn’t reach.
After vacuuming the floors really well with my shopvac to remove any dust, I was finally ready to apply the Bona NaturalSeal to the floor. I watched so many videos about applying this product to determine the best way for me, a complete novice, to do it. I considered using a T-bar because that’s how most of the people in the videos I watched applied it, but all of them were also pros who do this regularly. Having never used a T-bar before, I was pretty sure they made it look so easy because of their vast experience with it. So after finding this video showing the Bona sealer being applied with a roller, I decided that was more my speed. I’m a novice when it comes to using Bona products on floors, but when it comes to DIY in general, I’m a pro at using a roller after 30+ years of DIYing.
I used a Wooster 14-inch roller with a 14-inch microfiber roller cover (both of which I found at Home Depot) to apply the Bona NaturalSeal. And just like in that video, I shook the product thoroughly before opening it, poured it directly onto the floor, and then rolled it on going the direction of the grain. I always made sure that the new area that I applied feathered into the previous section smoothly with no puddles or ridges of built-up product on the floor.
After I made my way from the far wall of the bedroom, into the short hallway, into the walk-in closet, and then into the foyer and out the music room doors, I turned around and took this picture while the sealer was still wet. I was confident that it would dry lighter, but even if it didn’t, I would have been perfectly happy with that color because I loved that warmth that it gave the wood when it was still wet.
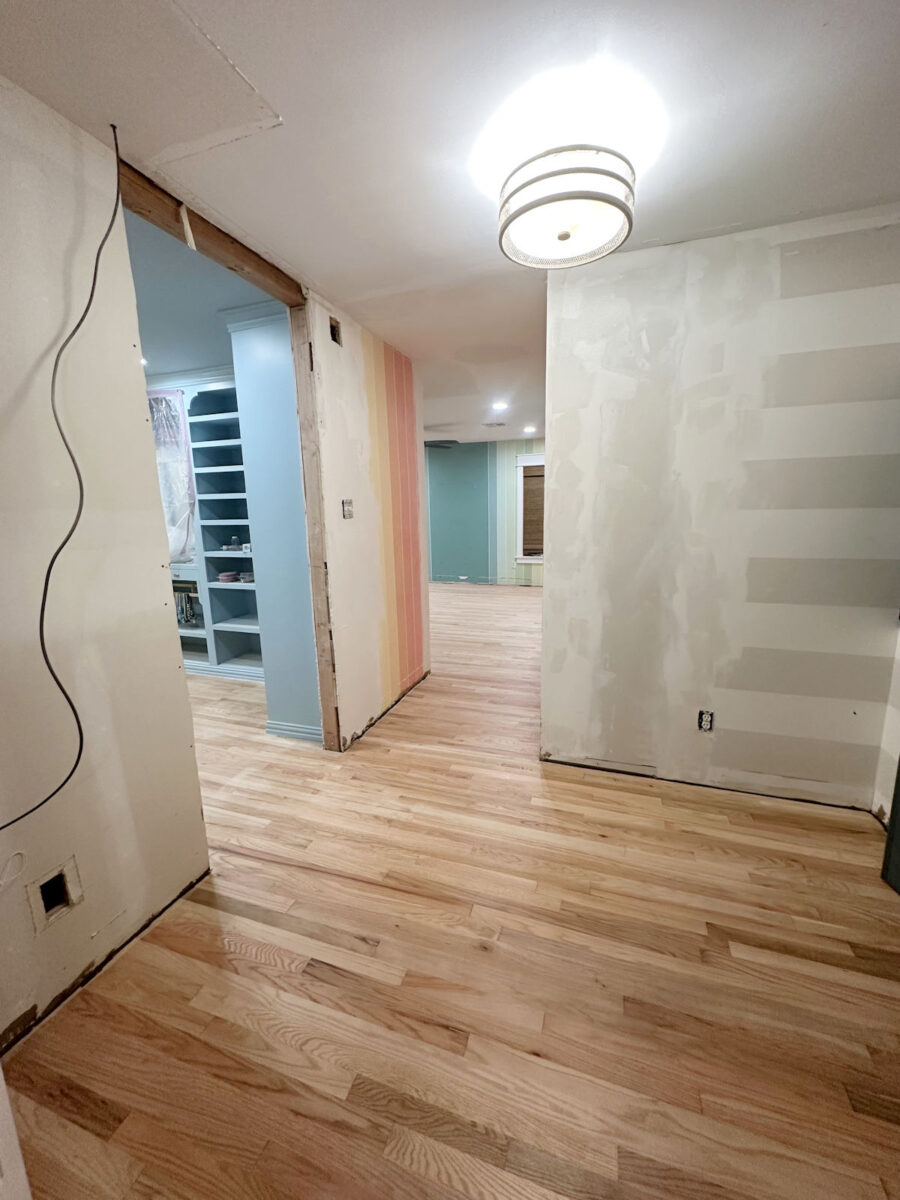
So this morning, I was anxious to get out of bed and look at the floors to see how they looked after the NaturalSeal had dried. Are you ready for the amazingness that is Bona Natural Seal on red oak floors? Here it is!
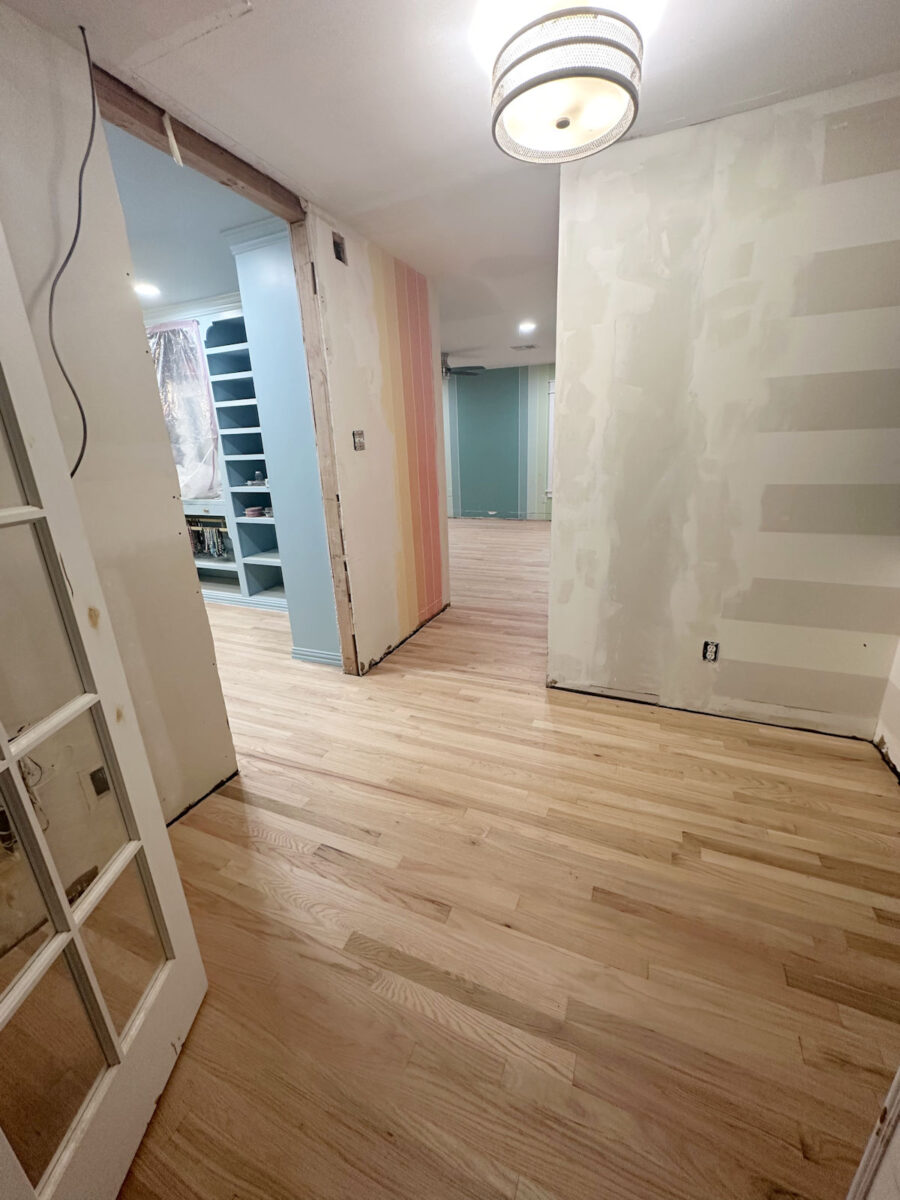
It did lighten up a bit as it dried, and the color also evened out. The boards that looked really dark when they were wet seemed to lighten a bit after they dried, and everything seems a little lighter than it was when it was wet.
The foyer has different lighting (and not very much of it), so it looks a little bit darker in the foyer. But all throughout the bedroom suite, the floors are light but have just a touch of warmth to them. Since the Bona NaturalSeal has a little bit of white pigment in it (half the amount of white as the Bona NordicSeal), I thought the final color might be a little bit lighter than the raw, freshly sanded red oak color. But it’s actually just a bit darker and warmer. And I’m thrilled with the color.
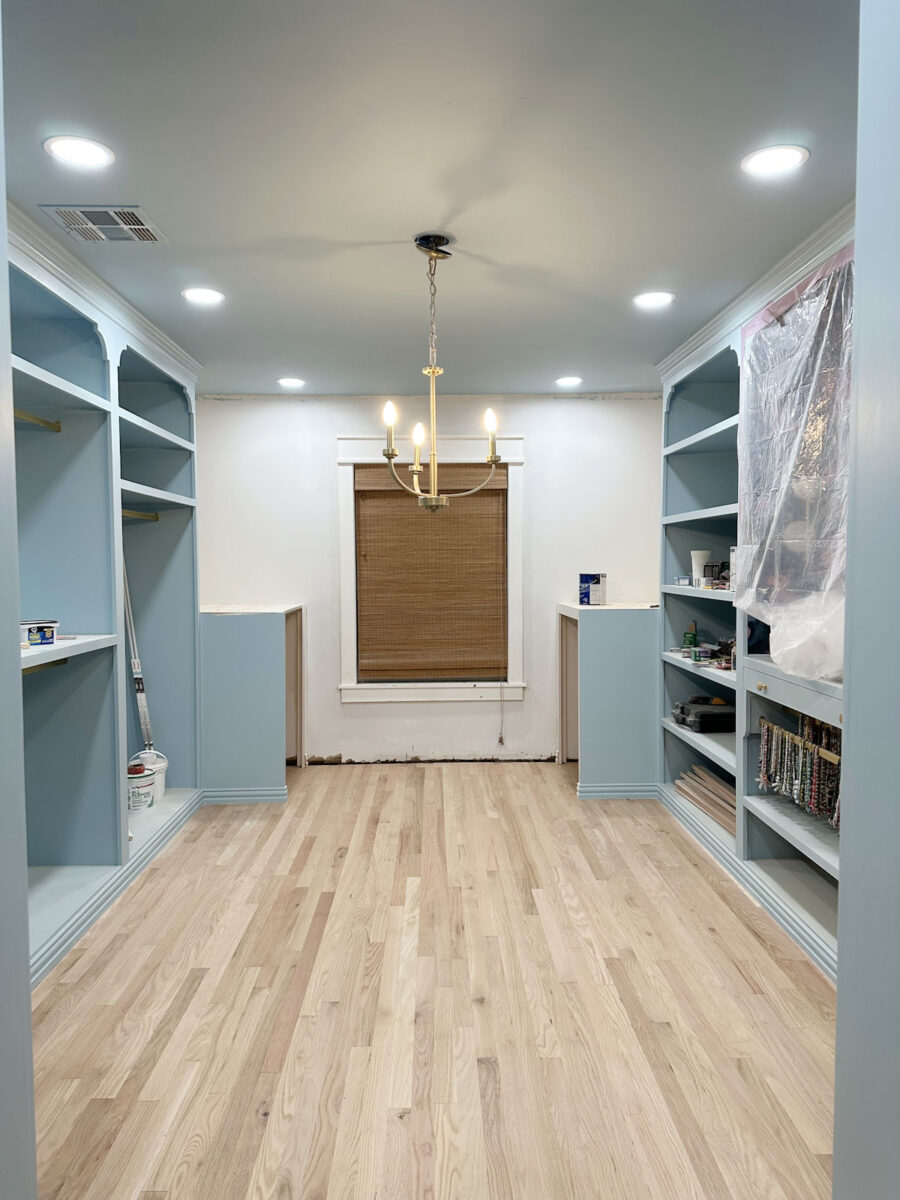
Here’s what it looks like in the walk-in closet where I have lots of very bright 5000K (daylight) LED lights.
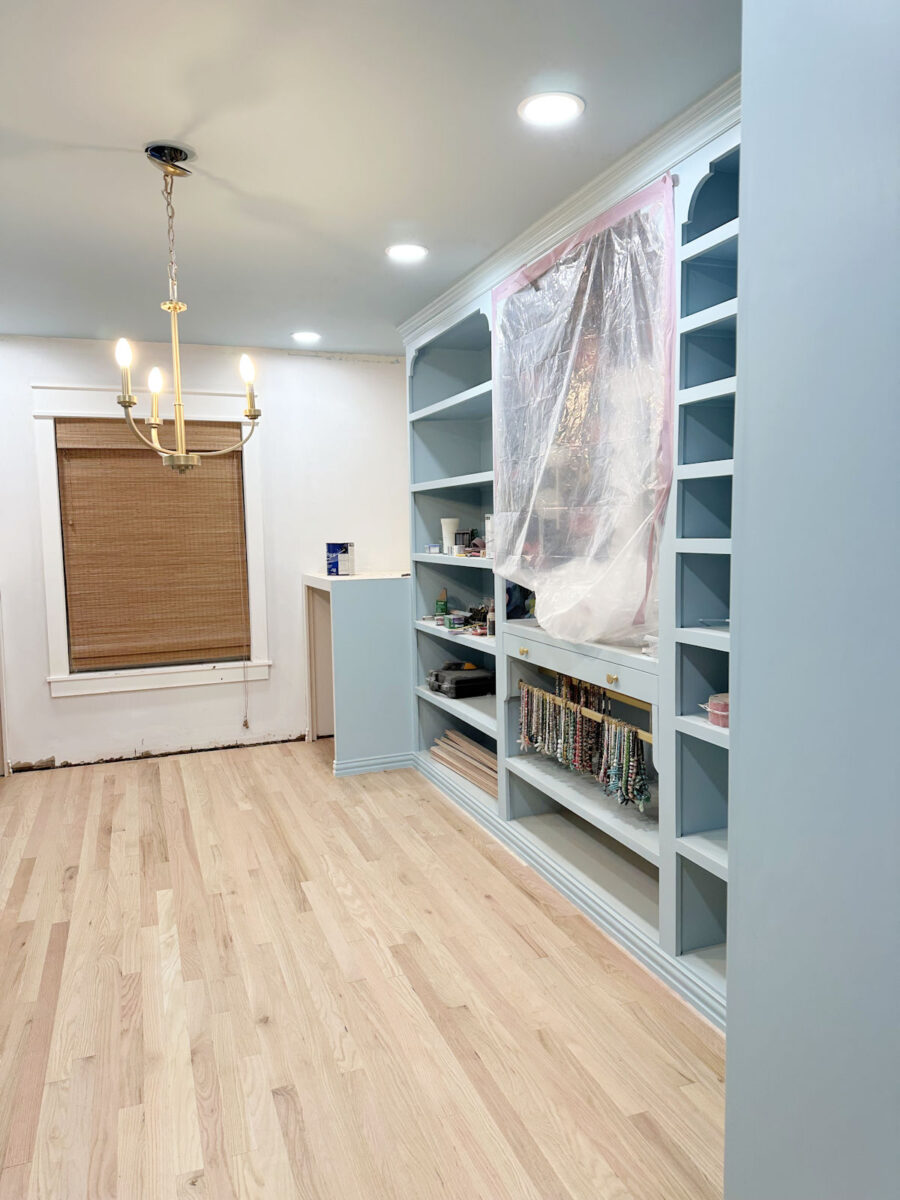
I mean, I think the color is absolutely perfect. I still need to apply the clear topcoat, and I have no idea if that will affect the color any. I don’t think it should. I’ll be using Bona TrafficHD in the extra matte finish, and it’s supposed to be clear with no color in it. I’m hoping it looks exactly like this once the clear coat goes on.
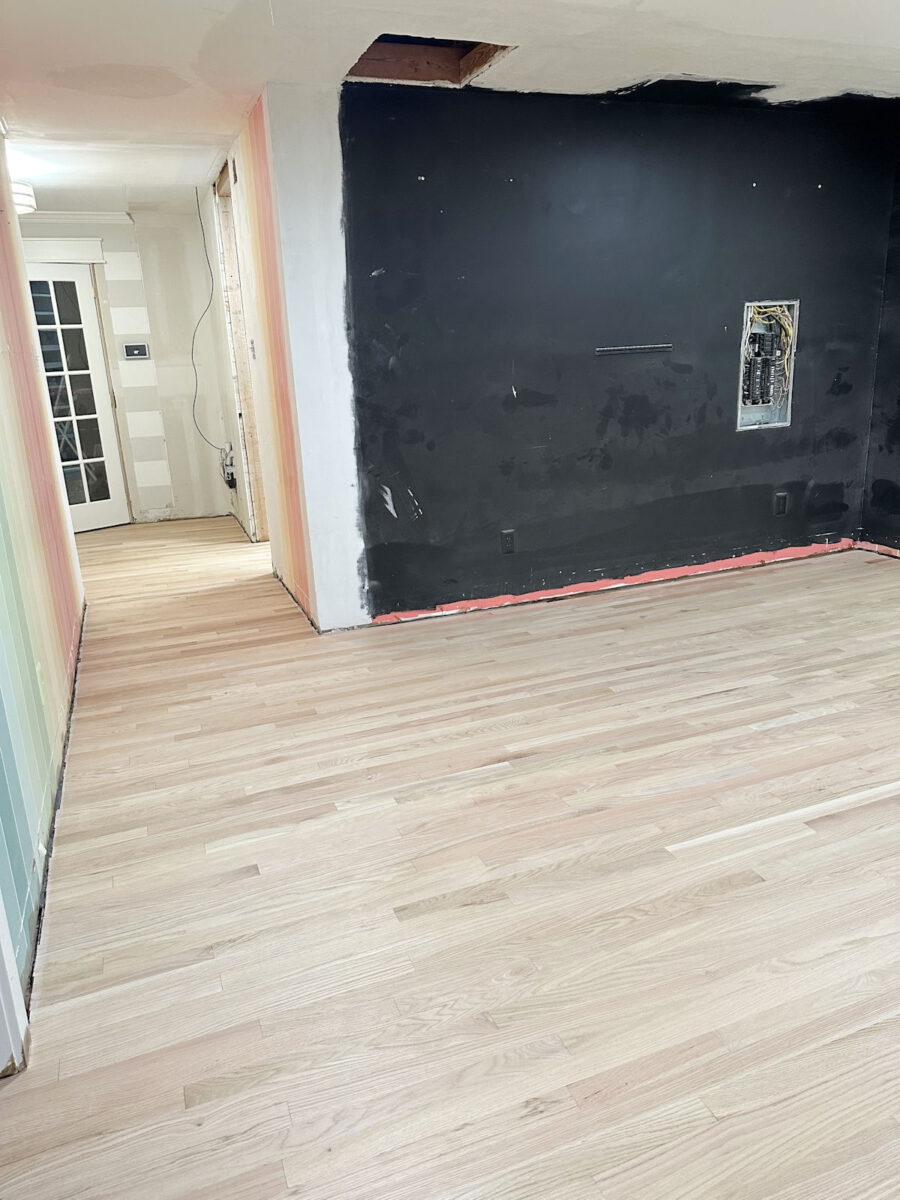
And here’s how it looks in the bedroom, which also has 5000K (daylight) LED lighting. So if you have warmer lighting (and most people do), the color would look even warmer than it does in my rooms.

My main concern was having these floors turn too red or orange since they’re red oak. I had originally intended to use the Bona Red Out before using the Natural Seal, but I couldn’t find a place that had it in stock, and I didn’t want to delay refinishing the floors. So I took my chances and went ahead without the Bona Red Out.

I’m actually really glad that it worked out that way. I think the slight red/orange undertone gives the floor a beautiful warmth, and I noticed that red oak floors, after Bona Red Out has been applied, have more of a yellow undertone to them.
Now that the sealer is dry, I can apply the two coats of the clear coat today. And I’m hoping that by the time I go to bed tonight, these floors will be completely finished. After the last coat of Bona TrafficHD goes on, it’ll take three days for the floor to fully cure, but I’ll be able to walk on them after just a couple of hours.

I am so glad I took the time to redo these floors. It was a pain to redo something that I had only finished 2.5 months ago, but the payoff is so worth it. I mean, just look at this huge difference!
I liked the dark floor, but the light floor makes the rooms look so much bigger and feel so much lighter, and I don’t just mean lighter in color. I mean lighter in the way that it makes the rooms feel when I’m standing in them. The dark floors just had such a heaviness to them, both in color and in the way it made the room feel.
And I’m super excited about having floors with an extra matte finish on them. Y’all know I have issues with shiny finishes. Unless a piece of furniture is specifically painted to have a super high gloss lacquer finish (which I do love as long as it’s done to perfection), I tend towards very satin and matte finishes. So that shiny finish on the dark floor was really frustrating to me. That was the lowest sheen available in that polyurethane. But an extra matte finish on the floor is definitely more to my liking, and I can’t wait to get it finished!

Addicted 2 Decorating is where I share my DIY and decorating journey as I remodel and decorate the 1948 fixer upper that my husband, Matt, and I bought in 2013. Matt has M.S. and is unable to do physical work, so I do the majority of the work on the house by myself. You can learn more about me here.