
I’m down to two remaining big projects for my walk-in closet — the flower chandelier and framing out the doorway. After having so much trouble with the finish on the island and basically having to sand down the drawers and doors and start over last week, I decided to give myself a break and focus on the fun project this weekend. So I got started on the flower chandelier. Framing out the doorway will have to wait a bit longer.
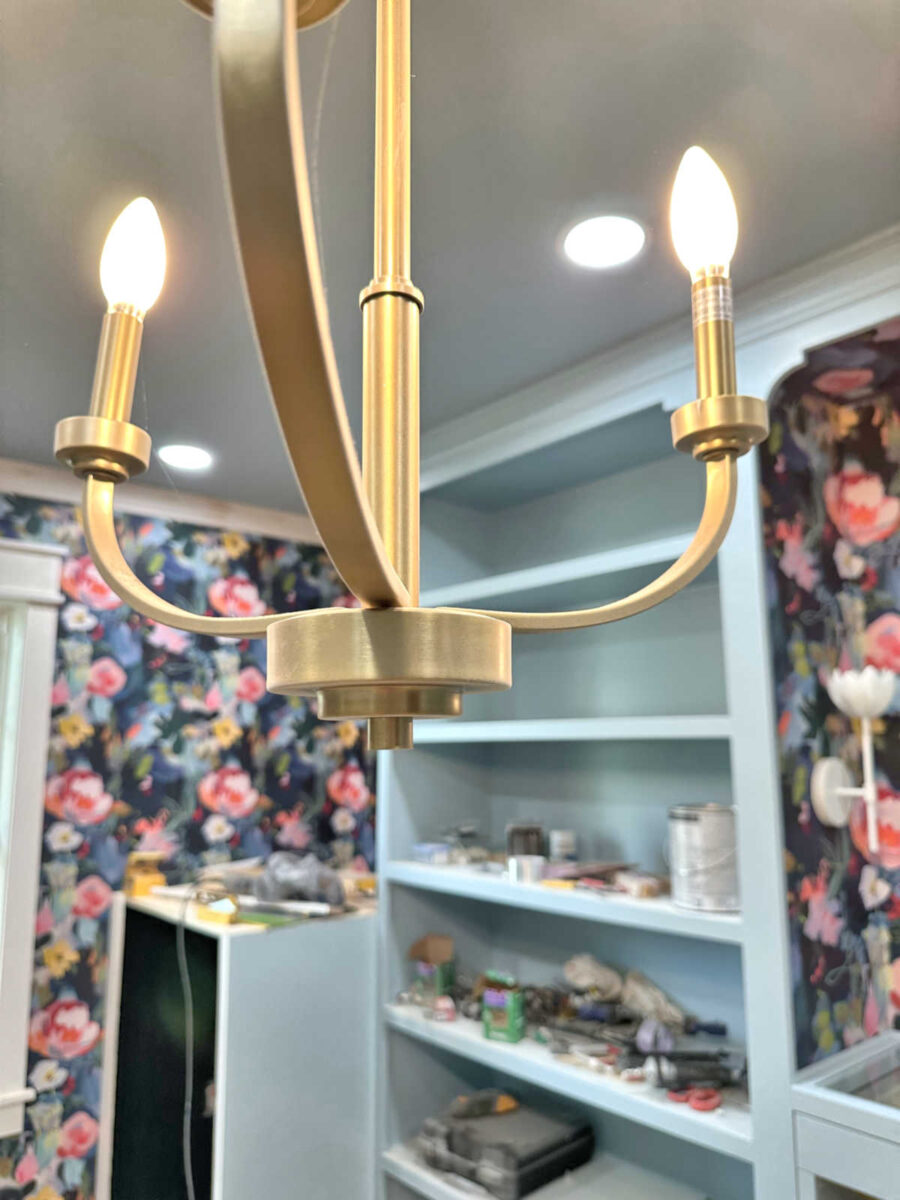
As a reminder, this is the chandelier that I’m using as my inspiration for making my own. I didn’t buy this one because it costs over $2500, and that’s just out of the question for me. There’s no light fixture that I’d ever love so much that I’d pay that amount of money for it.
So I decided to try to make my own inspired by that one. I needed to start with a very simple chandelier with a specific shape, so I decided to start with this one. (Please excuse the old picture!)

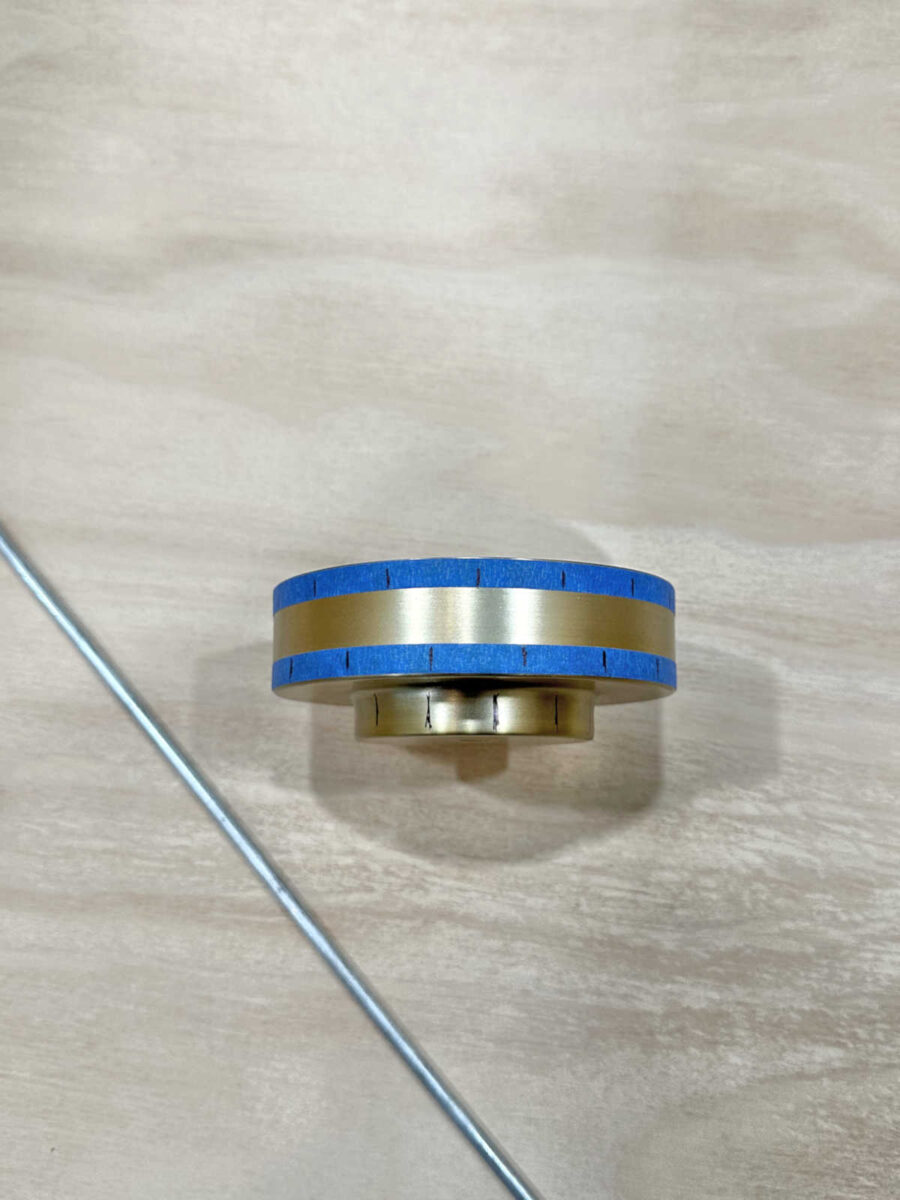
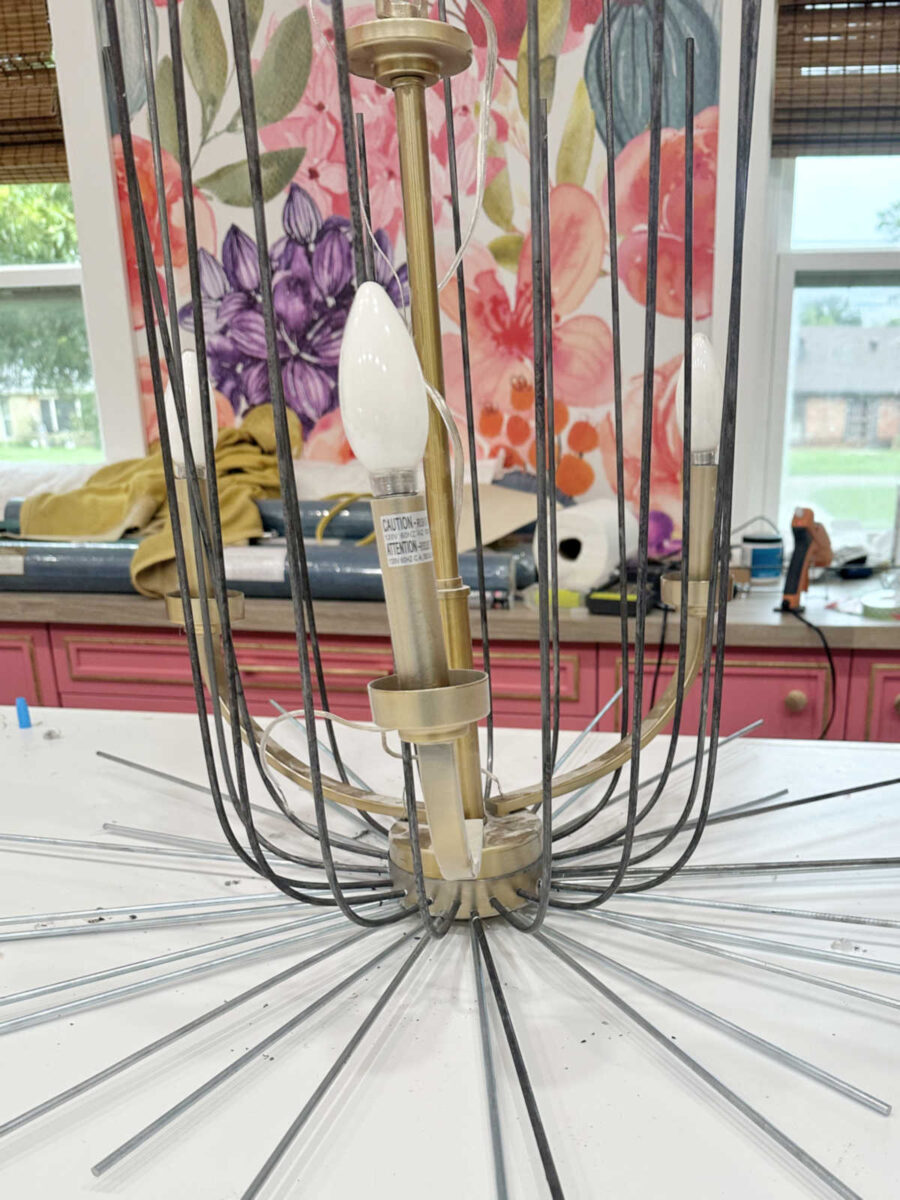
I chose this one because of the specific shape of the arms, but also because of this section at the bottom that I thought I could attach the flower stems to.
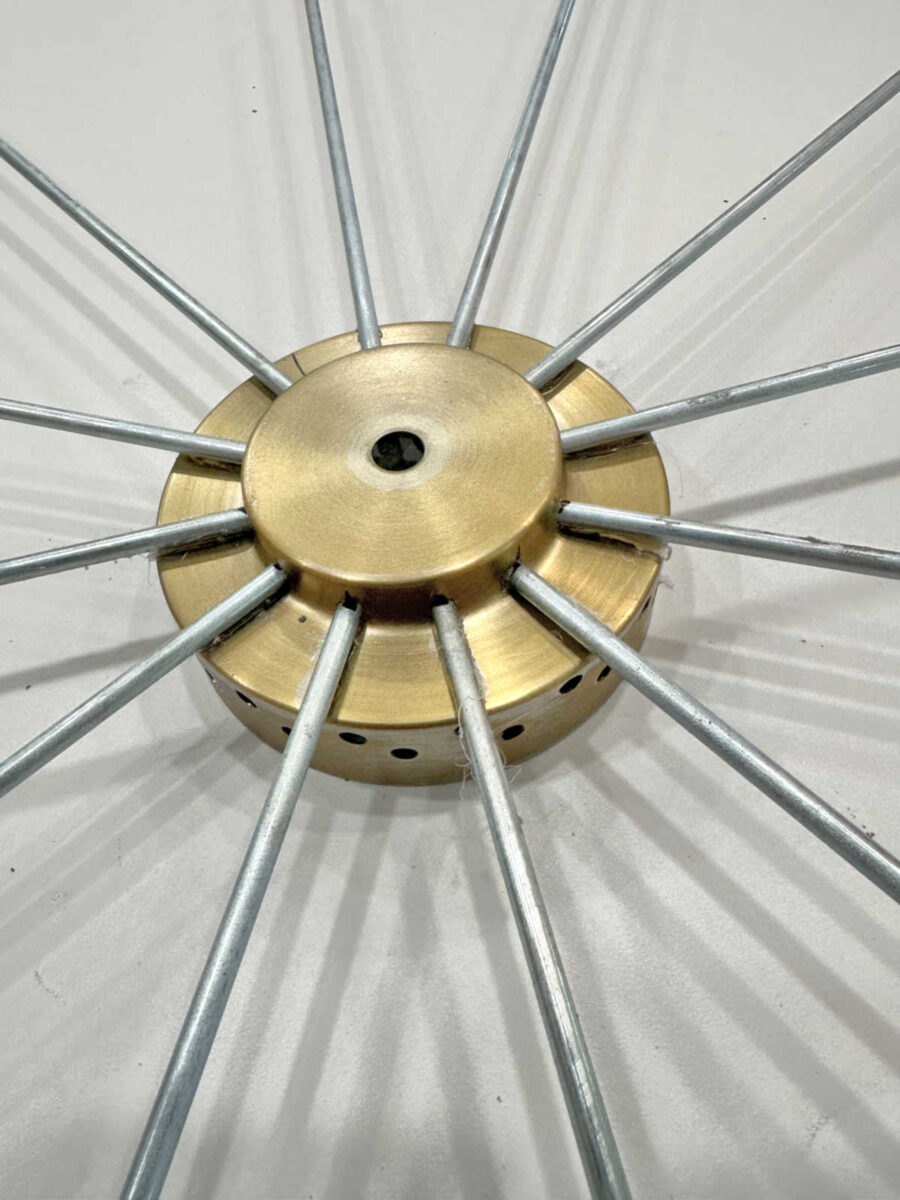
So I unscrewed that bottom nut holding the bottom cap on, and decided to attach all of the stems to this bottom cap.
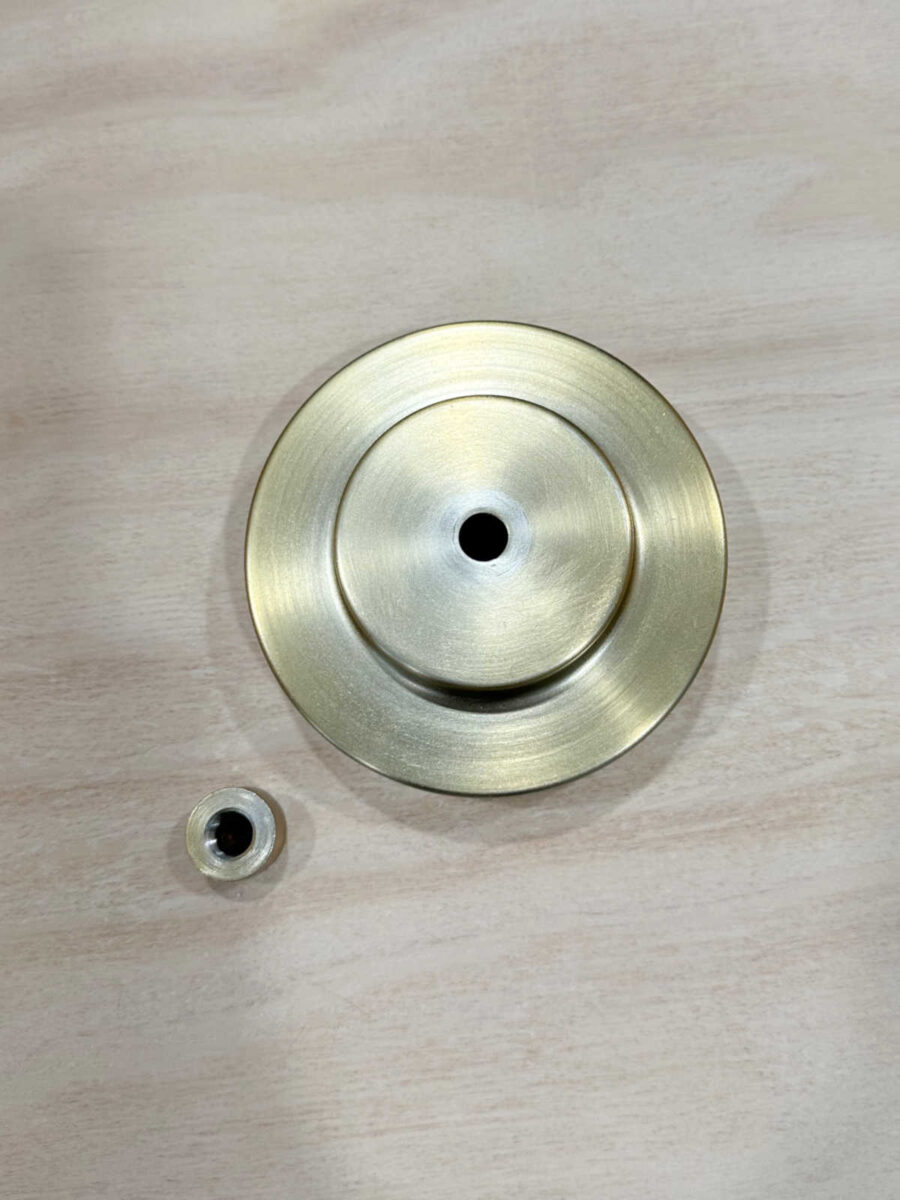
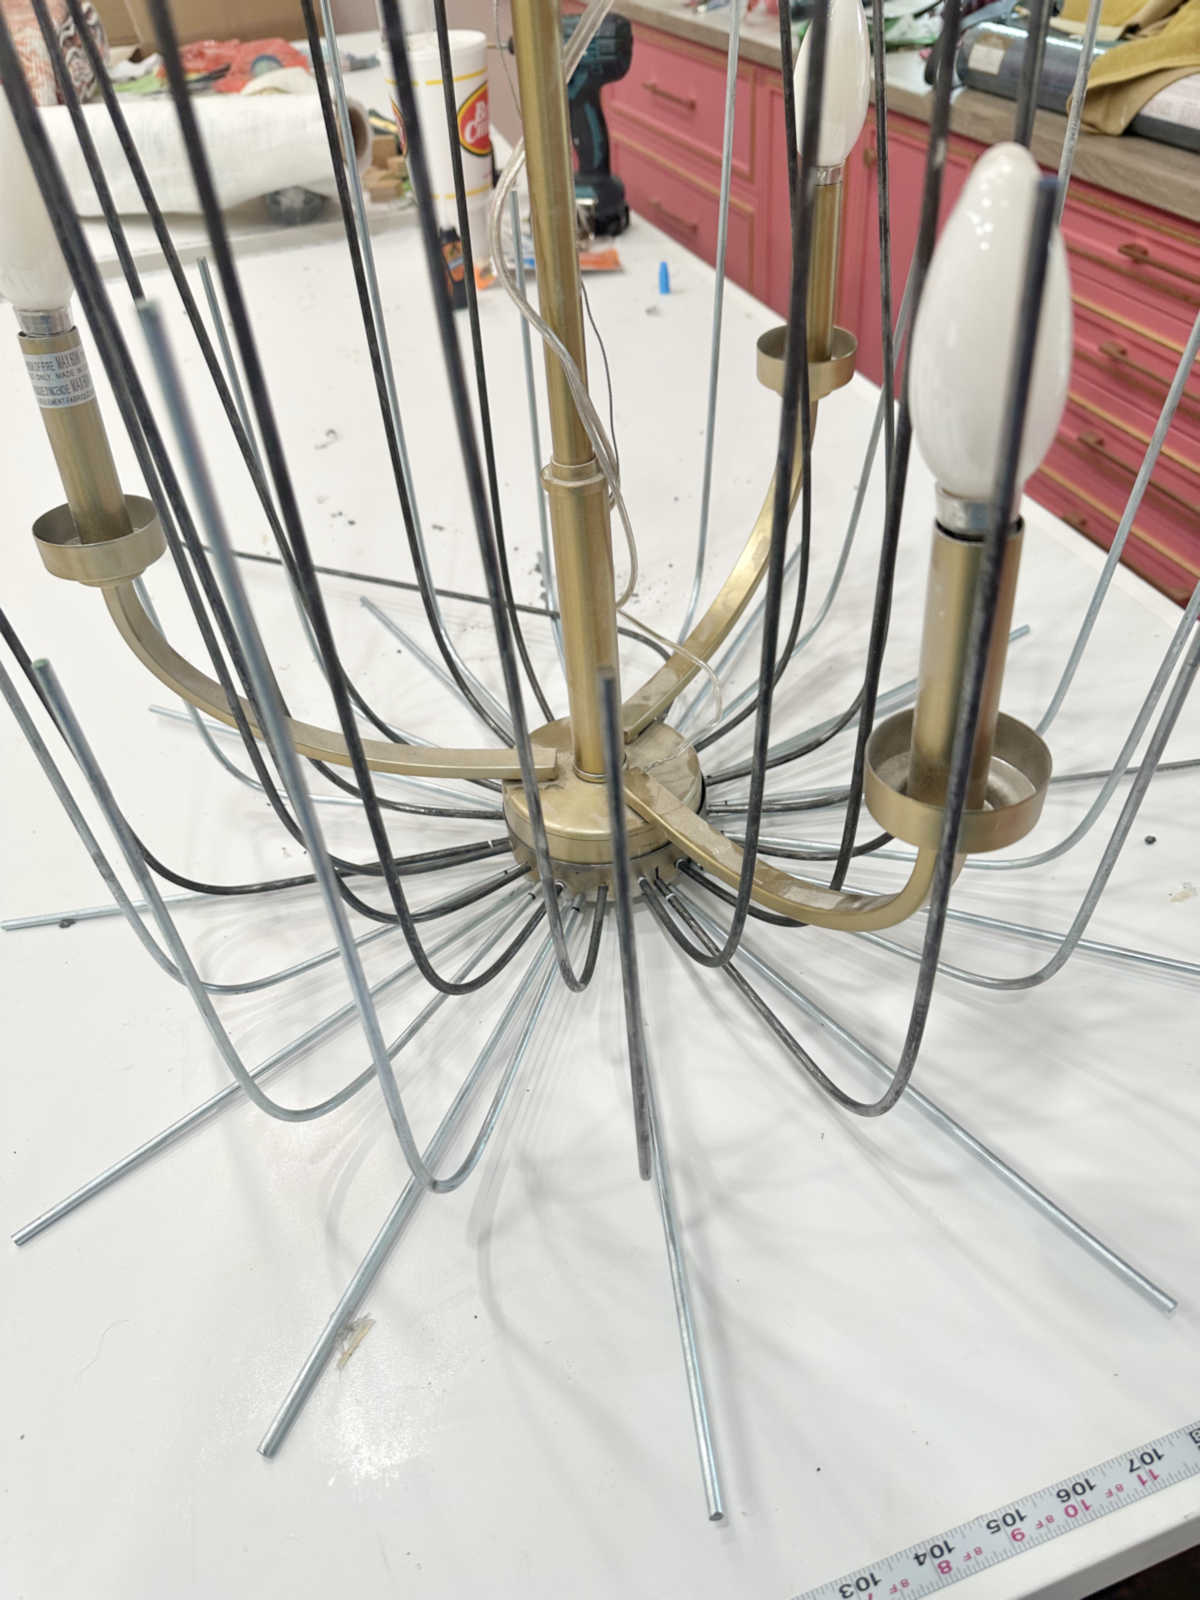
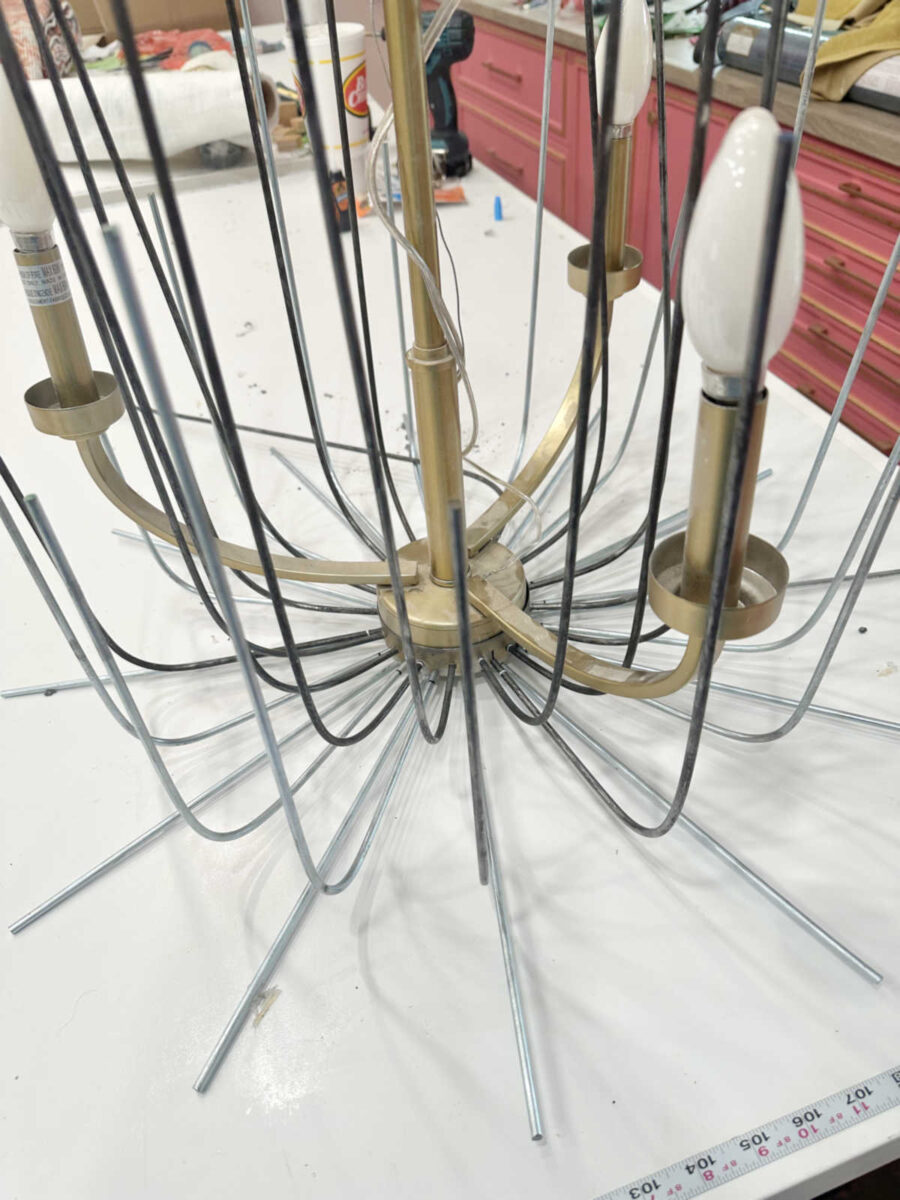
With that bottom cap and nut removed, this is what I was left with. So I had to keep in mind that the center of the bottom cap had to be left open in the center to make room for the wires that connect the lights.
I had about 3/4″ perimeter around the inside of the bottom cap that I could use to secure the stems without interfering with the wires. and the bolts and nuts holding the light arms onto the light.

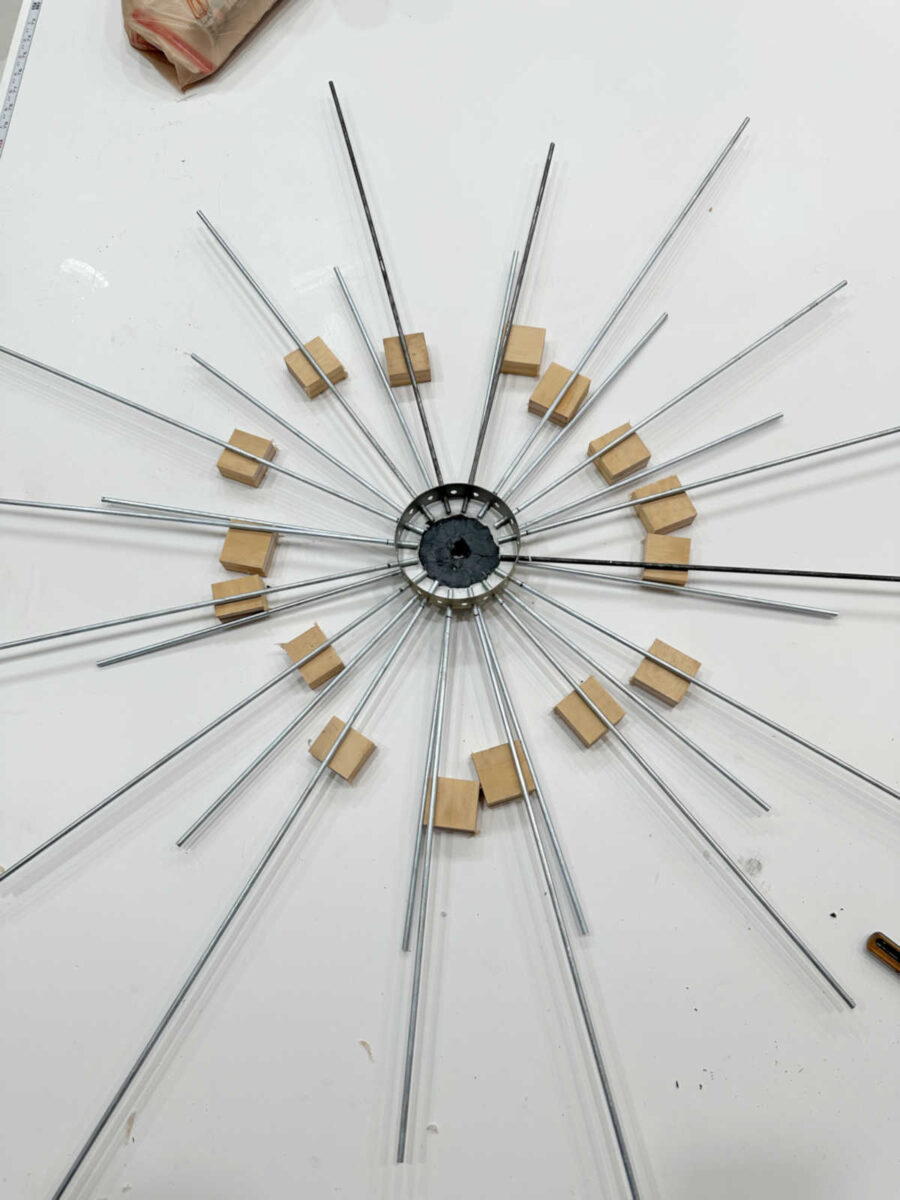
First, I had to mark where I wanted the stems to enter the bottom cap. I wanted three rows of stems, and it worked out to space them about 5/8″ apart.
And then I used my drill to drill 3/16″ holes on each mark. It’s a bit challenging to get holes drilled perfectly through metal without a drill press, but I did the best I could using my hand-held drill.
And then I continued on the next row up.
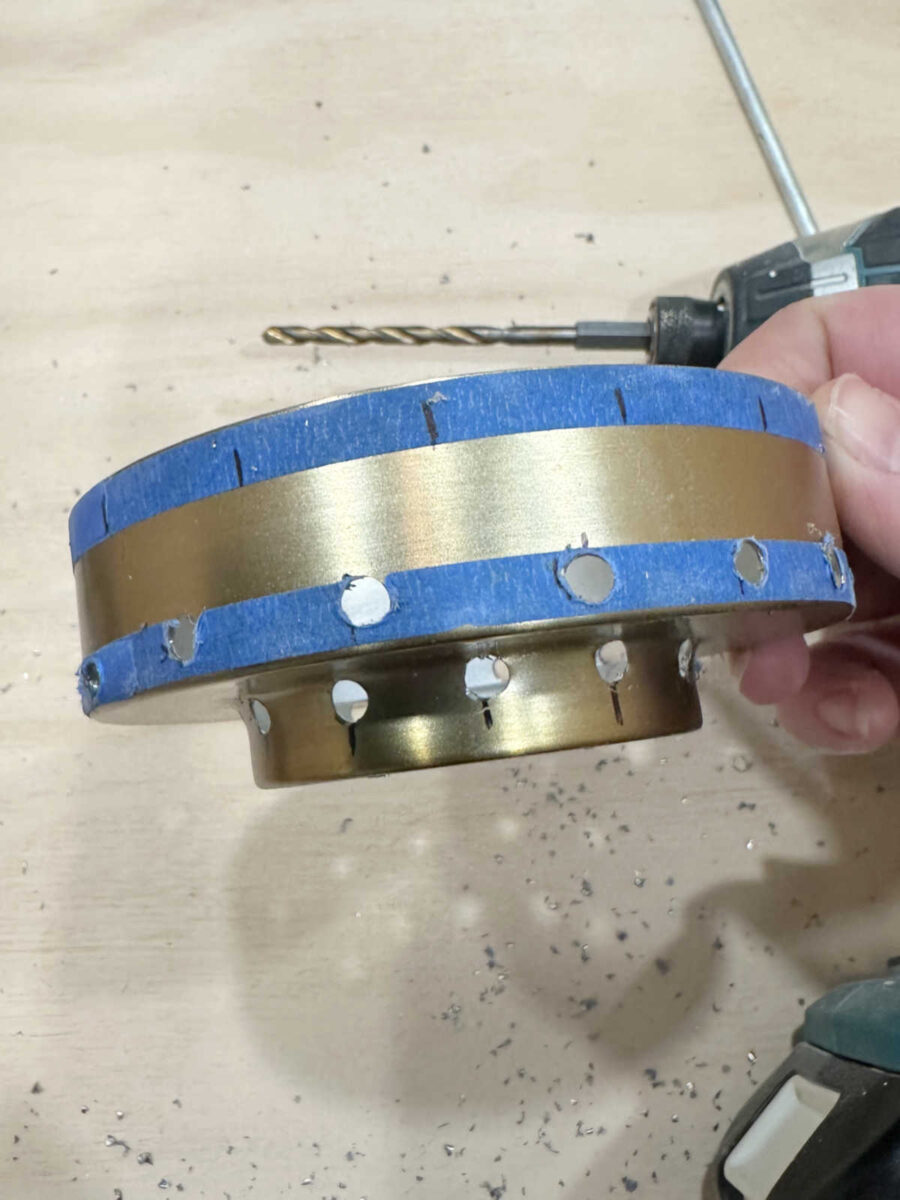
I decided to move the top row down quite a bit. It would have been very challenging (if not impossible) to reassemble the bottom cap to the light with the top row of holes drilled to close to the top of the bottom cap.
And with all of those holes drilled, I was ready to attach the stems. I turned the bottom cap over and started with the bottom row. I used my miter saw to cut the 3/16″ metal rods to about 14 inches long, and then inserted them into the bottom row of holes. I inserted about 3/4″ of the rod into the holes, and then I used hot glue to temporarily hold them in place
I used my utility knife to cut away any hot glue that squeezed out on the sides of the metal rods and looked messy.
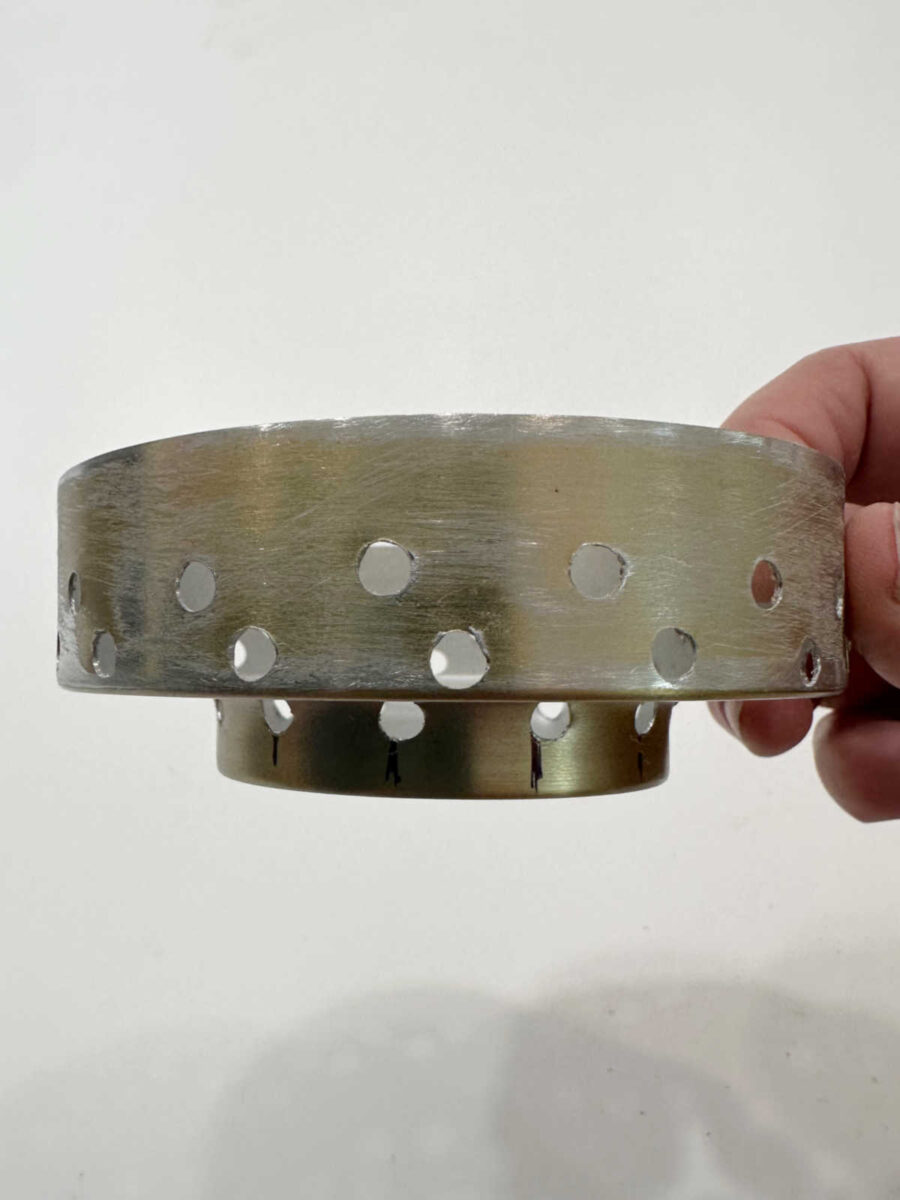
And then I very gently turned the whole assembly over so that it was upright, and so that I could secure the rods from the inside of the cap. To do this, I used JB Weld SteelStik epoxy putty.
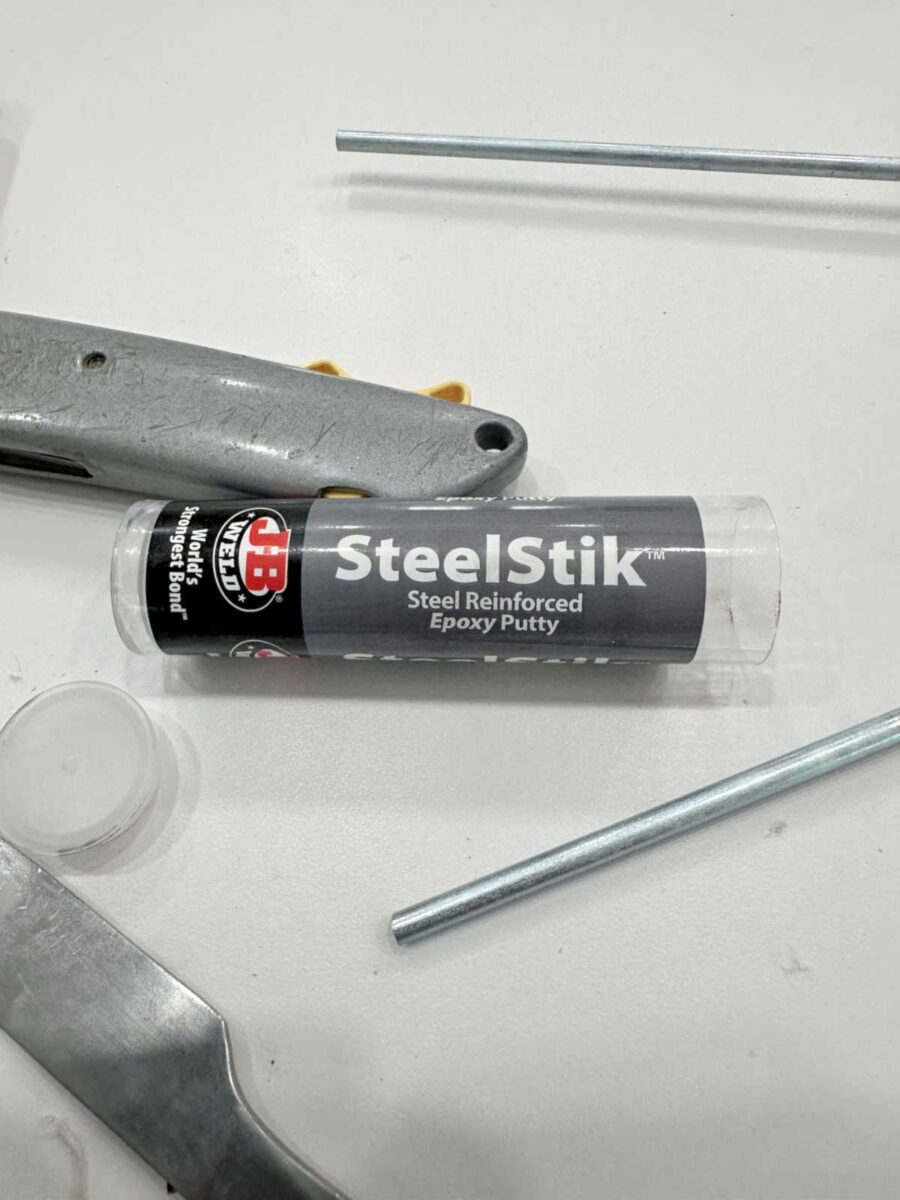
This is a two-part putty that comes with the two parts in one roll. You can see the gray part on the outside of the roll and the black part on the inside of the roll below. As long as the two parts remain separate, the putty remains soft. But when you cut off as much as you need and mix the two parts together, it activates the putty and then you have a limited amount of time before it starts to harden.
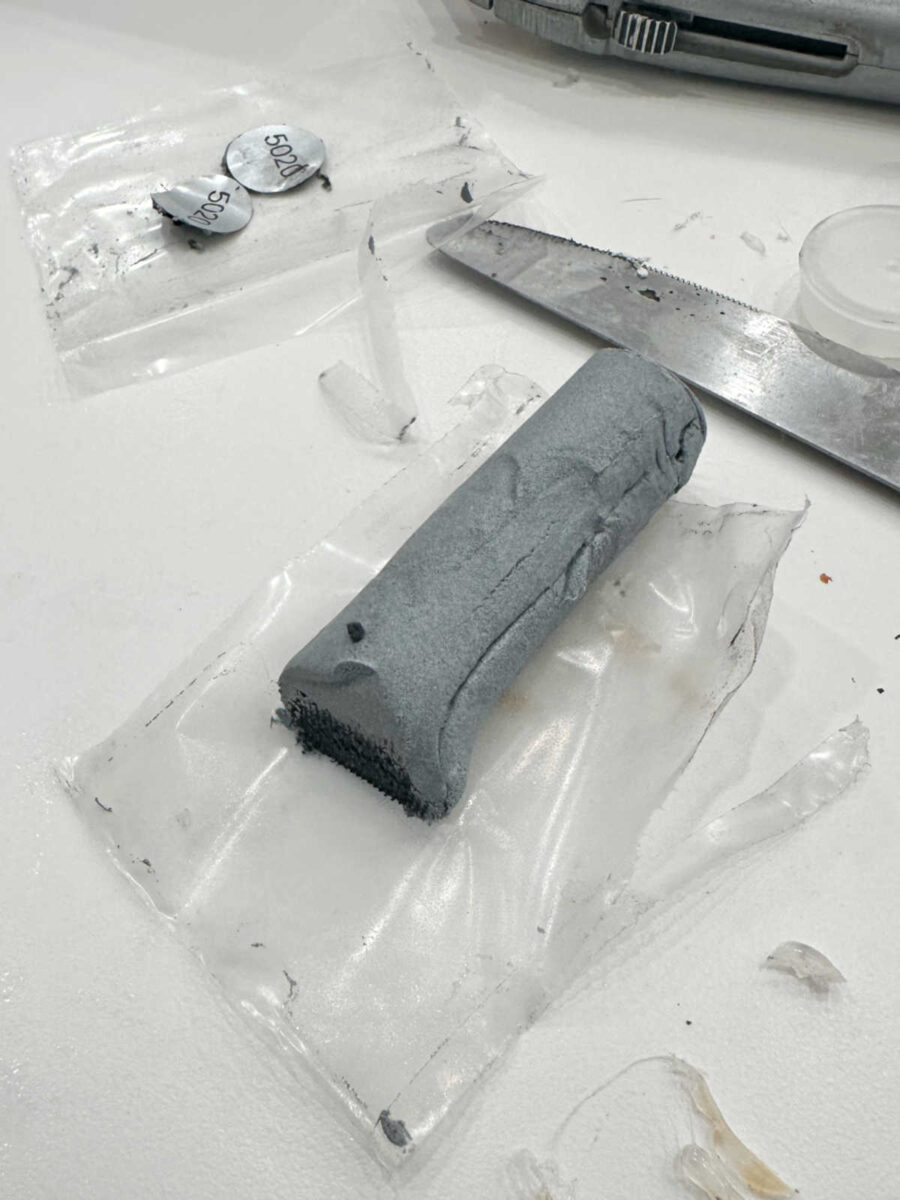
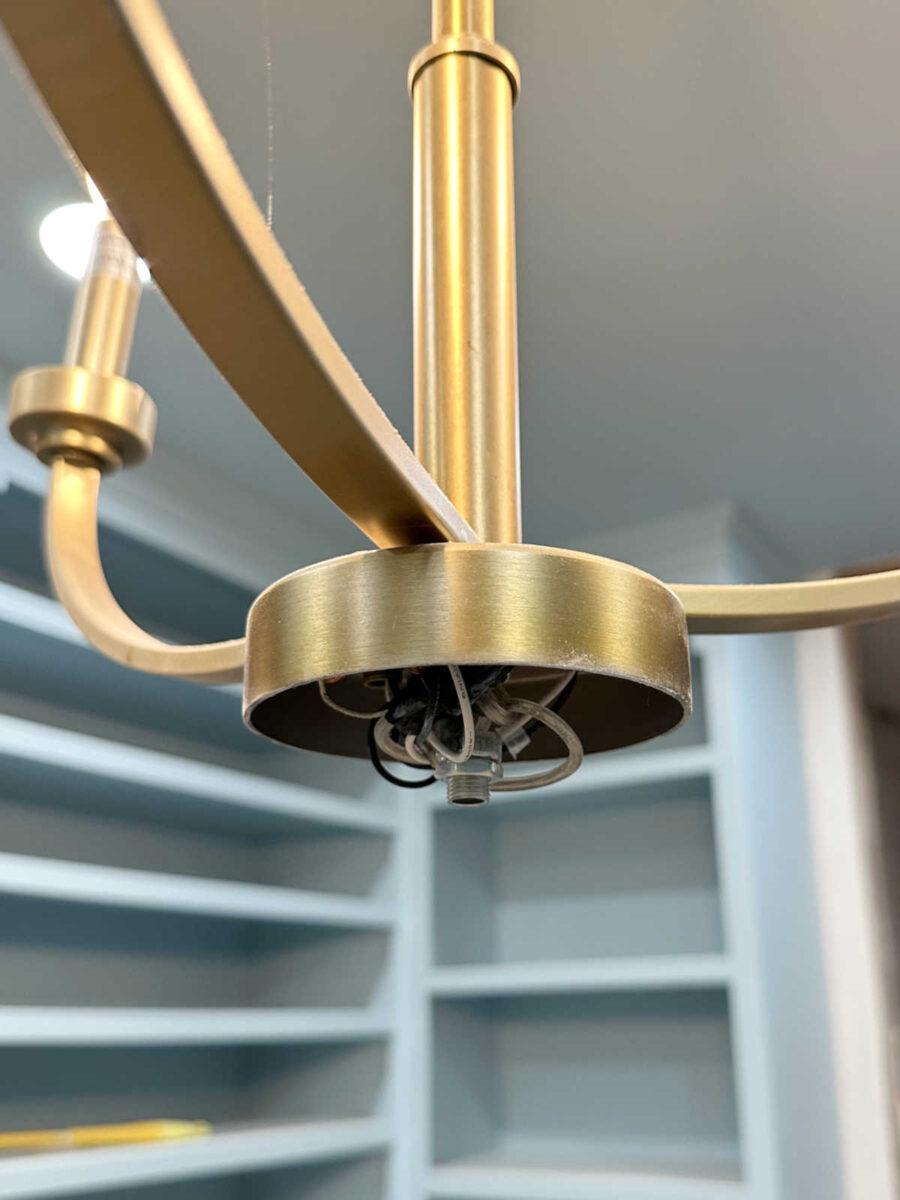
So I used about half of one roll, mixed the two parts together with my hands (like playing with Playdoh), and then smooshed it into the bottom well of the cap, securing those rods. I just made sure that I left that center hole open so that this base cap could be reattached to the light with the threaded rod and the bottom nut.
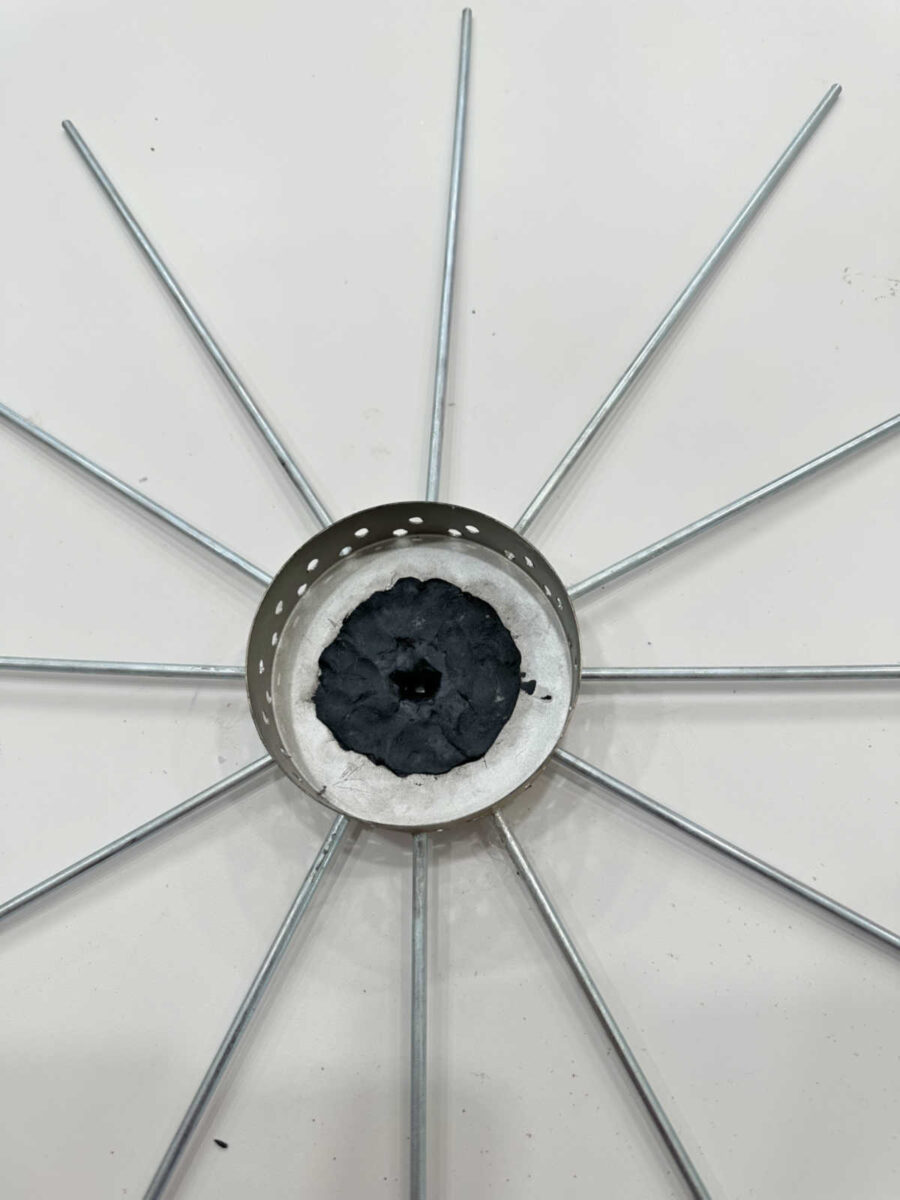
I left that to dry for about 30 minutes and then came back and did the second row. I cut these rods longer and inserted them about 1/2-inch into the bottom cap, and then secured those with another layer of epoxy putty, making sure that I left the center part of the bottom cap open to leave room for the wires on the light. I cut some scrap wood to hold these off the table in the right position.
Here’s a closer look at what those looked like before I added the epoxy putty.
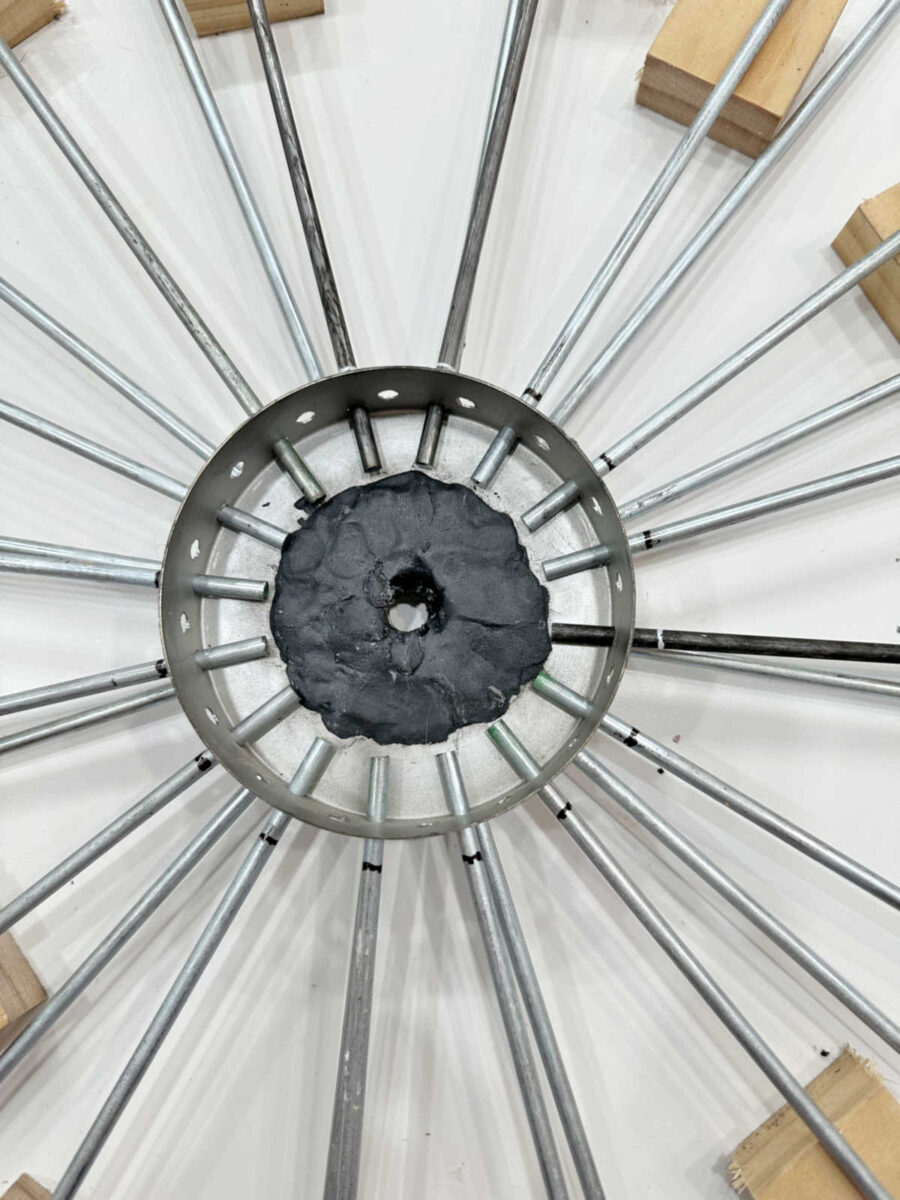
Once I added the epoxy putty to that row and let it dry for about 30 minutes, I came back and did the same thing for the third and final row of metal rods. Once I had the epoxy putty on this last row, I left the whole thing to dry and cure overnight.
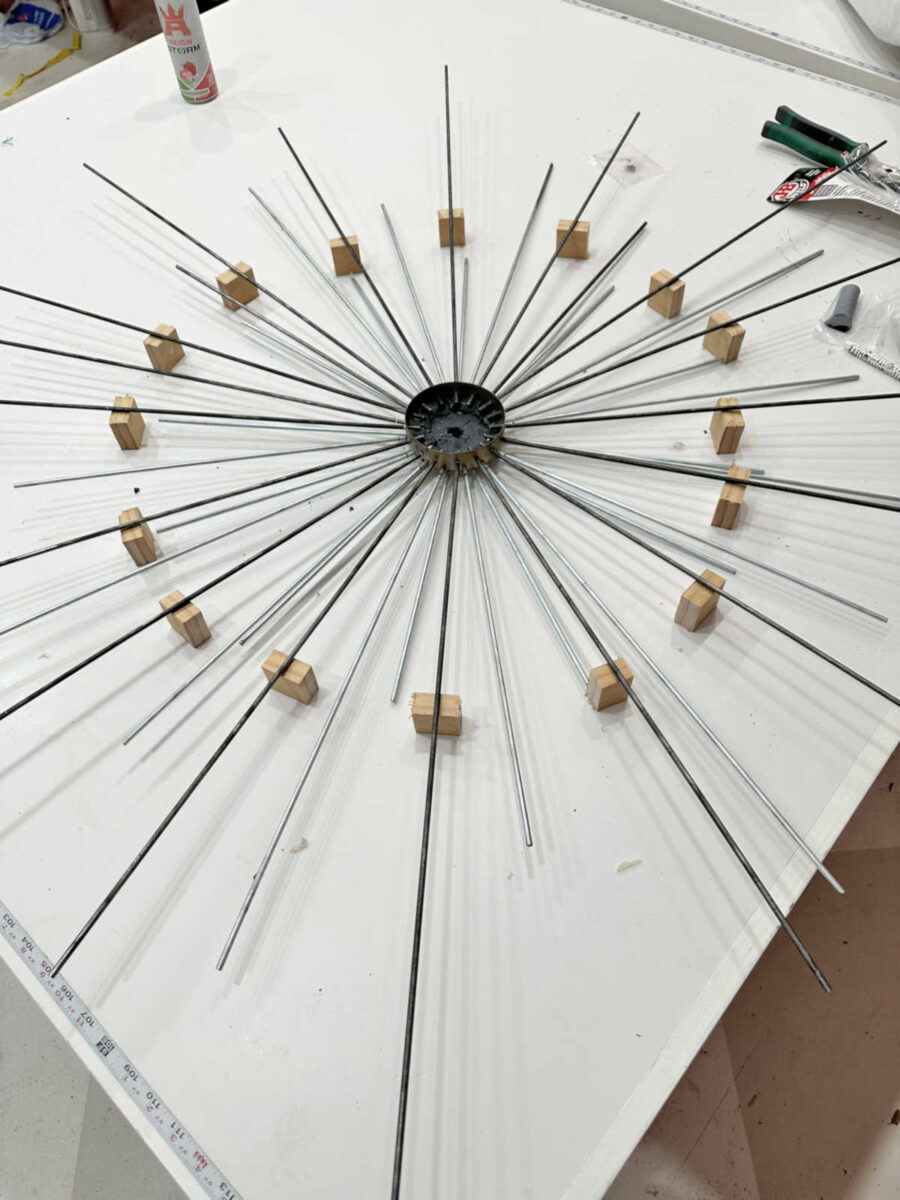
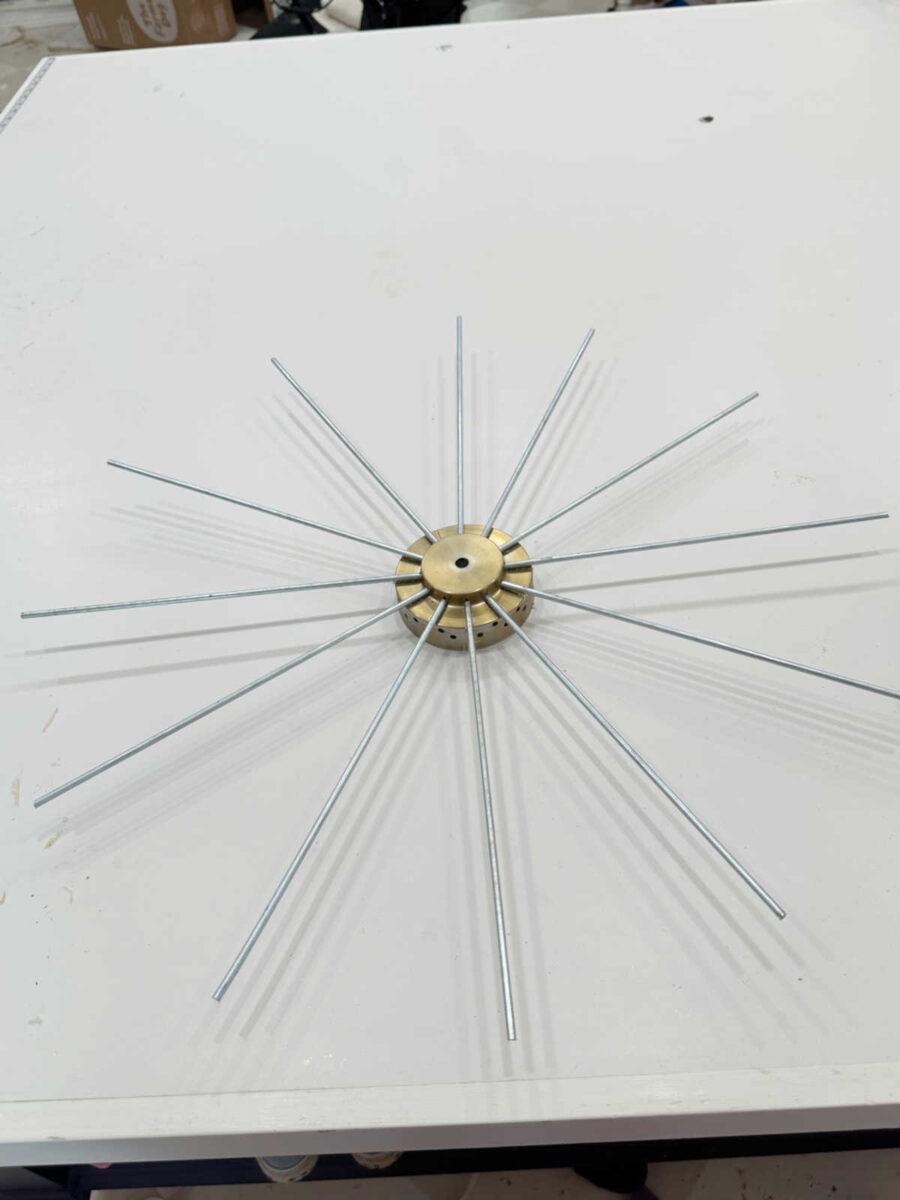
The next day, the whole assembly was very secure, so I started bending the rods up to make the flower stems. For the first row, I used an empty quart paint can, and bent the rods around the can.
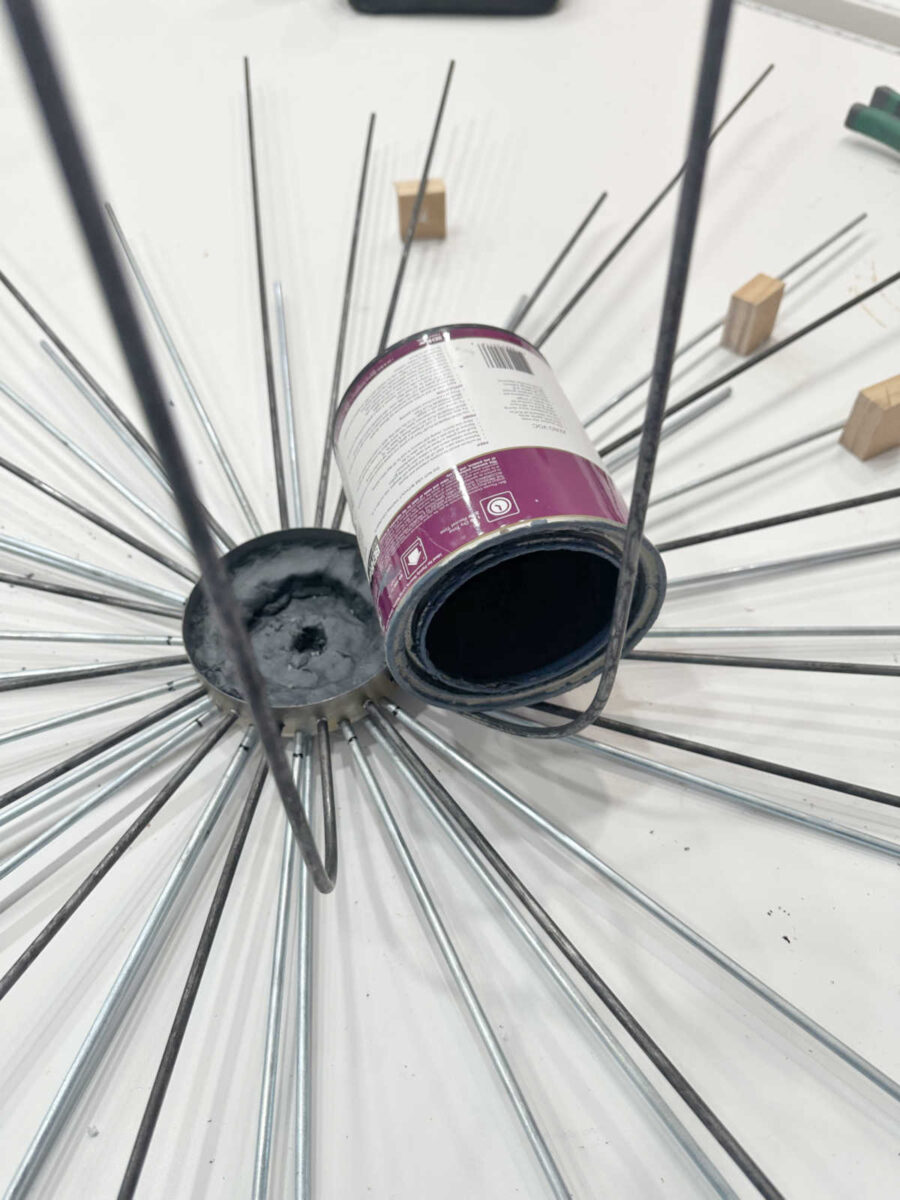
That actually worked way better than I had expected it to work.
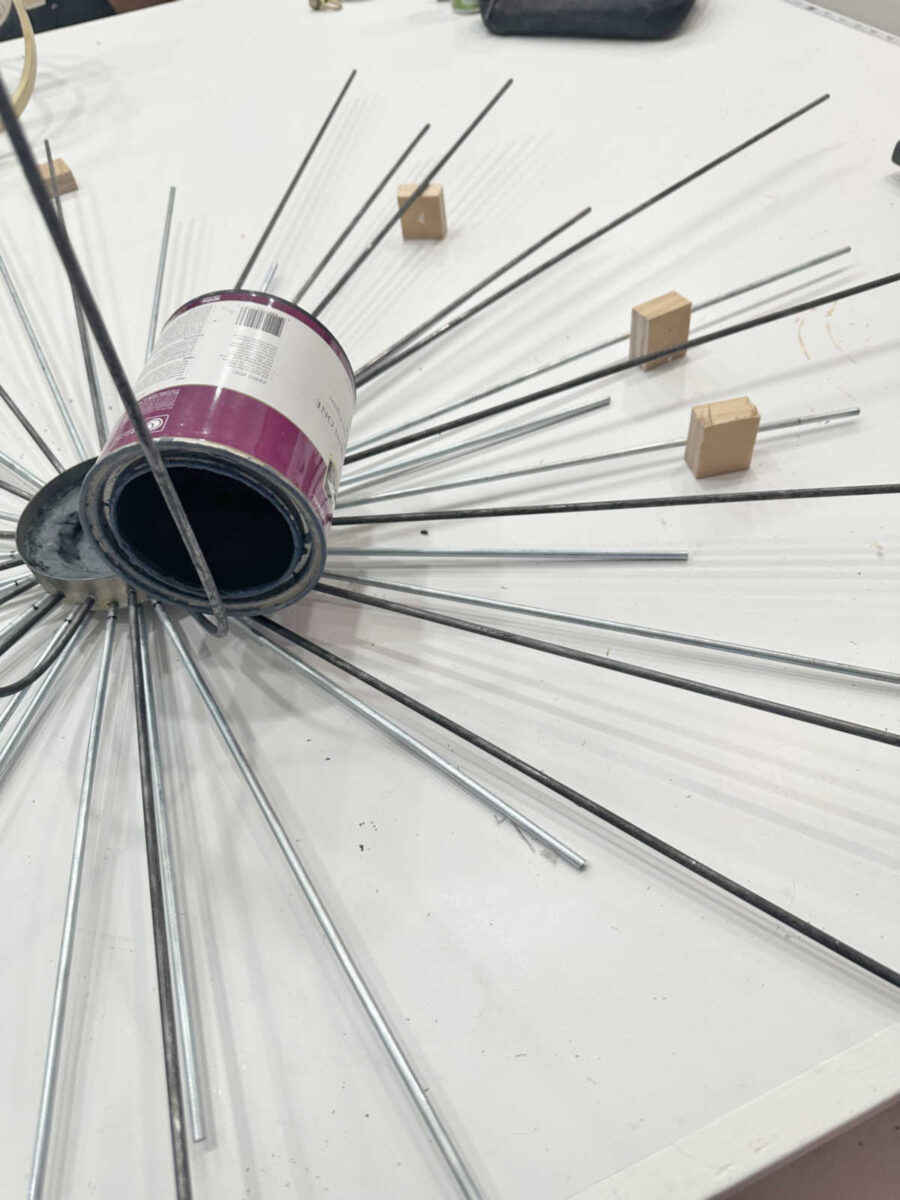
Here’s what it looked like with all of that first row done…
And then to do the second row, I needed a smaller diameter curve, so I used a spray paint can up against the first row to bend the second row of metal rods.
And here’s what those looked like once they were all done.
That’s where I stopped because I have a sneaking suspicion that I cut the wires for that bottom row too short, and that stressed me out. 😀 So I decided to sleep on it and look at it with fresh eyes today. Also, you can tell that I’m going to have to do some surgical removal of metal from that piece that the bottom cap fits over to make the whole assembly go back together. My metal cutter/grinder tool hasn’t gotten a whole lot of use, so this will be the perfect opportunity to use it. I’m also going to have to use it to cut all of these rods to the perfect height, as I was just guessing at the lengths that I’d need, and clearly some of them are way too long.
So at this point, I’m still not fully confident that I can pull this off. I’d say that my confidence level is at about 60% this morning. Hopefully it will increase as the day goes on. Check back tomorrow, and we’ll see if I can actually do this!
More About My Walk-In Closet/Laundry Room

see all walk-in
closet diy projects
read all walk-in
closet blog posts

Addicted 2 Decorating is where I share my DIY and decorating journey as I remodel and decorate the 1948 fixer upper that my husband, Matt, and I bought in 2013. Matt has M.S. and is unable to do physical work, so I do the majority of the work on the house by myself. You can learn more about me here.