
I can hardly believe it, but my walk-in closet is finished!! This project ended up taking way longer than I thought it would (five months!), but to me, the end result is so worth the effort I put into it. Never in my life have I had so much storage space, and I never even dreamed that I would have a closet like this. I walk in here several times a day just to look around. 😁
This “before and after” is kind of different, though, because I went from a perfectly fine guest bedroom to a walk-in closet. I generally prefer a good before and after where the before room was in terrible shape with all outdated finishes so that it really contrasts with the fresh, new room. But I don’t have that here. With this one, I have a before bedroom that had a floral wall that I really loved, and now I have a closet that I think is pretty amazing.
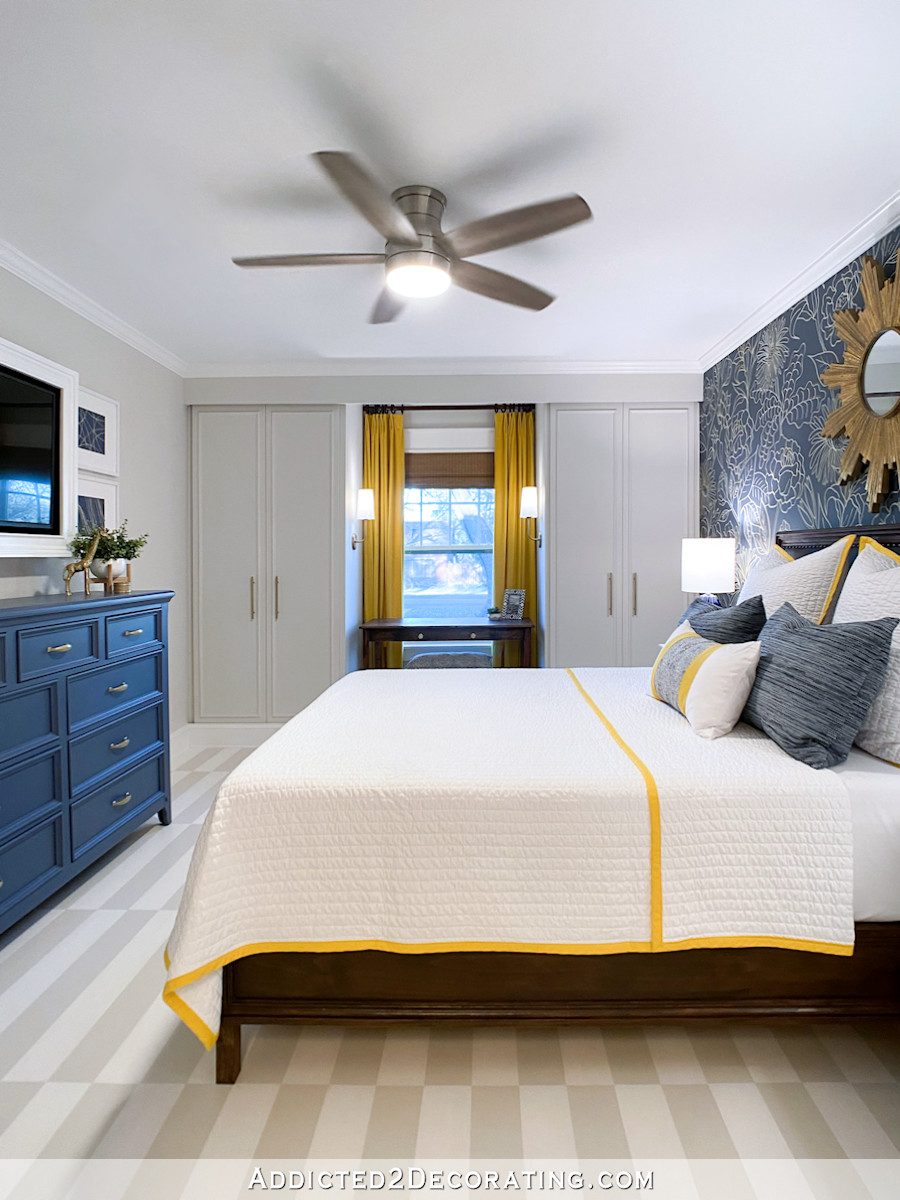
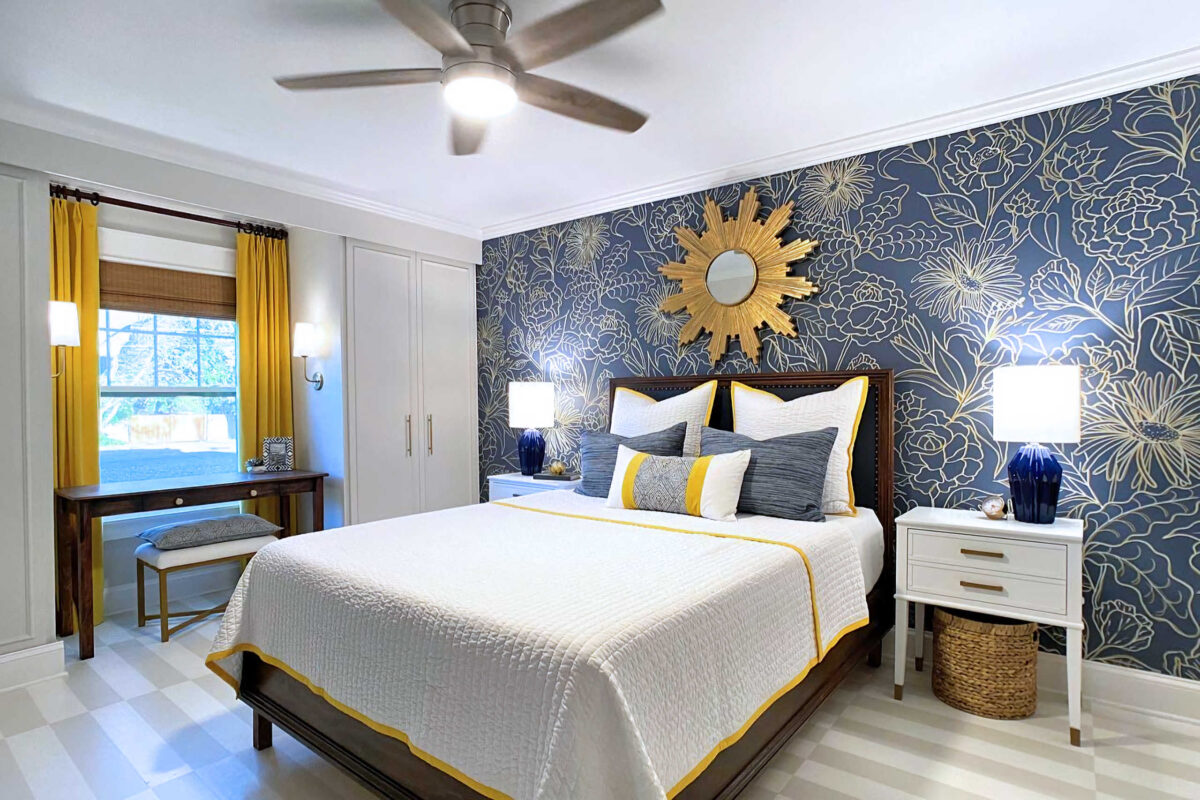
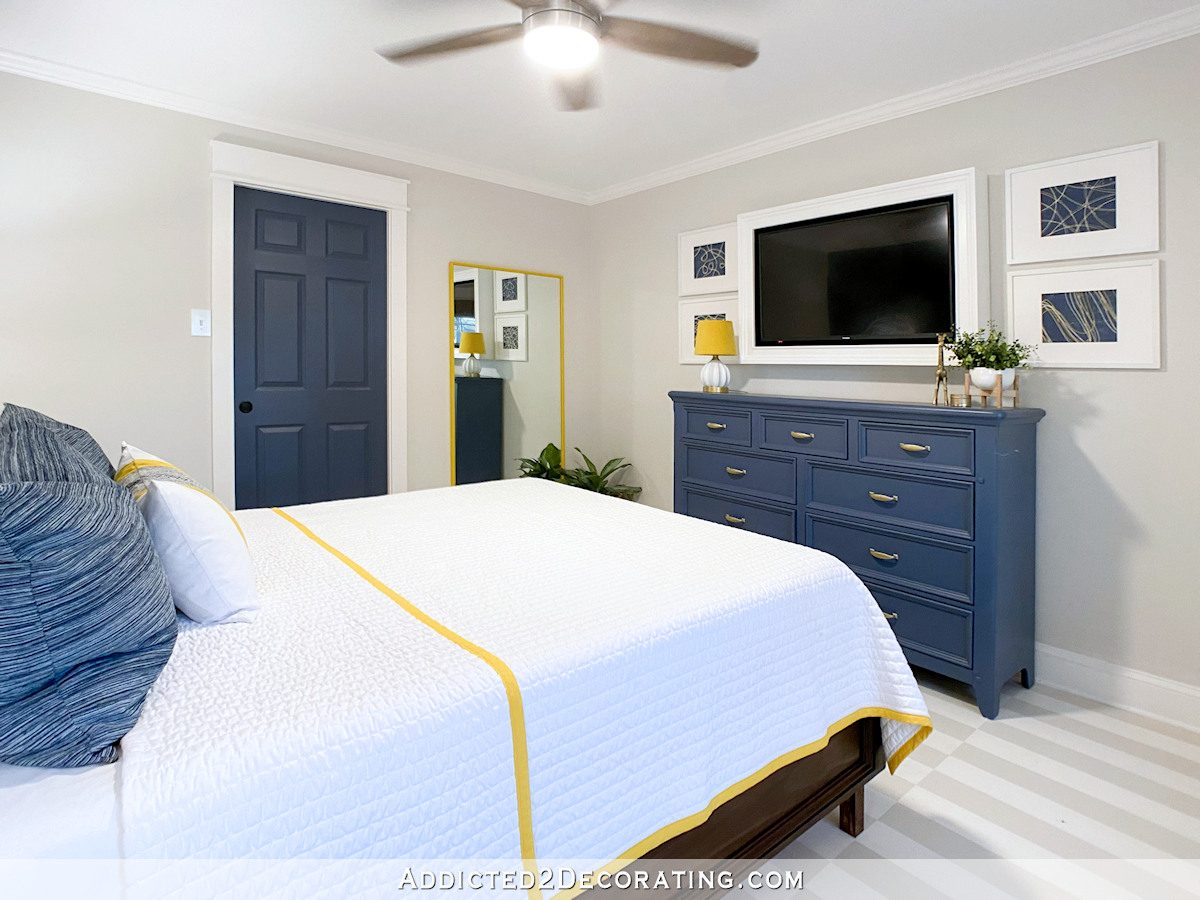
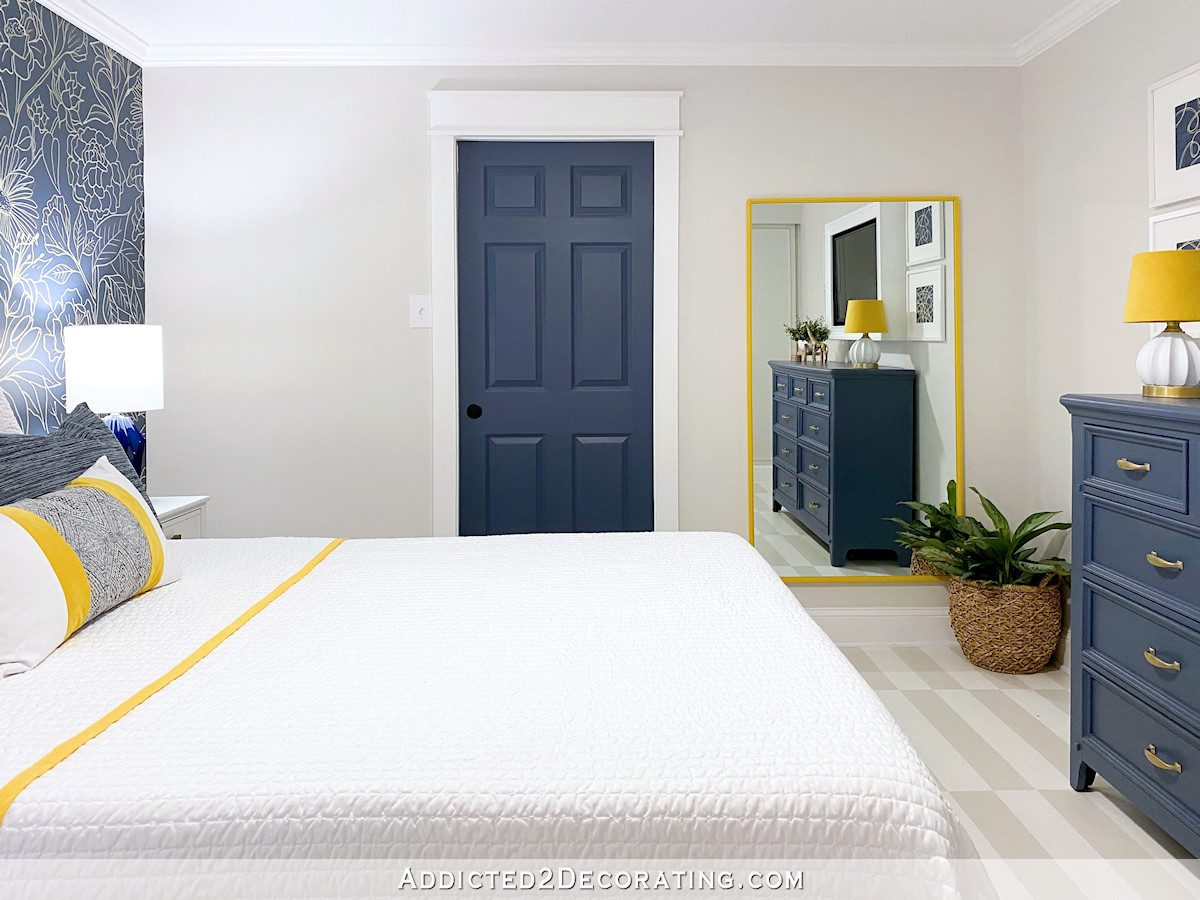
But the change is still pretty drastic. In case you’ve forgotten, here’s what the room looked like before as a bedroom.
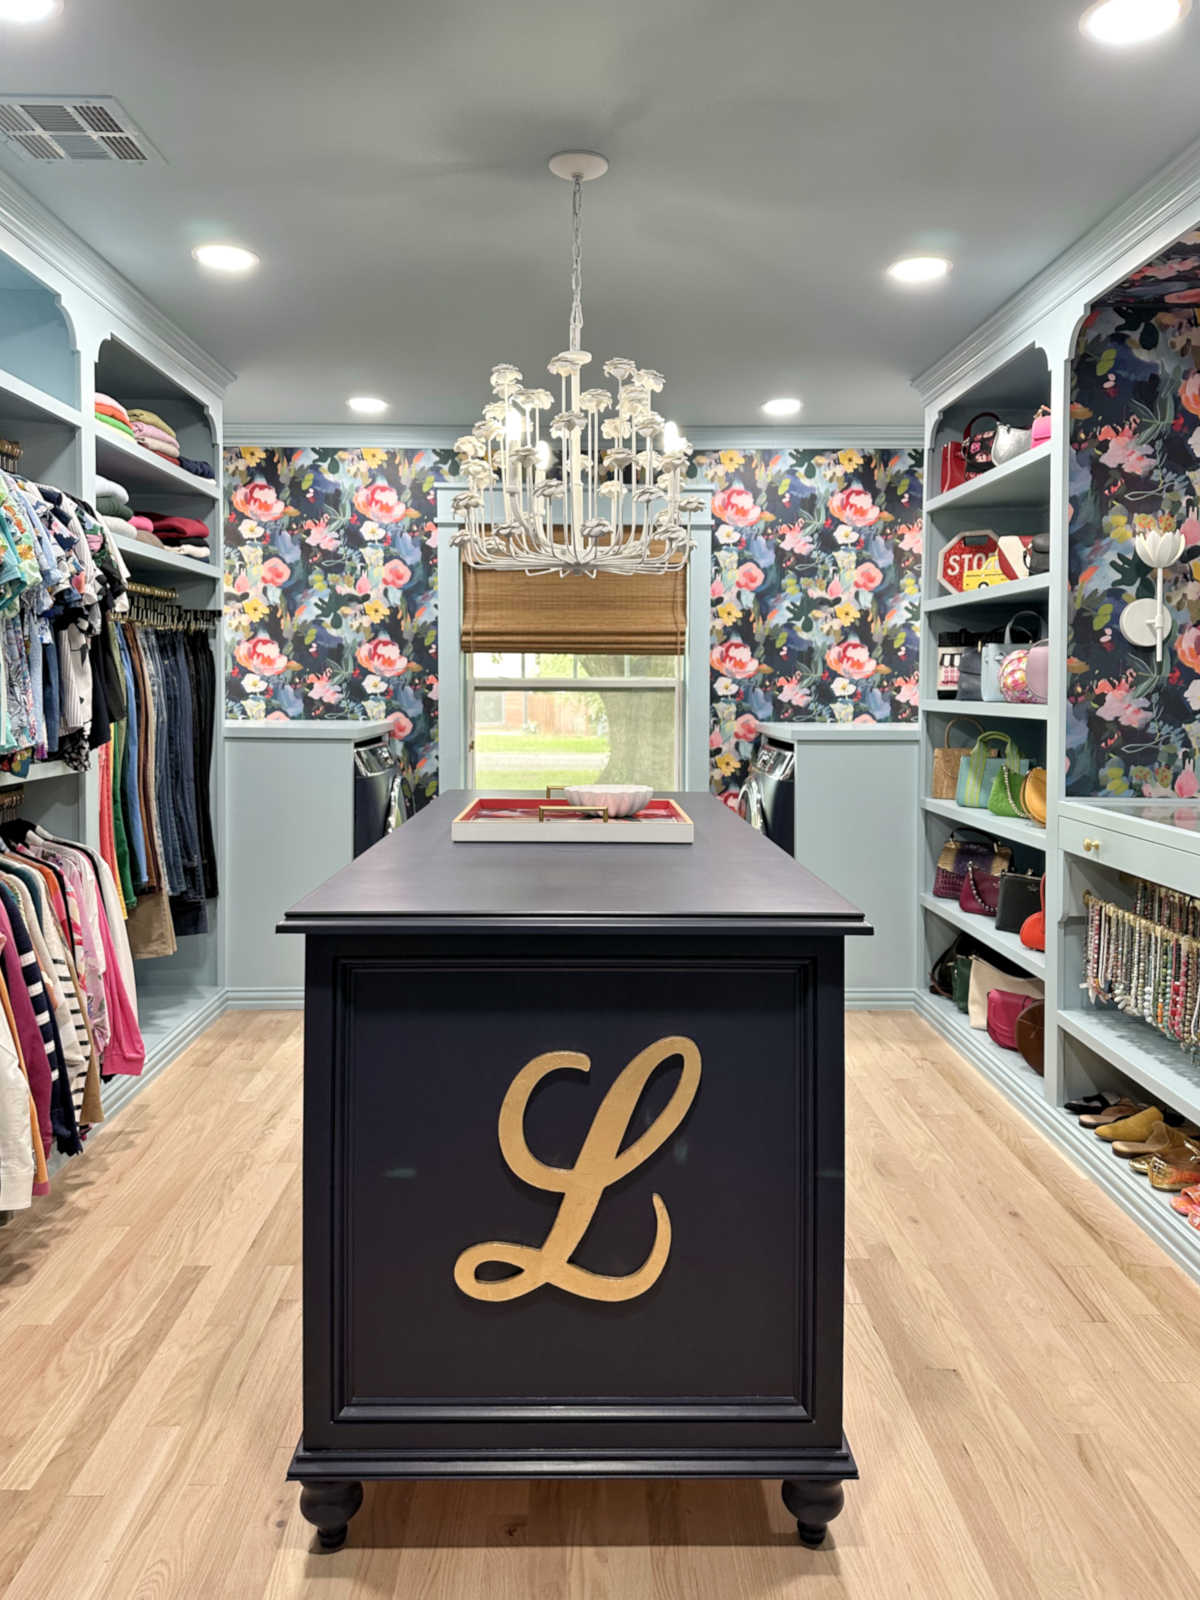
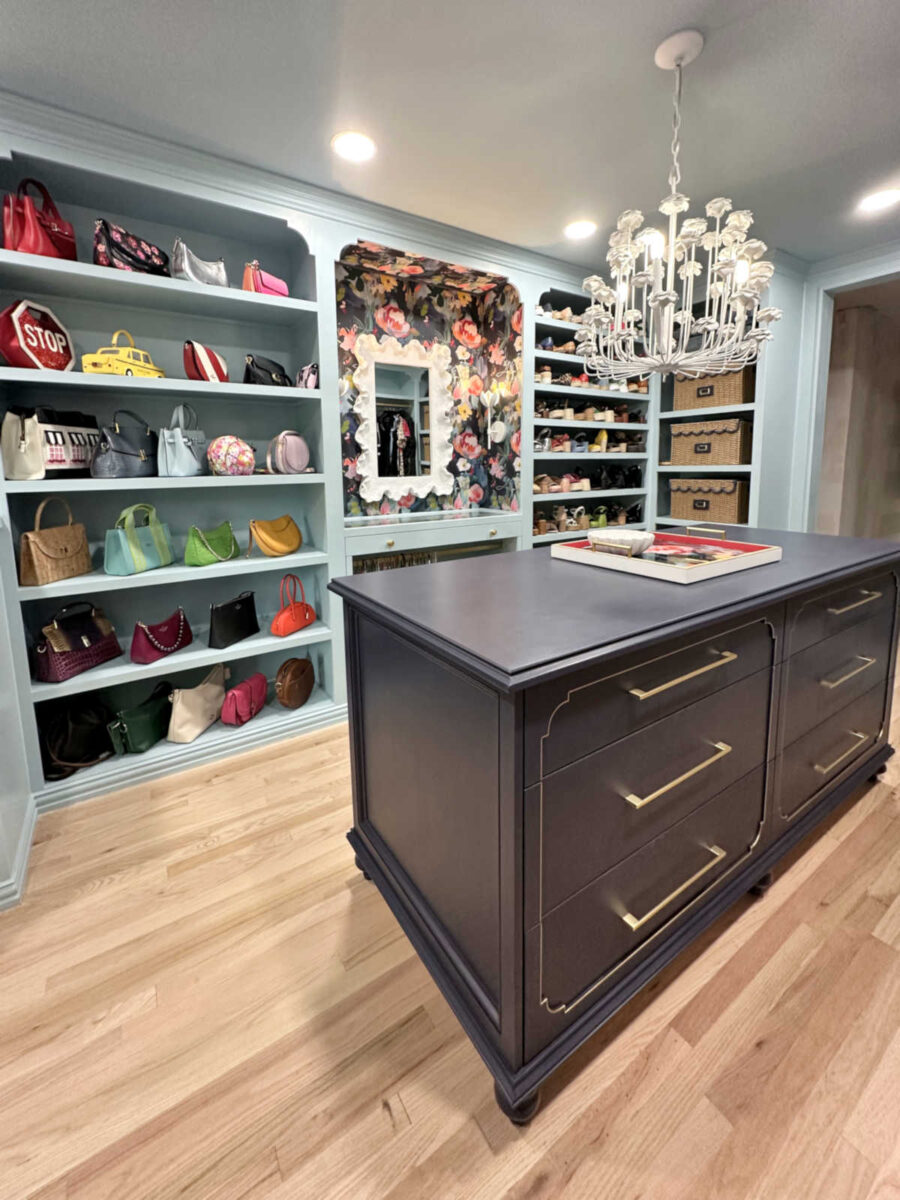
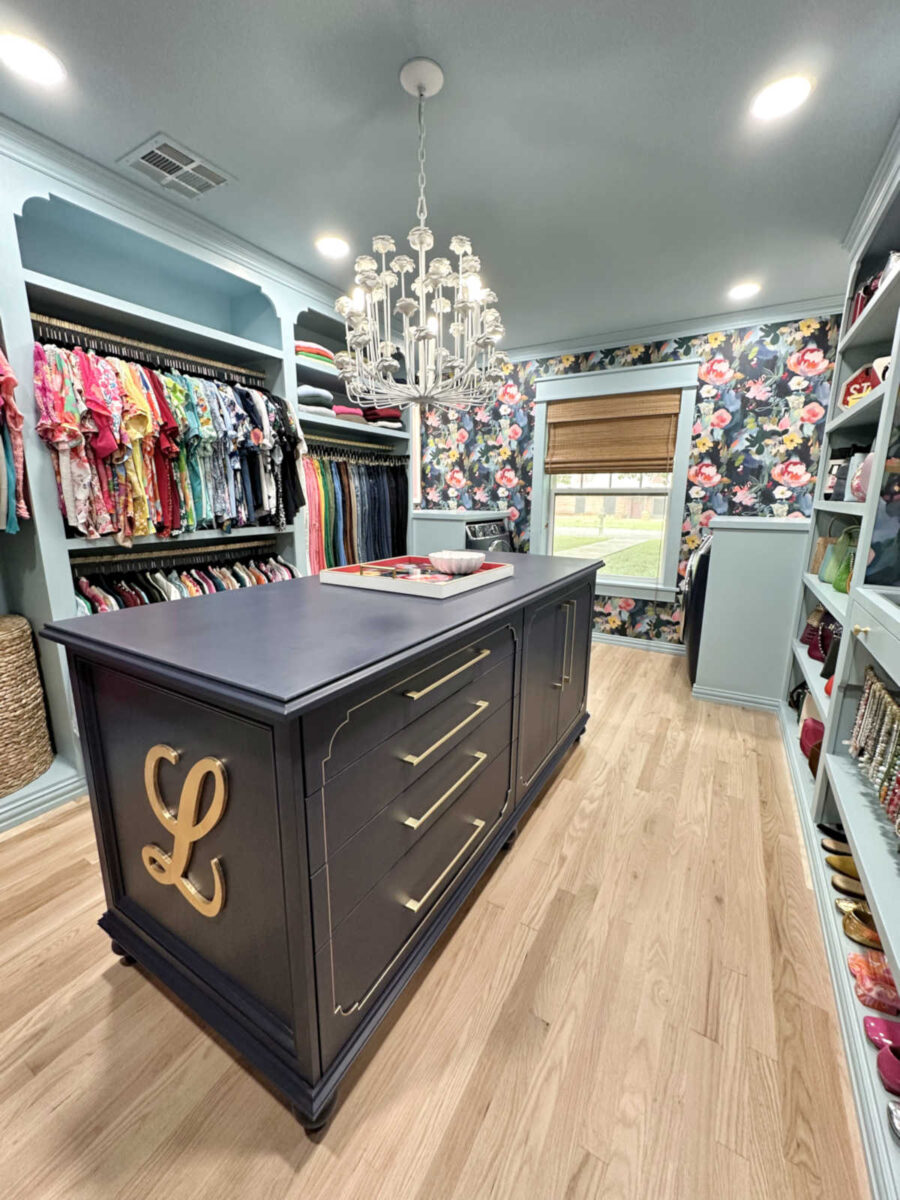
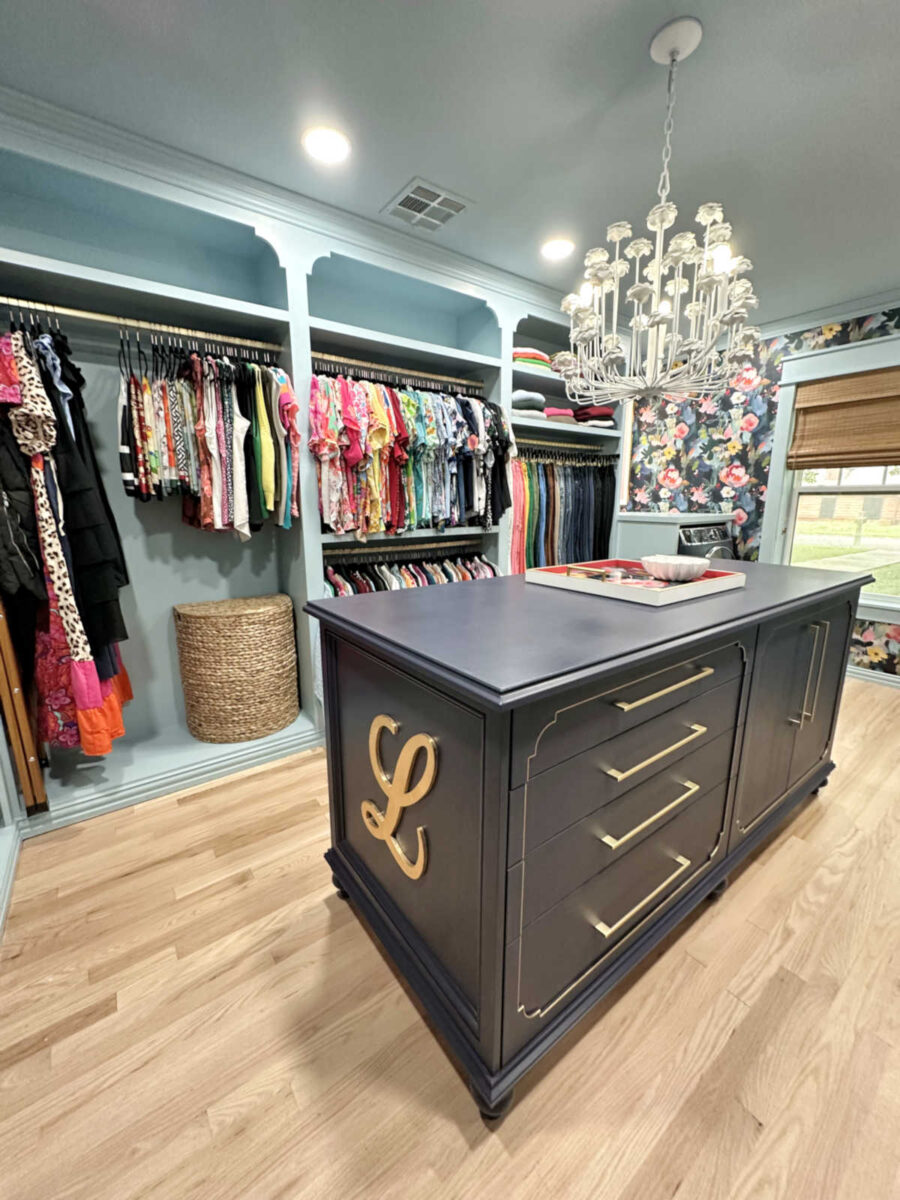
And here’s what it looks like now…

Here’s another view of the room as a bedroom…
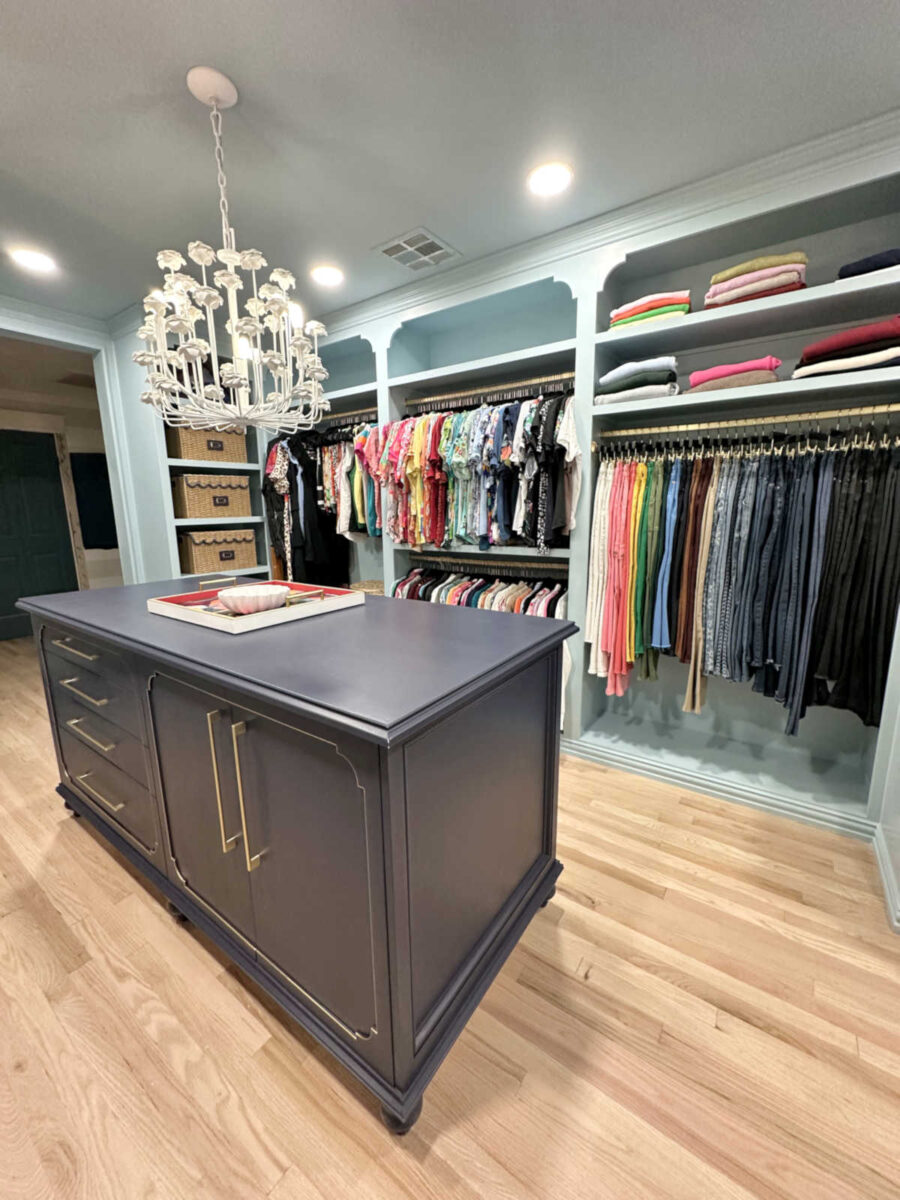
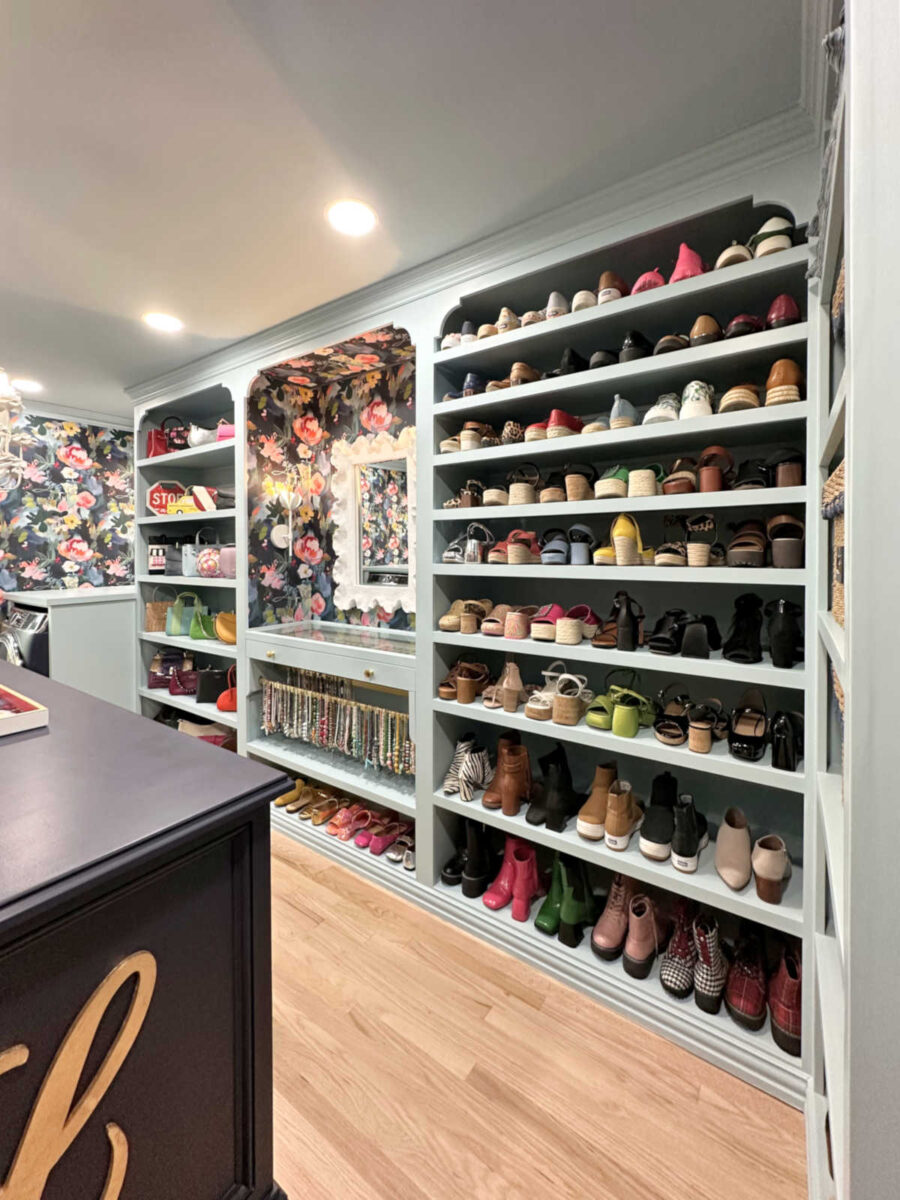
And here’s that same view now…
Here’s a view of the room as a bedroom looking back towards the door and the hallway…

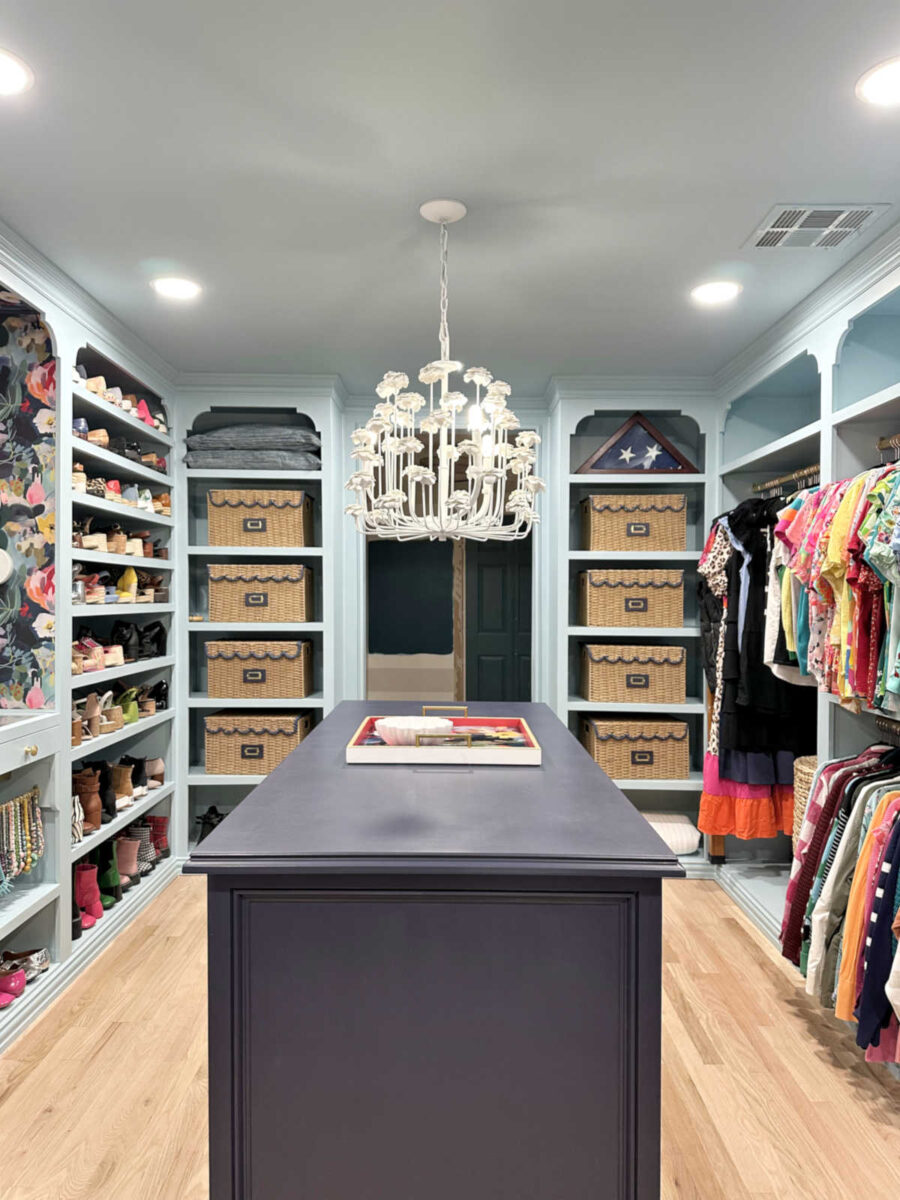
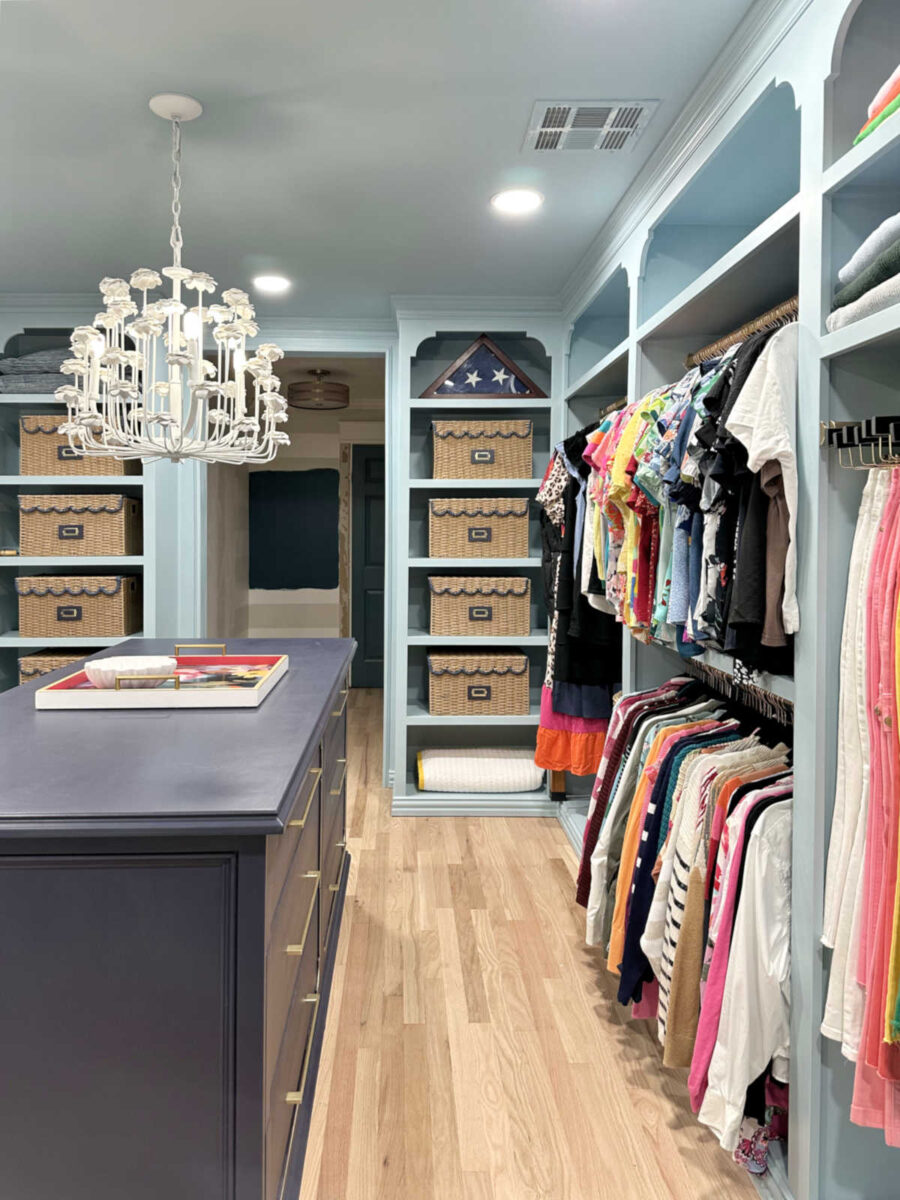
And here’s that view today.
I always thought this view of the bedroom was incredibly boring. Had it stayed a bedroom, I had plans to carry that floral wall treatment around the whole room.
But there’s nothing boring about how it looks today. I can’t wait to get the foyer finished because I hate looking through the doorway and seeing that unfinished foyer. It kind of ruins the vibe. 😀
And I’ll do just a couple more before and afters before I focus on just the closet. Here’s the view of the left wall of the bedroom from the doorway.
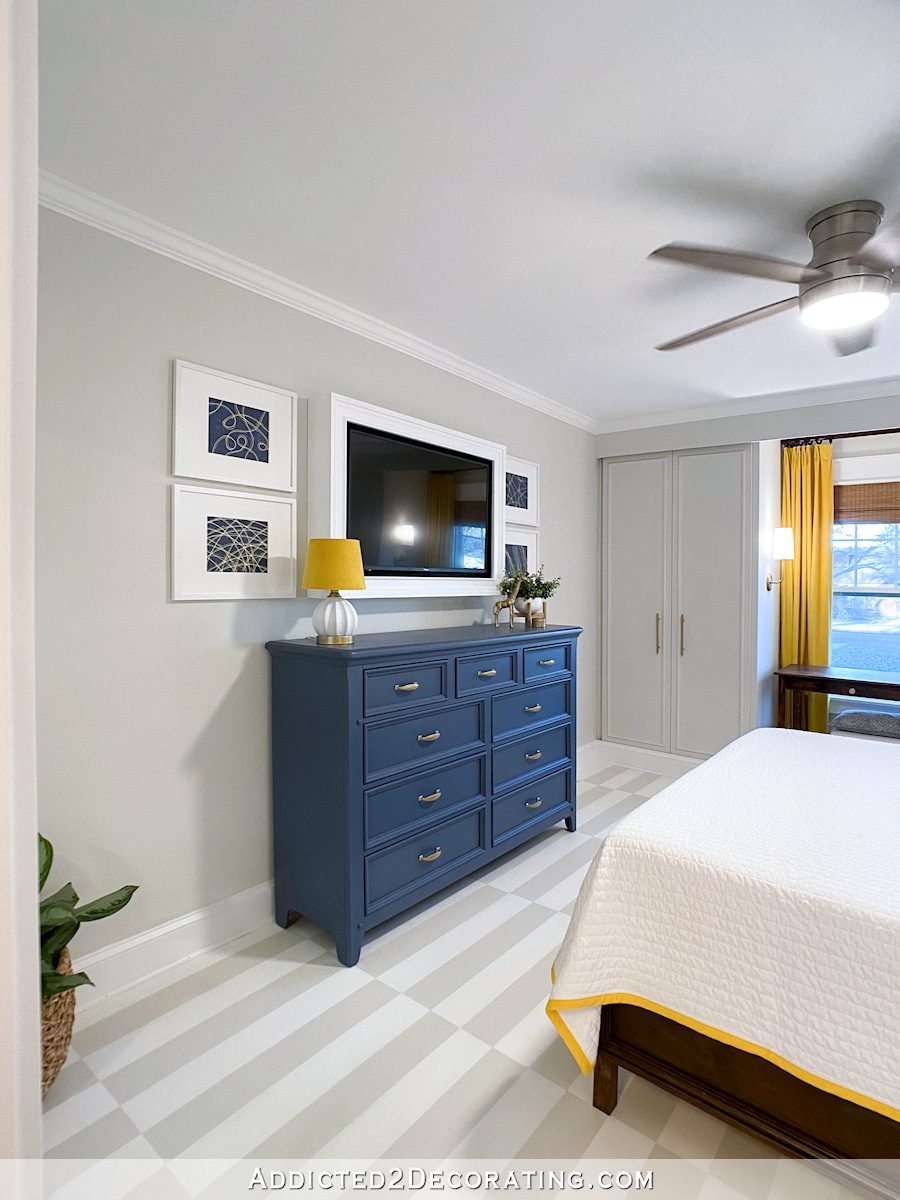
And here’s that view today…
And here’s the last before picture that I’ll show you…
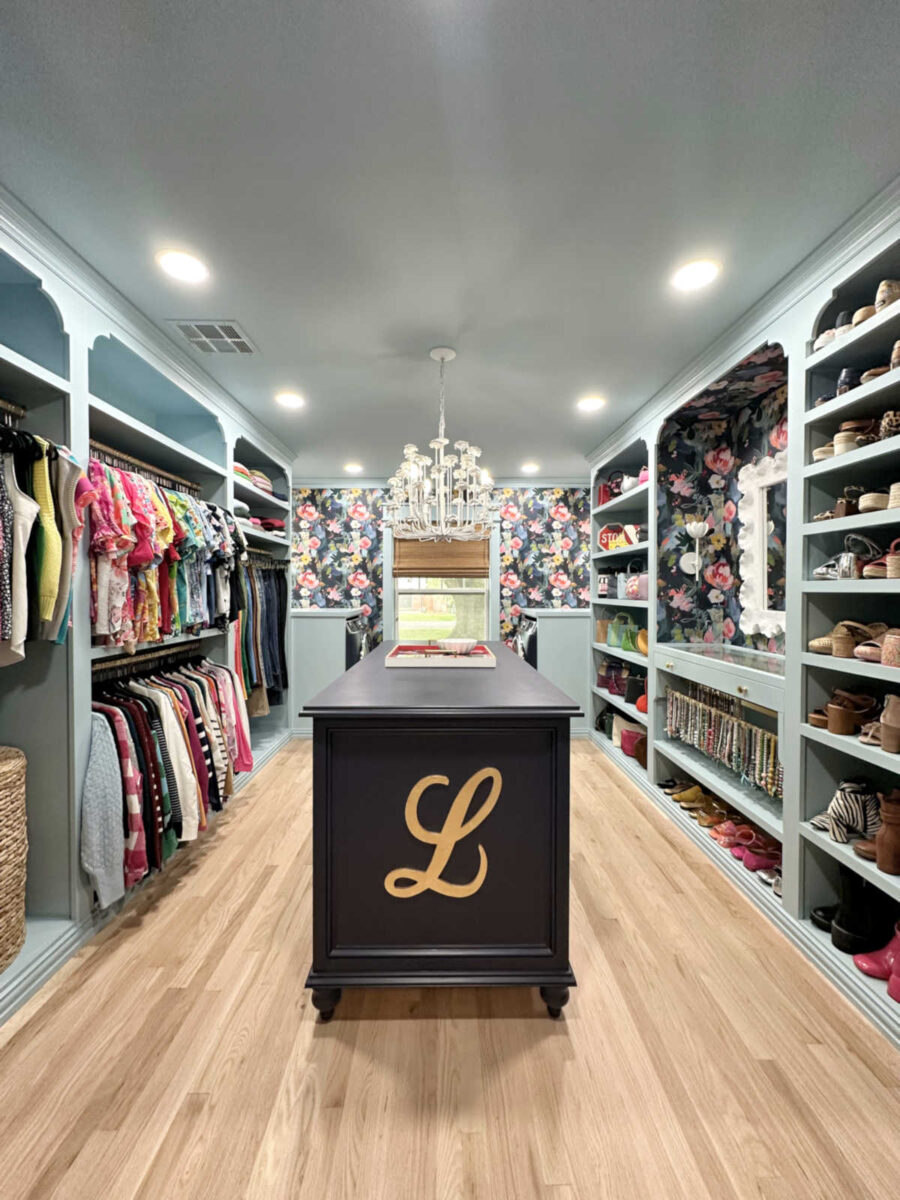
And here’s that view today…
I am so proud of how this closet and laundry area turned out. This was my biggest building project so far, and it was a doozy. Since I work by myself, building and then trying to wrangle such large cabinets into place and get the screwed together was a challenge, and it wasn’t exactly what I would call a fun challenge. But it all worked out, and even though it took so much longer, I’m very glad that I decided to build from scratch instead of using IKEA Pax wardrobes.
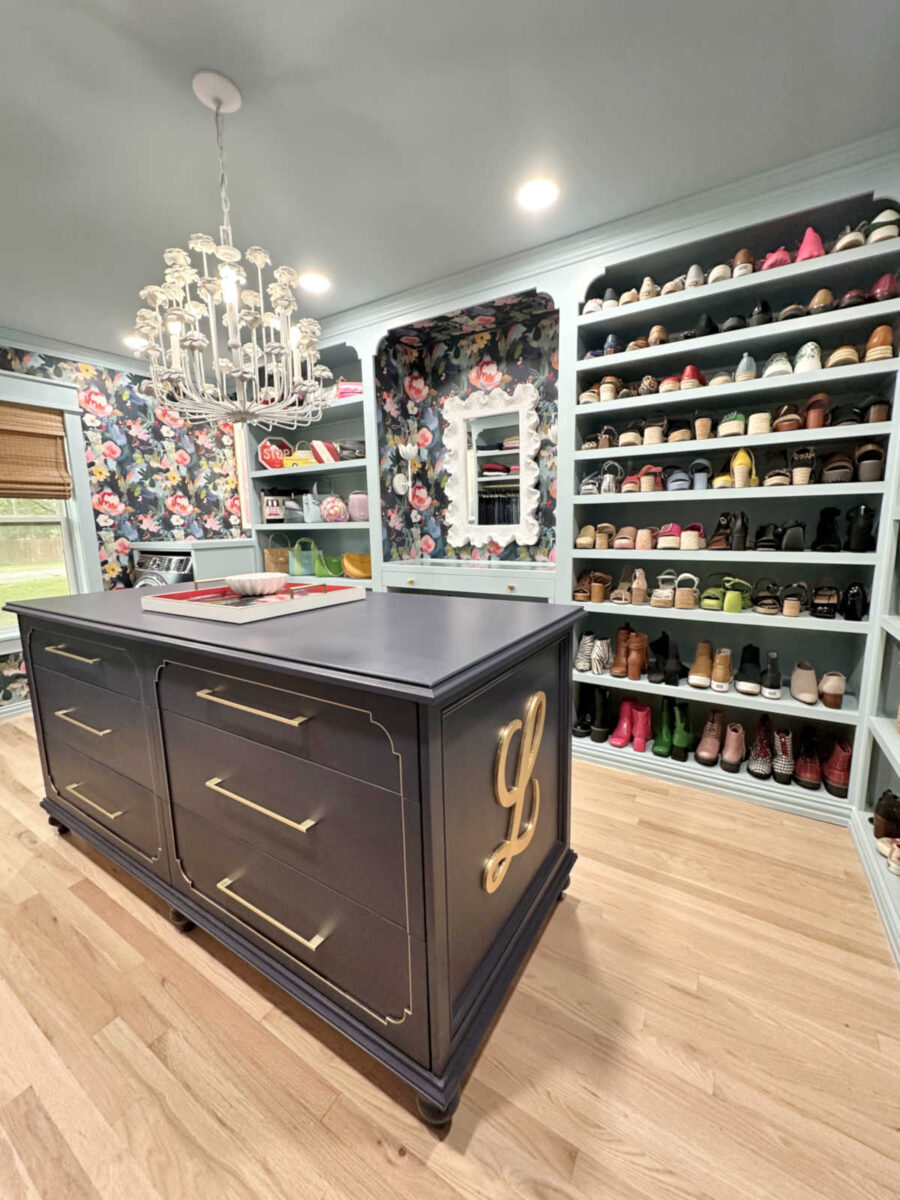
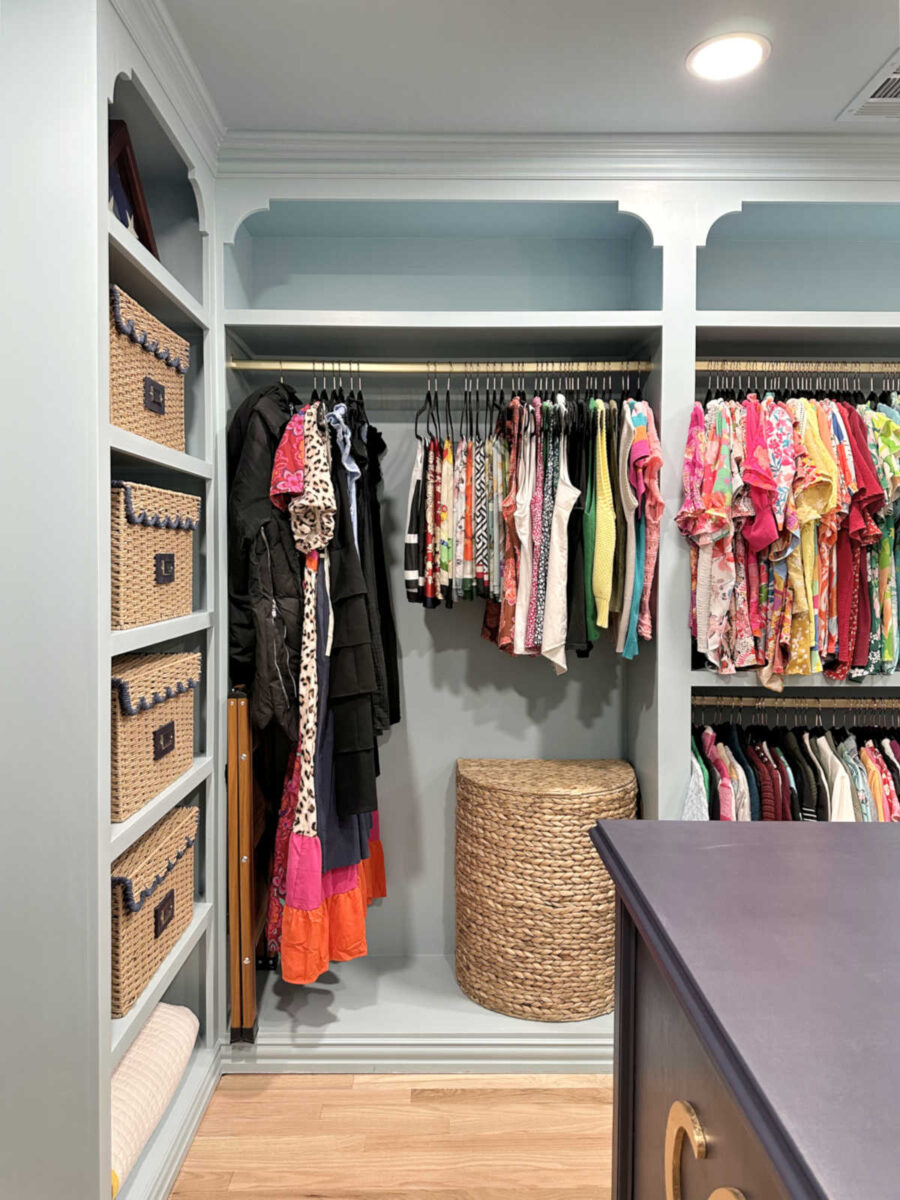
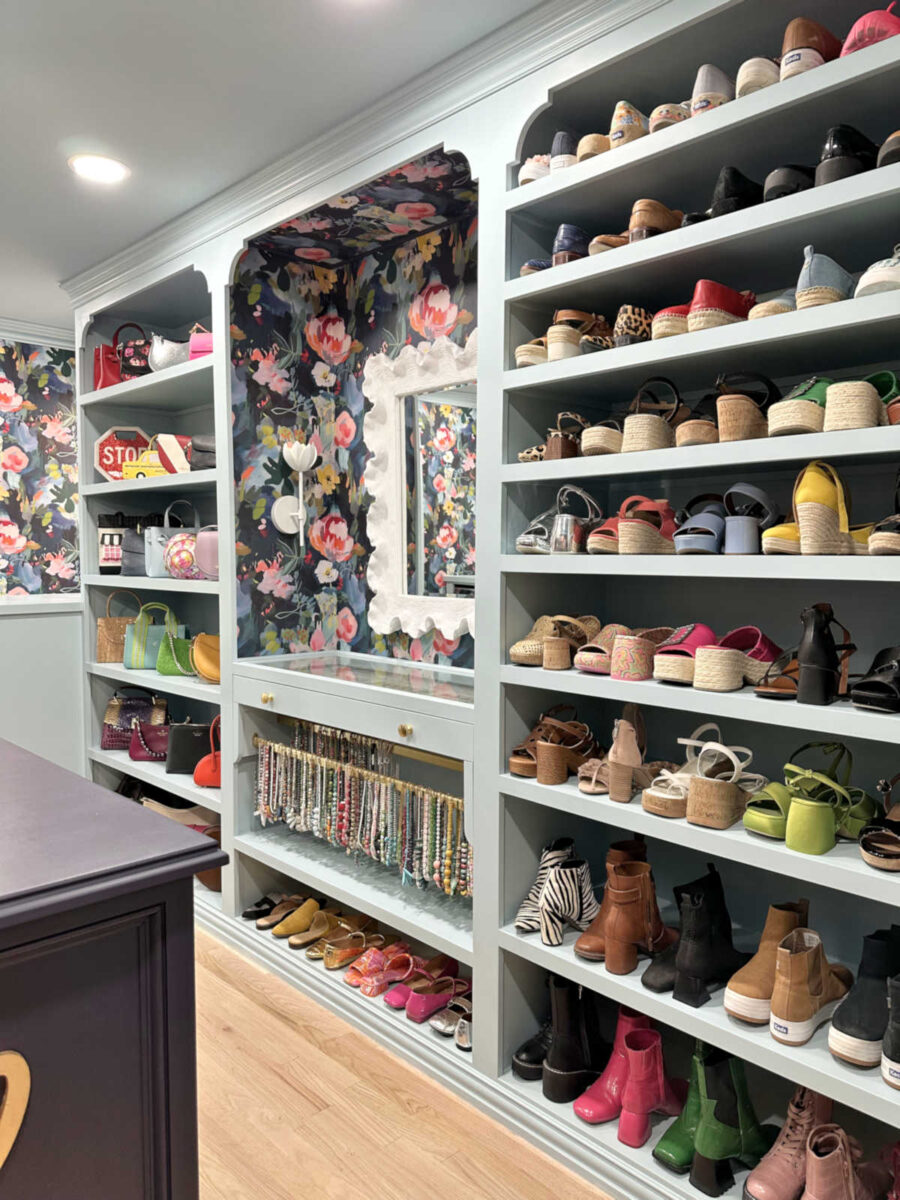
Y’all know I love my IKEA cabinets in my studio. But for this room, building from scratch allowed me to customize everything just like I wanted it, and to build the custom widths and heights that I needed so that I could squeeze every inch of usable storage space out of the wall space in here as possible. And I now finally have enough storage for all of my shoes.
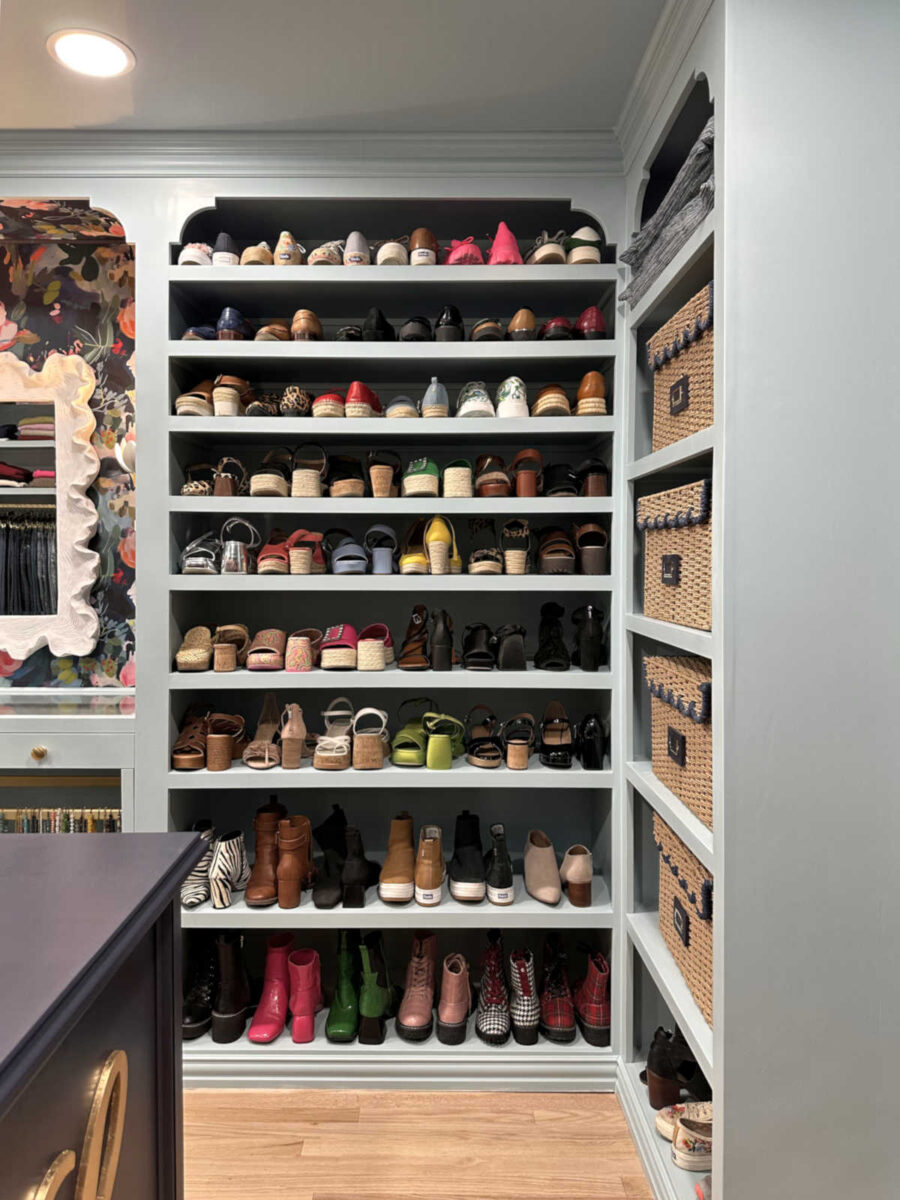
Actually, that’s not true. I didn’t have enough room for all of them, so I had to get rid of about seven pairs of shoes. I might have a shoe problem. 😀
I just love walking in here to this organized space and having everything right where I can see it and easily find it.
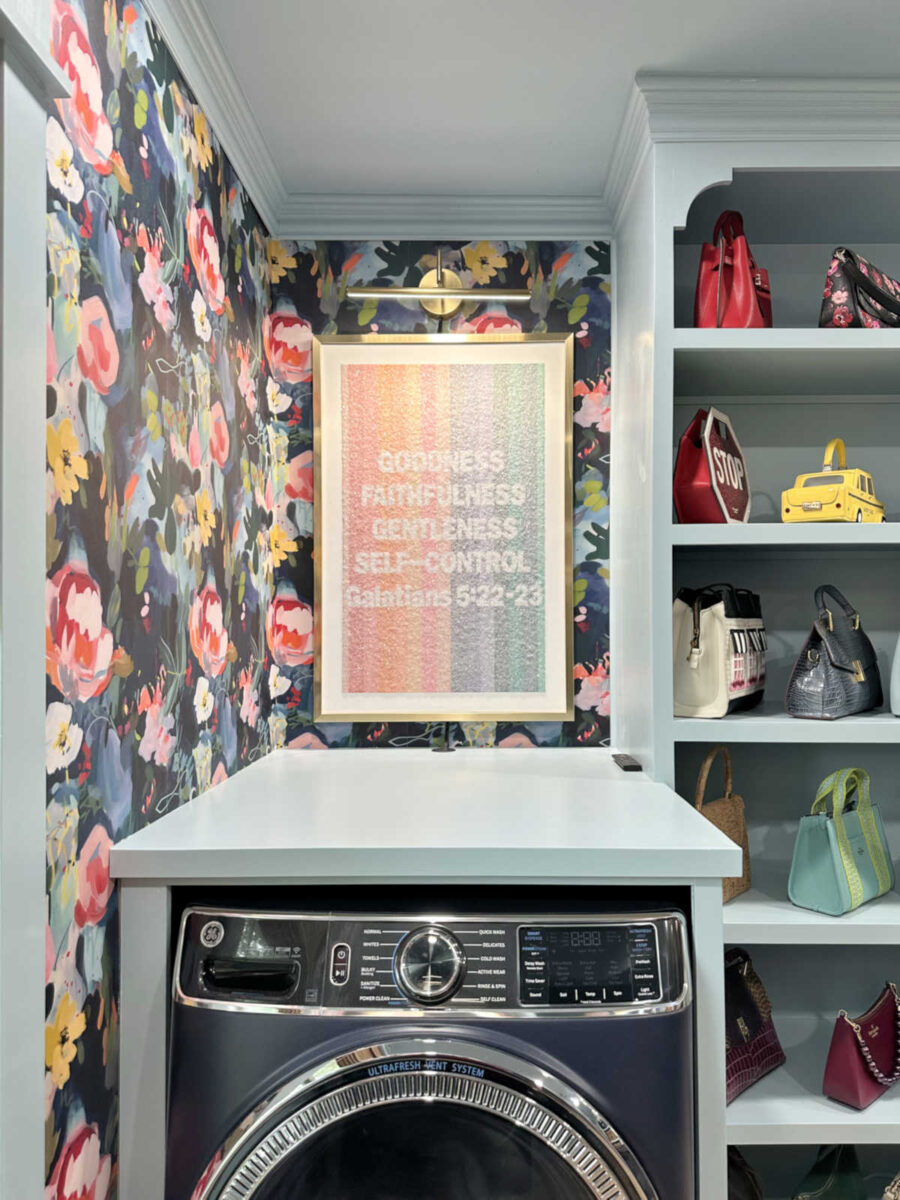
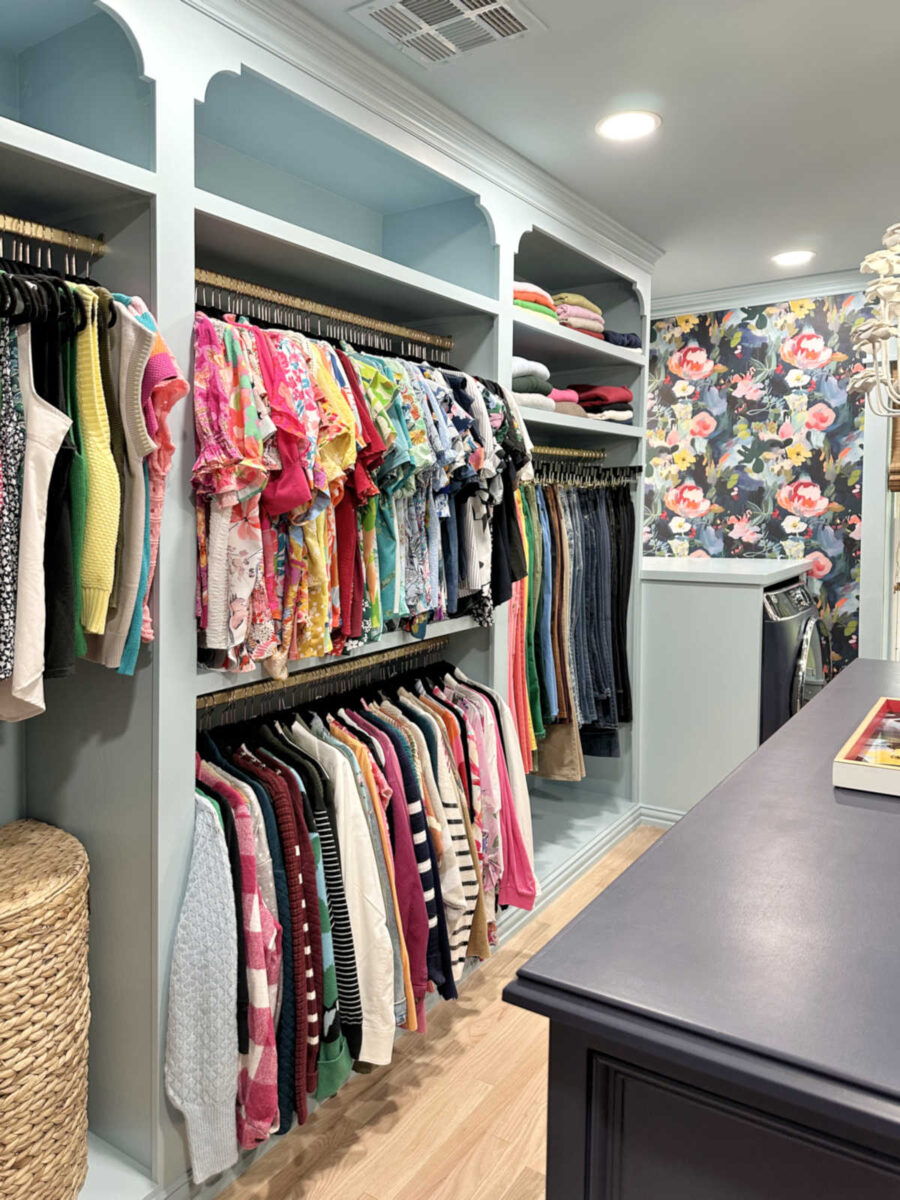
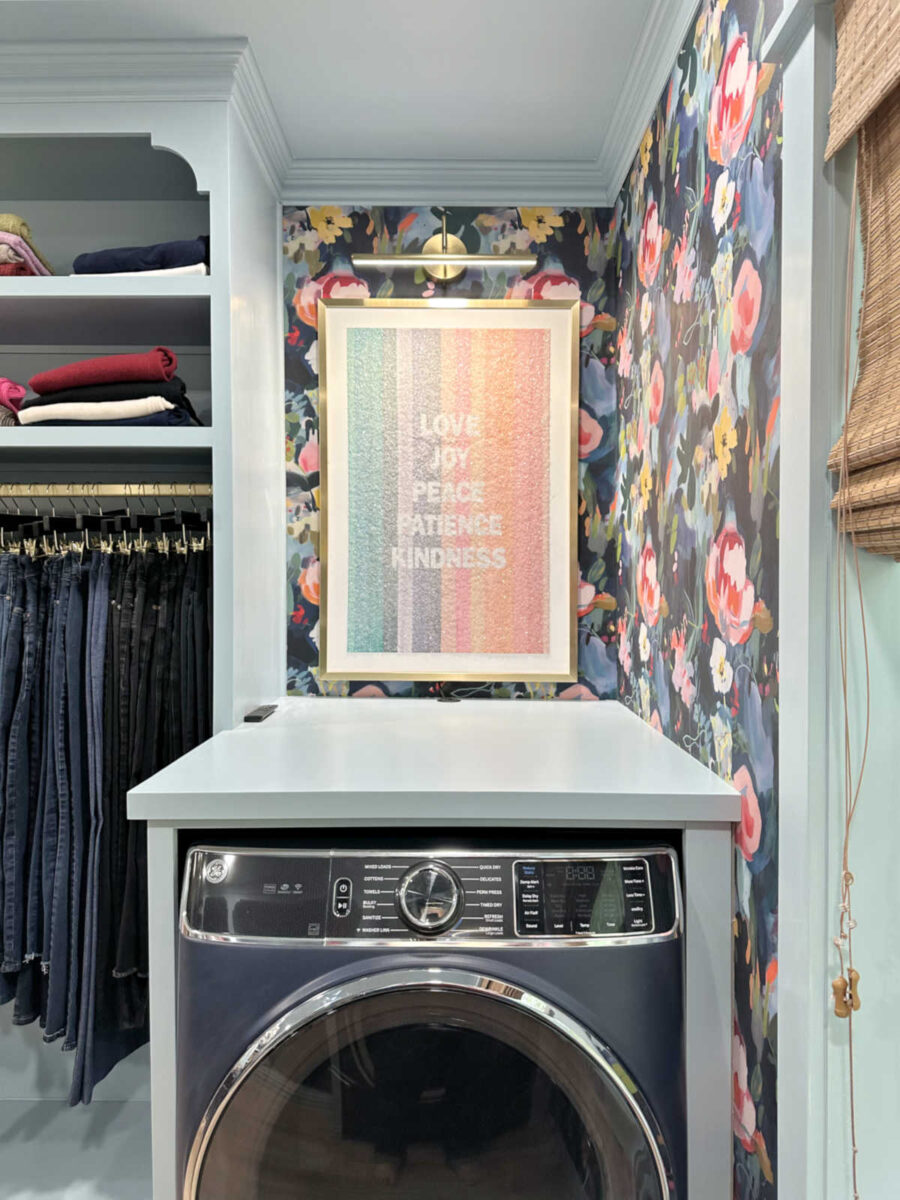
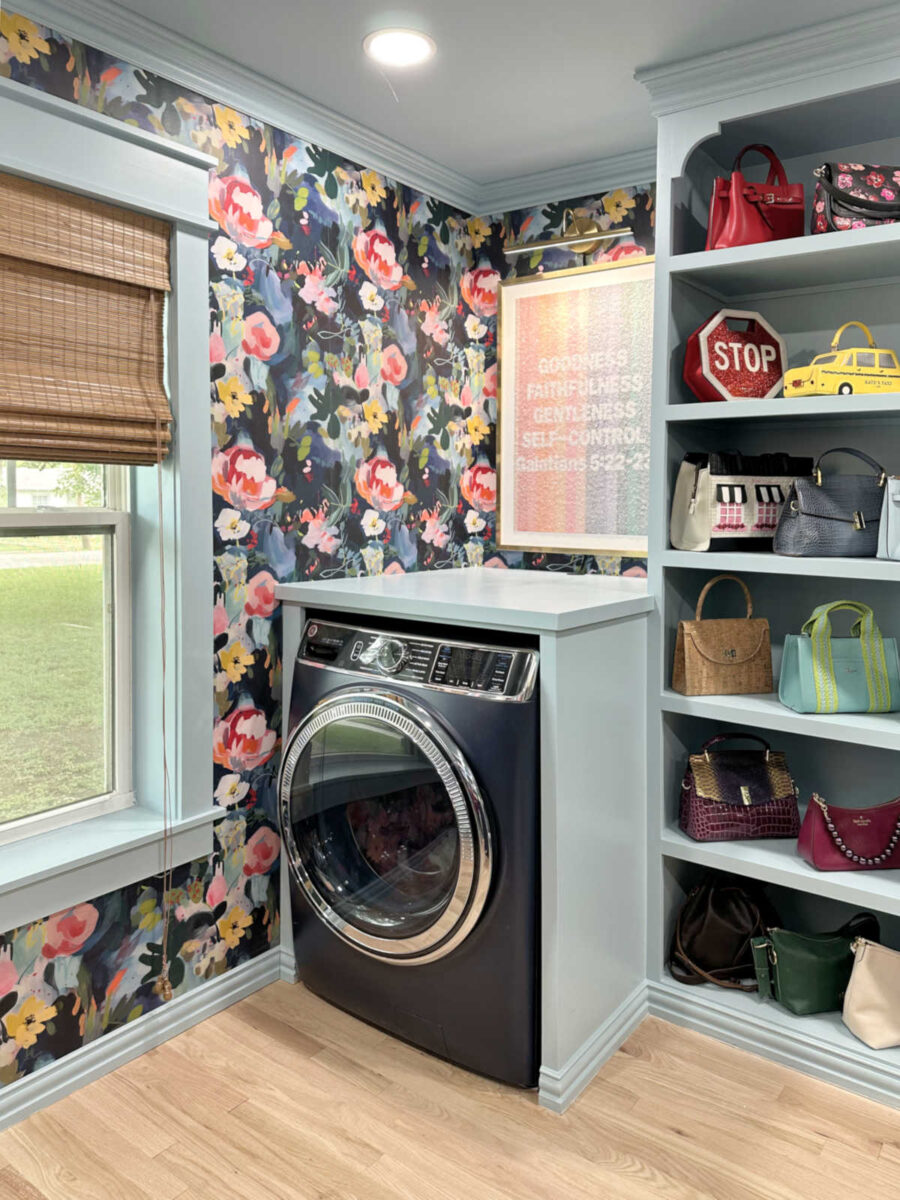
And I have to say, I was a bit nervous and unsure about having the washer and dryer inside the closet, but this is honestly one of my favorite decisions I’ve made so far on our house. Having these in the closet is so unbelievably convenient. It’s the perfect arrangement, at least for me. I can see how it might not work for a home with more than one person who does laundry. But I’m the only one who does laundry in this household, so for us, it’s perfect.
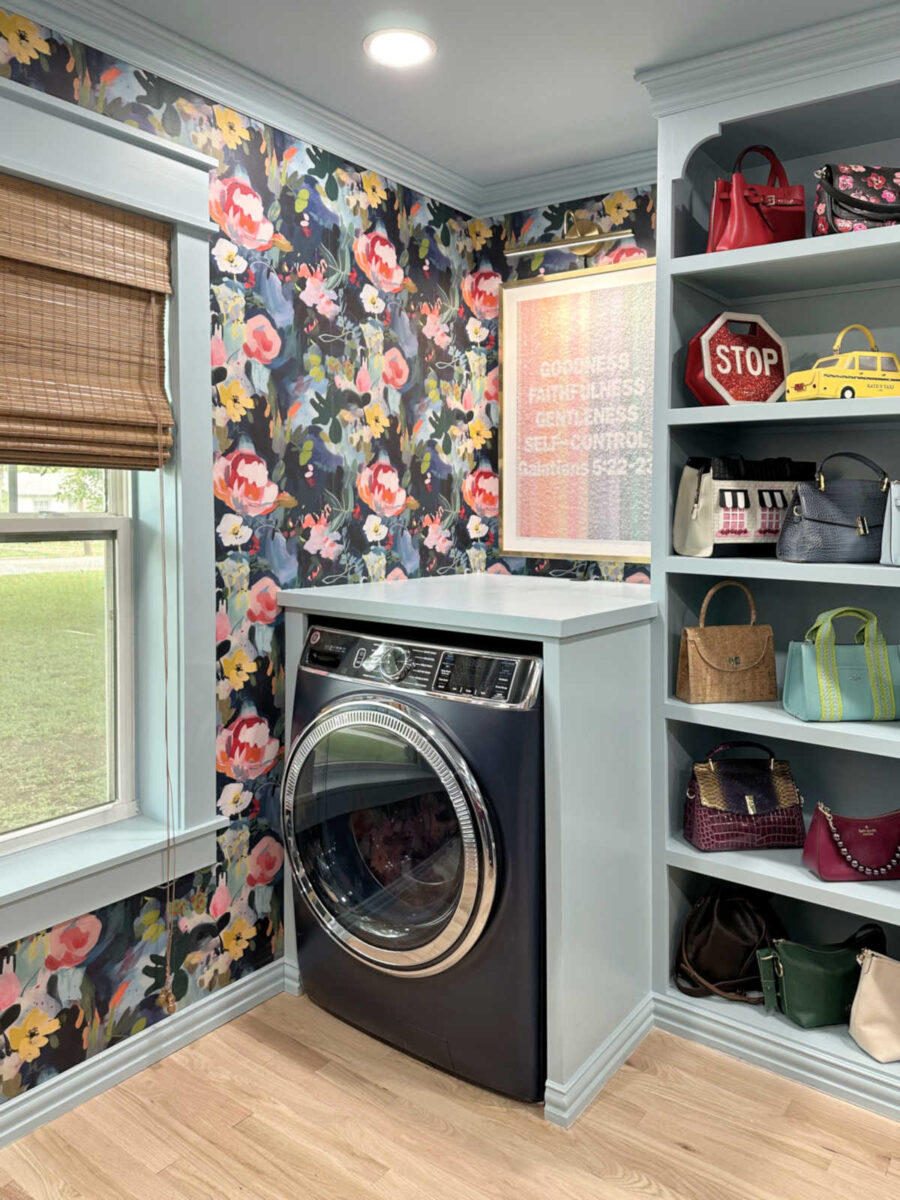
And I’m so glad that I got to use my sparkly word art in here. I know word art isn’t everyone’s cup of tea, and it’s not really mine, either. But these have special meaning to me, so I’m really glad that the colors worked so well in here.
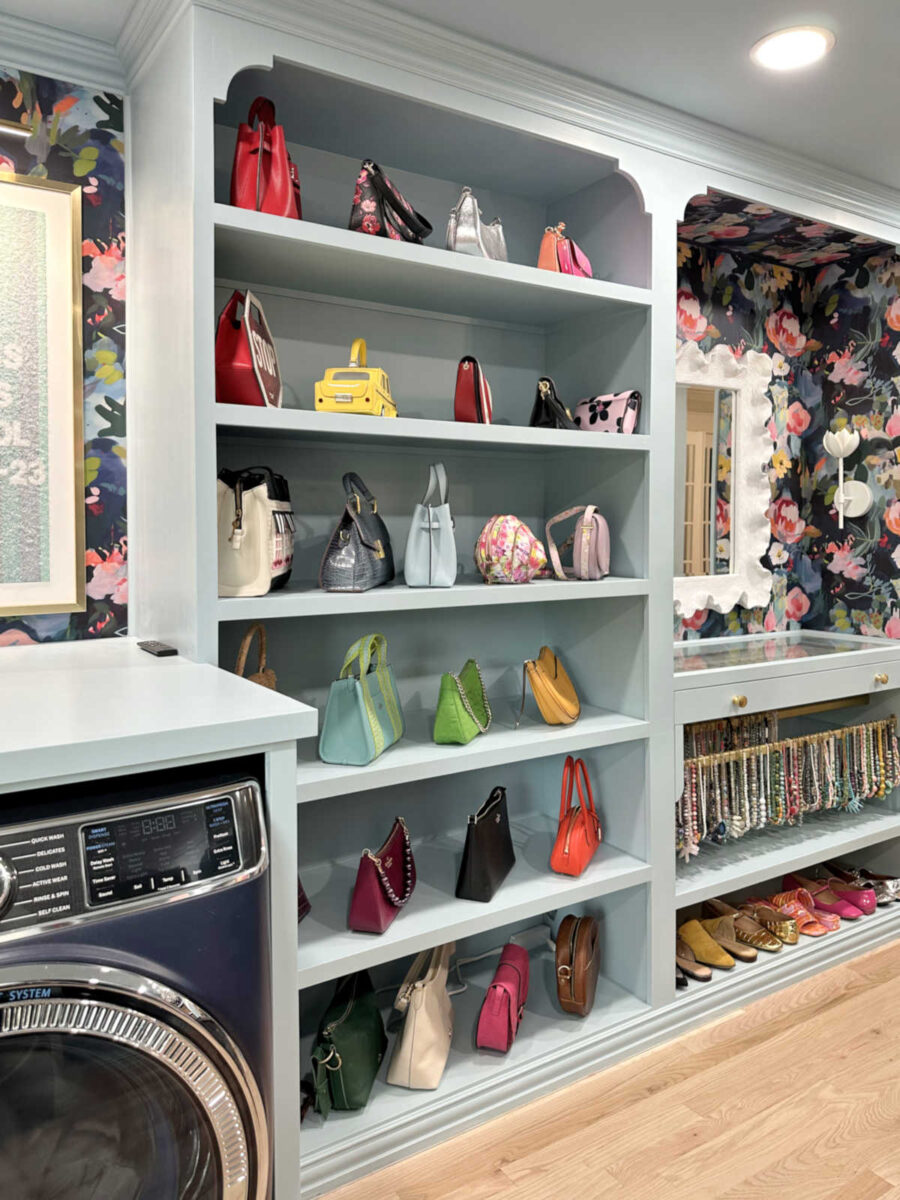
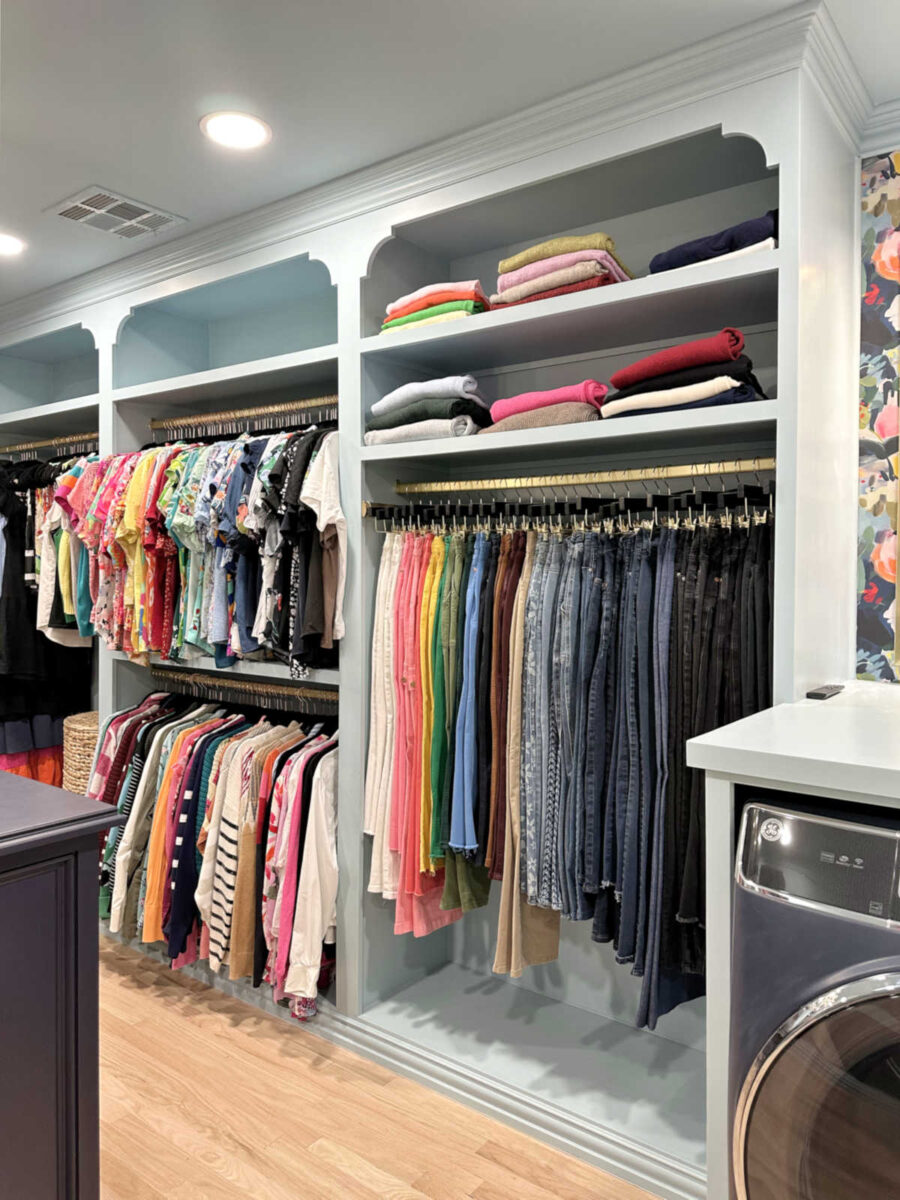
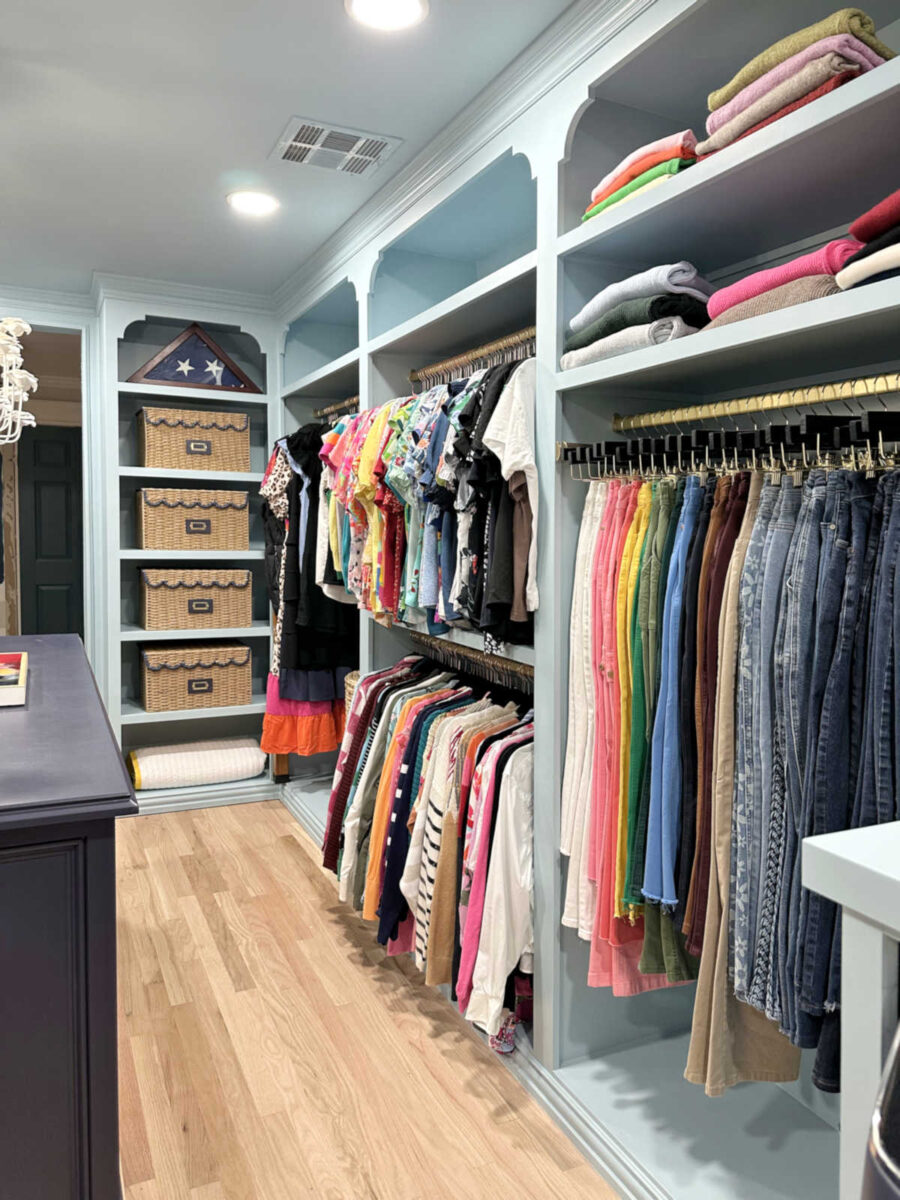
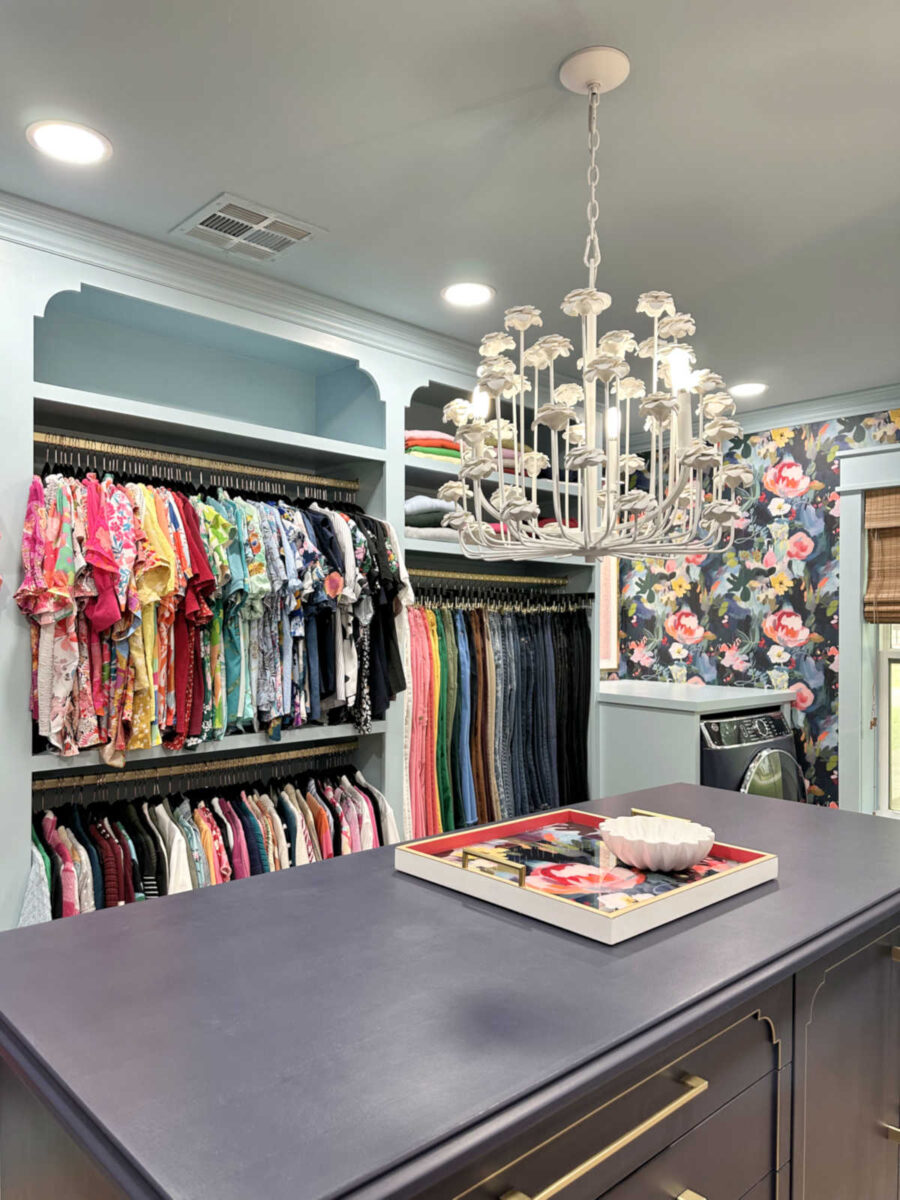
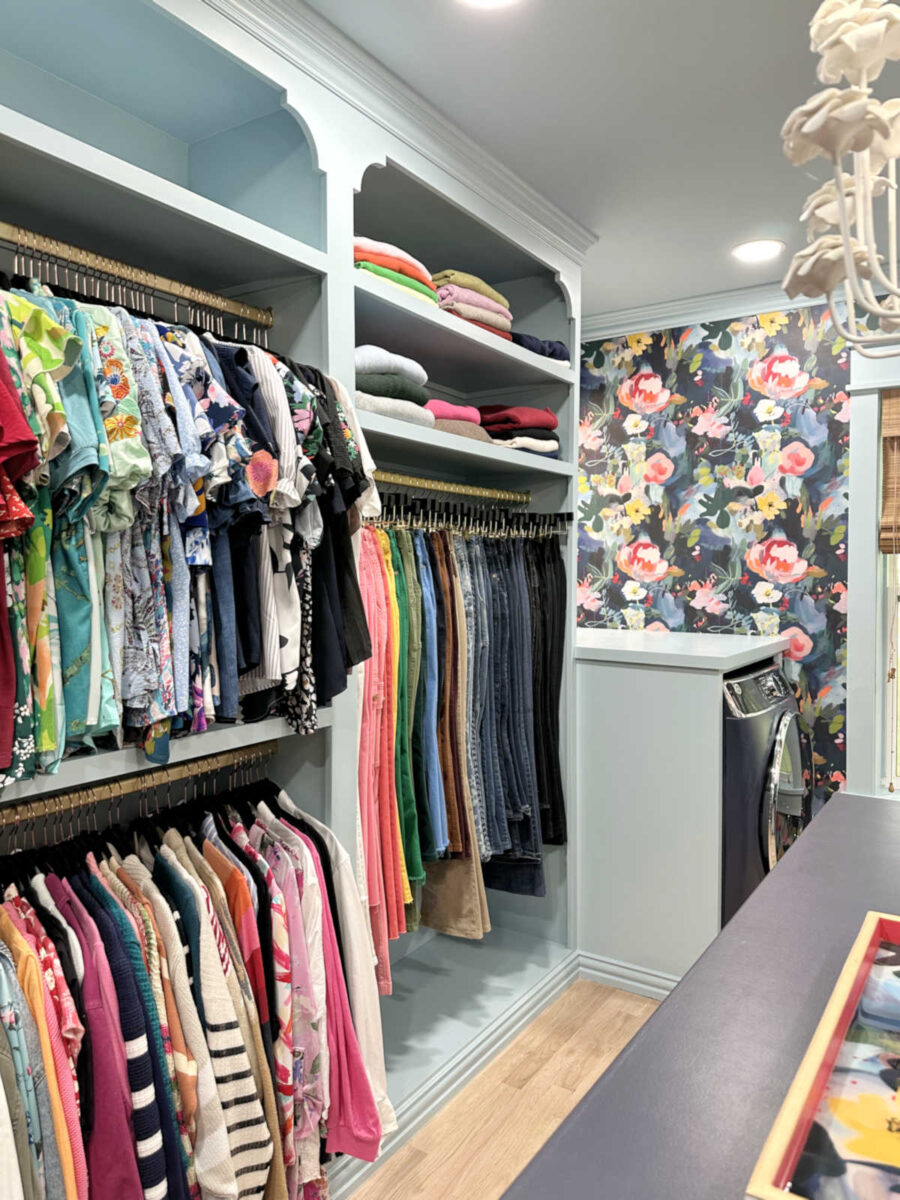
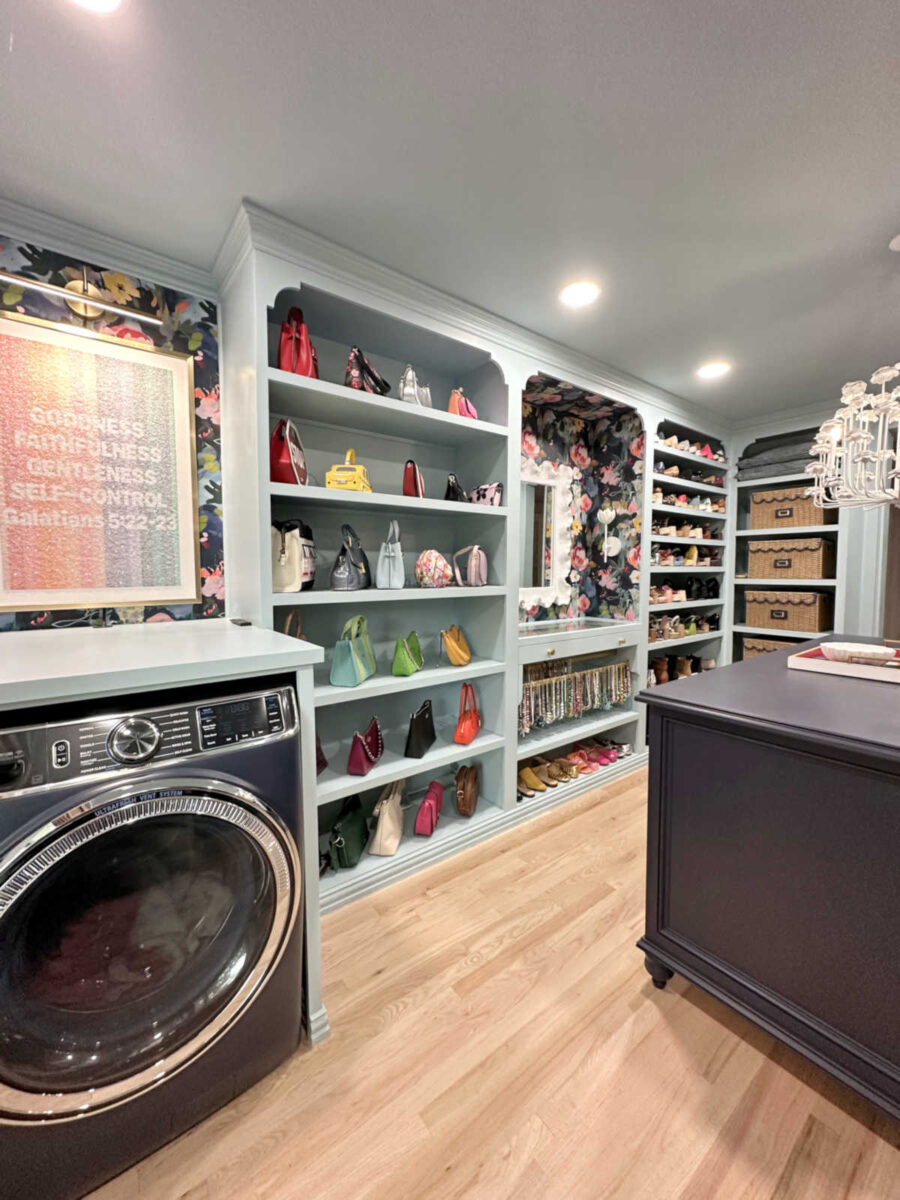
Here are a few more pictures of this side of the room, presented without commentary, before we move to the other side of the room.
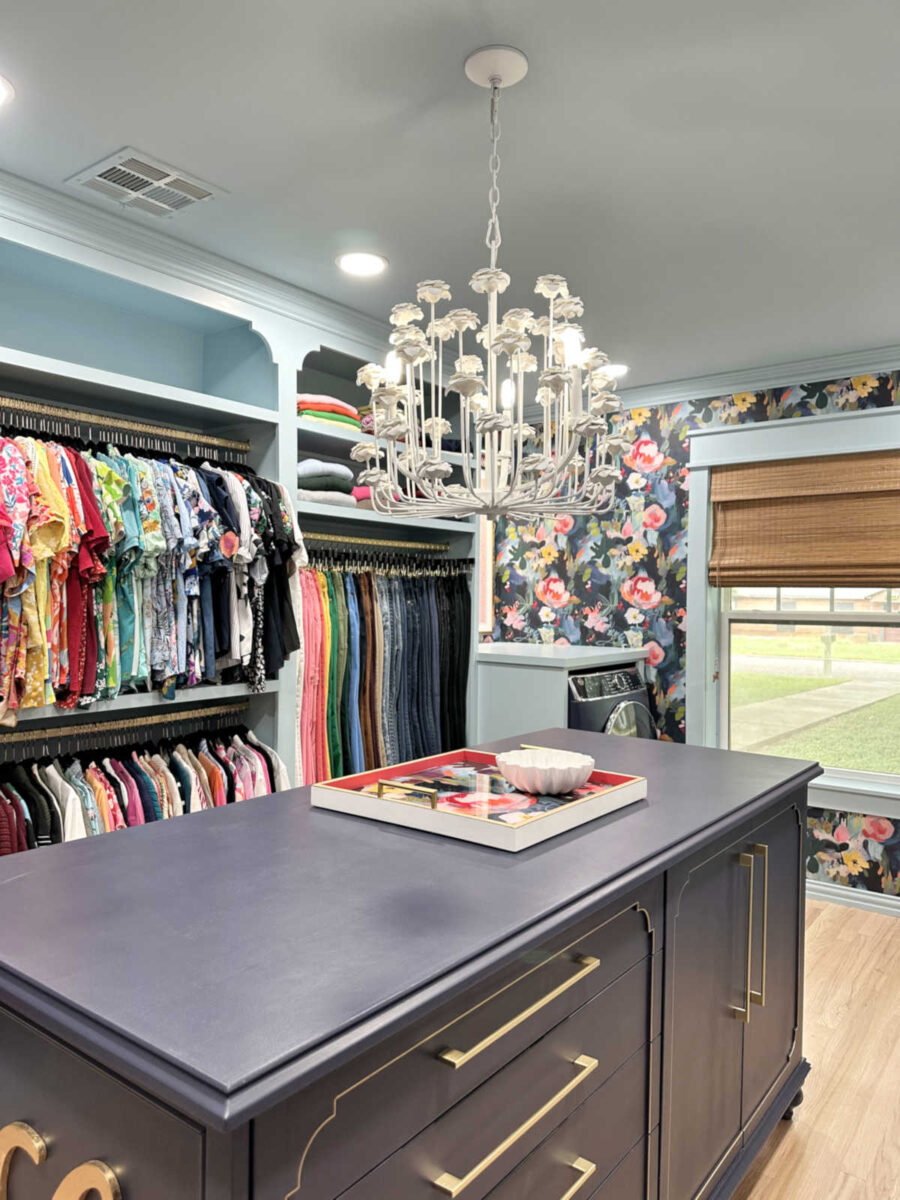
All of my hanging clothes are on this side of the room, and I still have empty storage space. I’m glad to have it because as I empty out the sunroom even more, I’ll have items like blankets and pillows that will need to be stored. So these shelves will be perfect for that.
And as I was editing these pictures, I had to laugh at myself because I took the suggestion made by some of you, and I arranged my short sleeves shirts by color as best as I could. That has been very convenient and has made it easy to find exactly what I’m looking for. But then when I brought my long sleeve items in, I just threw them on there pretty haphazardly and forgot to arrange them. So that section wasn’t really ready for its debut.
I was a bit concerned about having my washer and dryer arranged so that they’re across from each other instead of side-by-side. But I have to say, I’ve really loved this arrangement. I don’t find that it takes any more effort to put wet clothes in the dryer with this arrangement than it did with them side-by-side.
Alright, y’all, I have so many pictures (I went a bit overboard…I was excited), so I’ll just let y’all look around a bit without having to read my commentary.
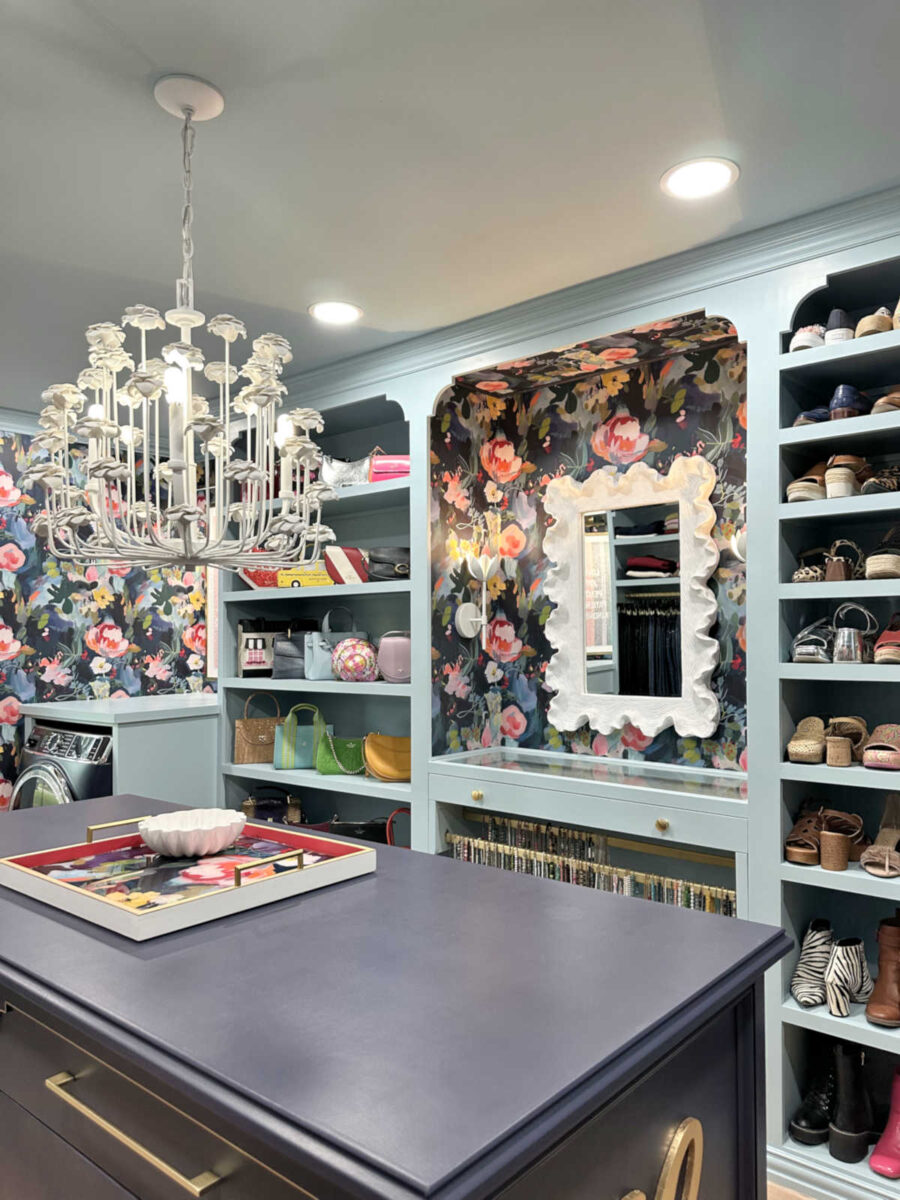
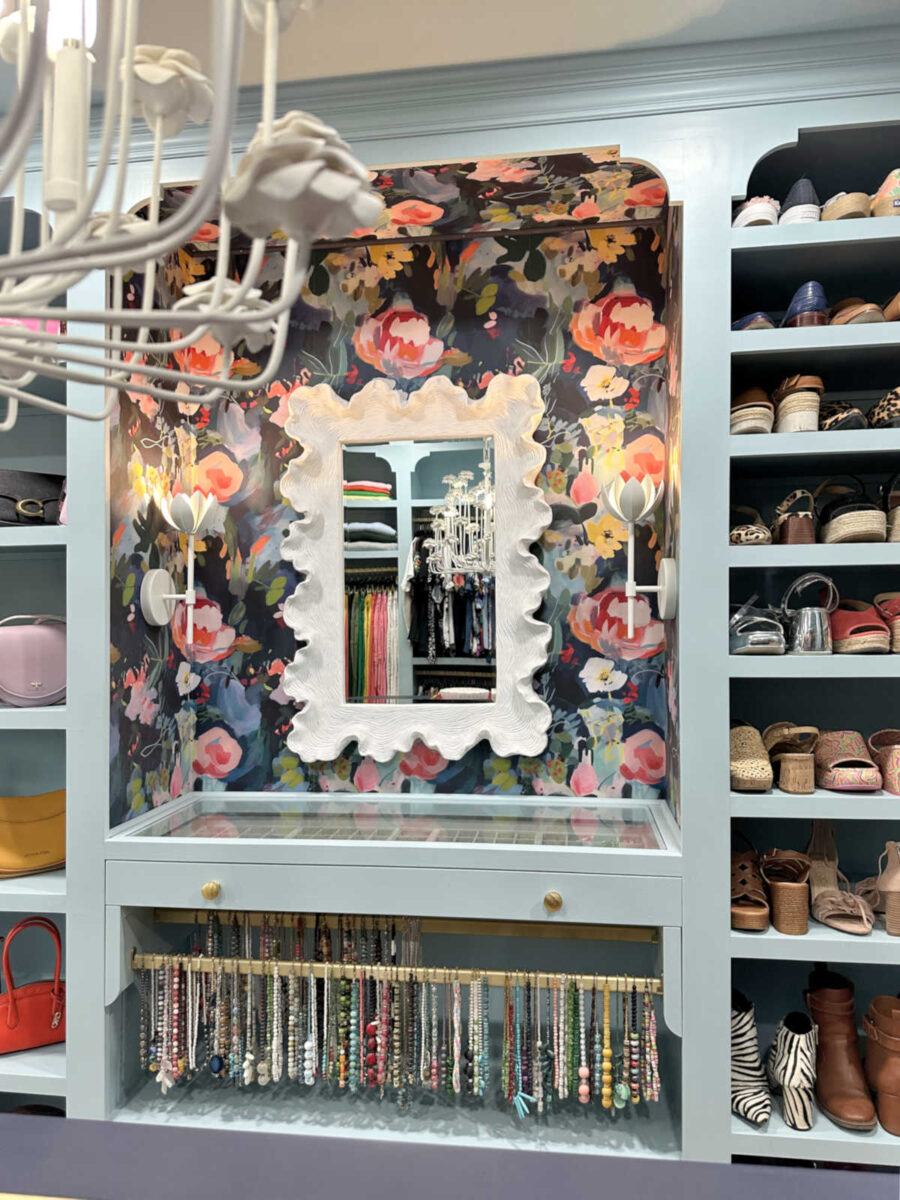
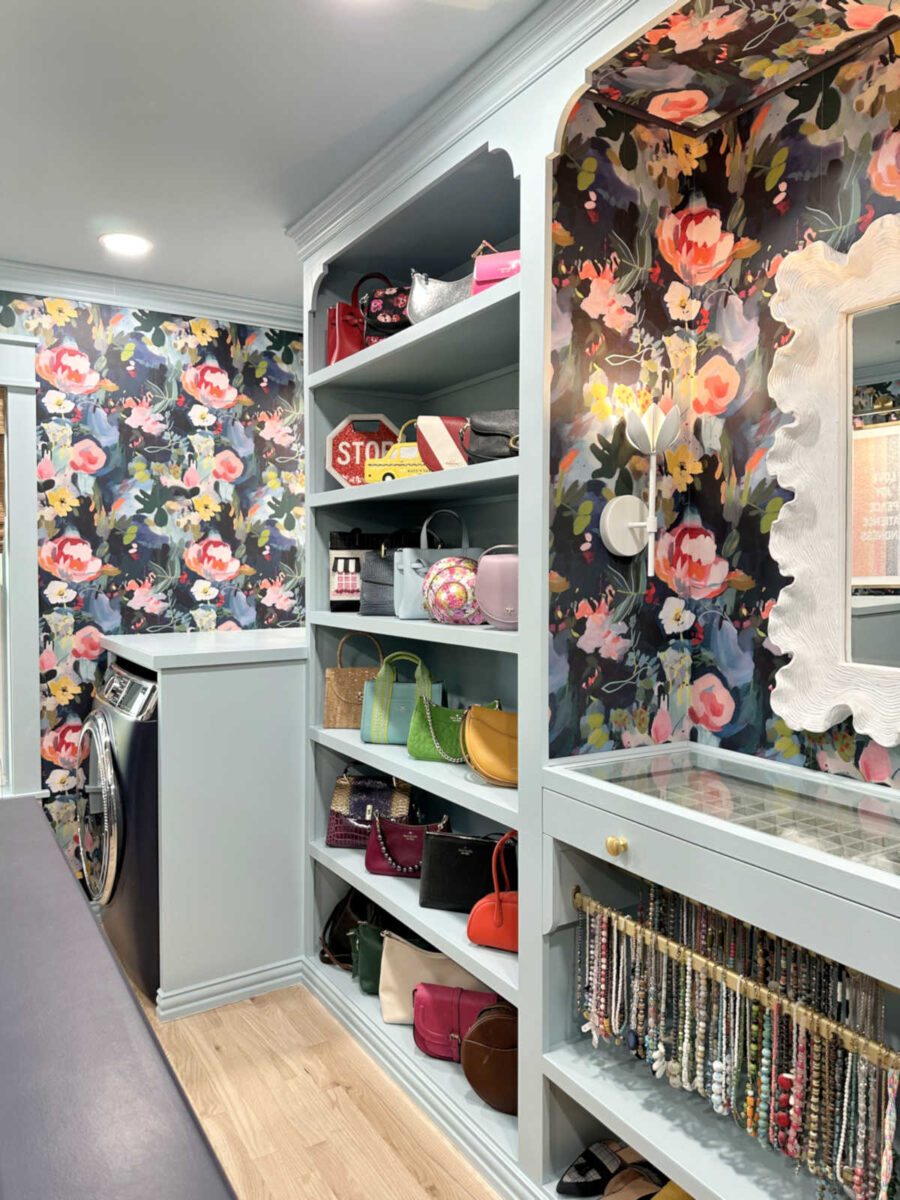
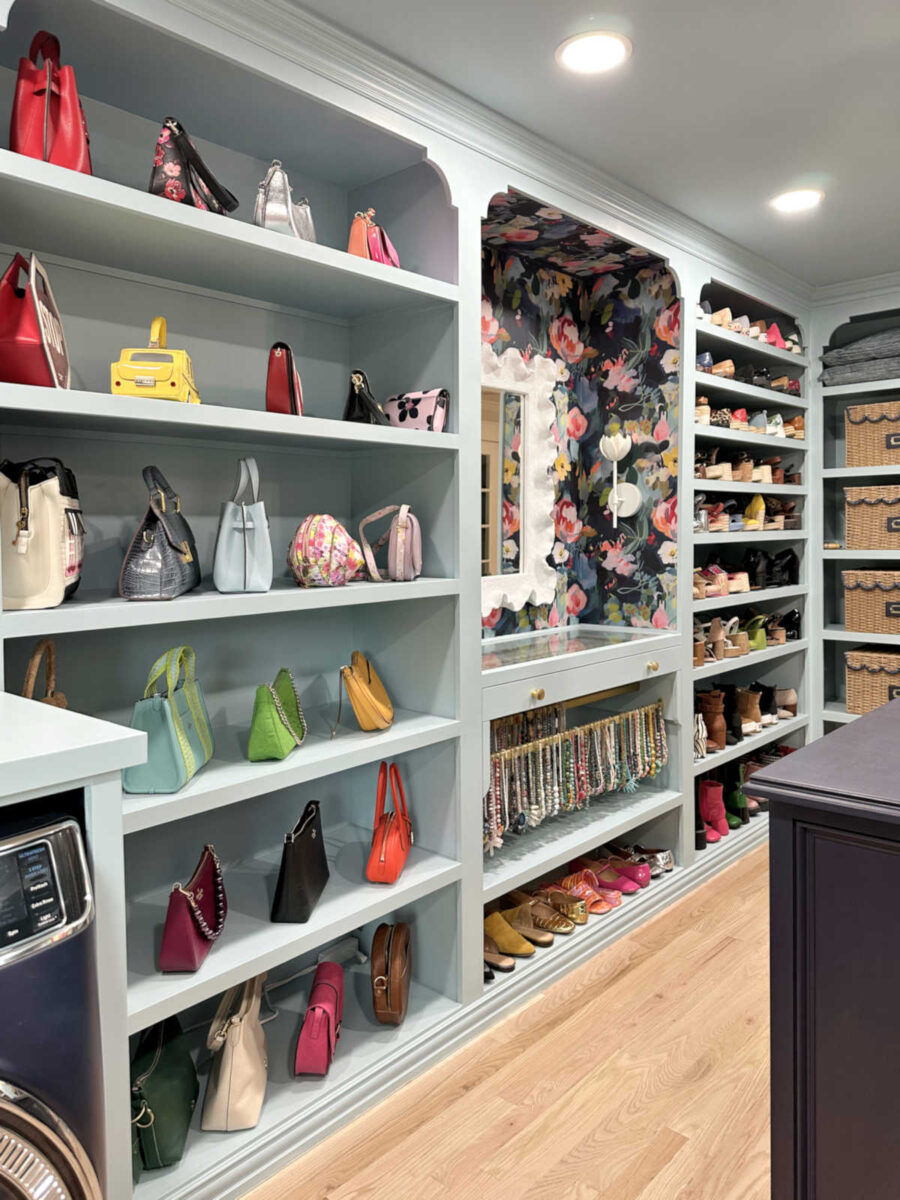
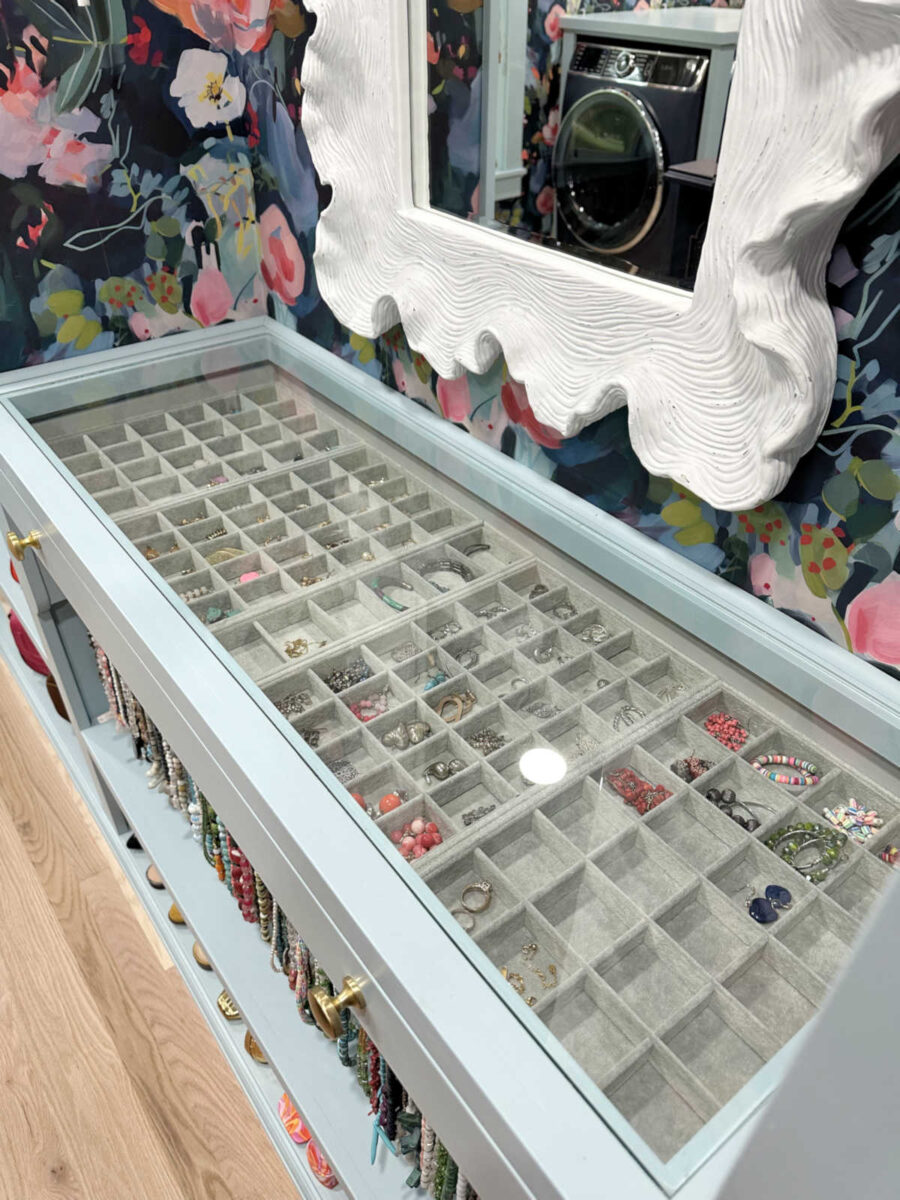
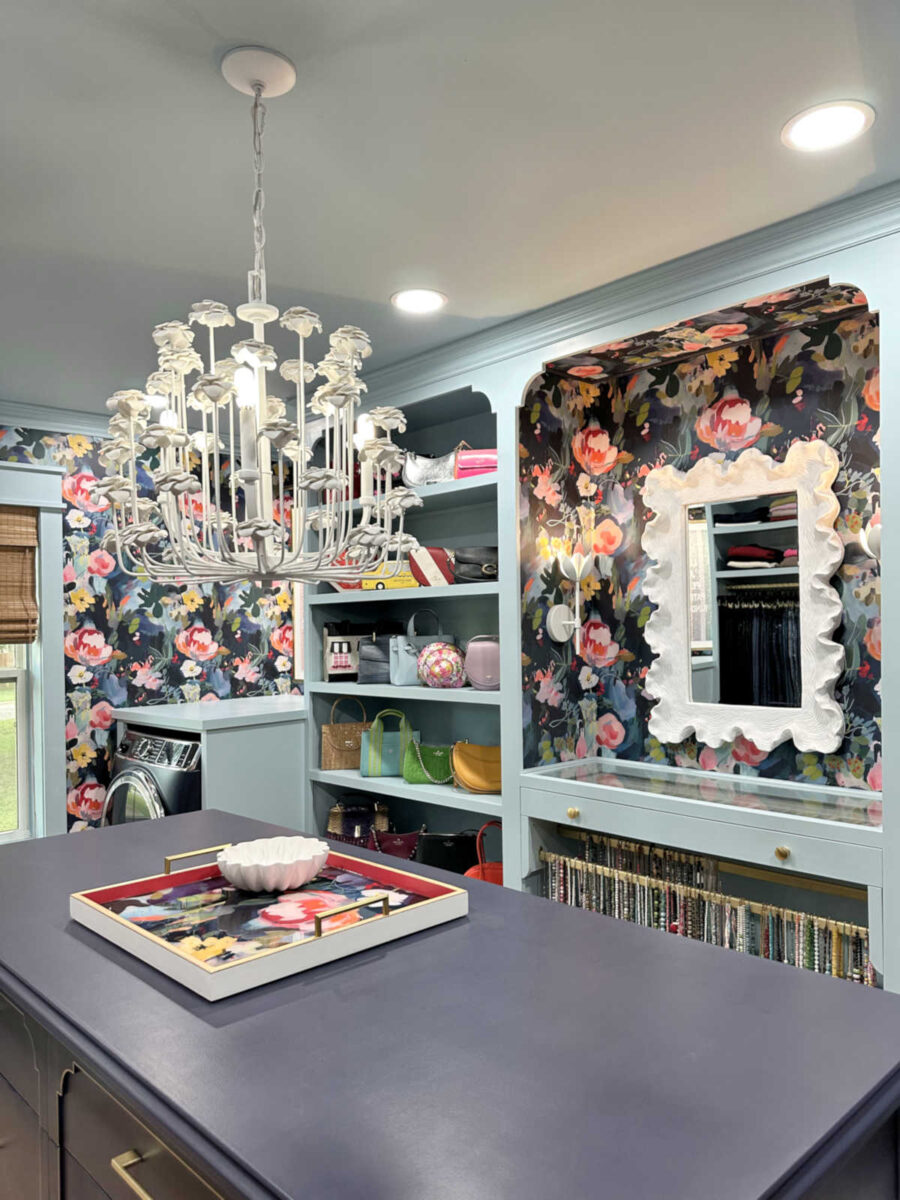
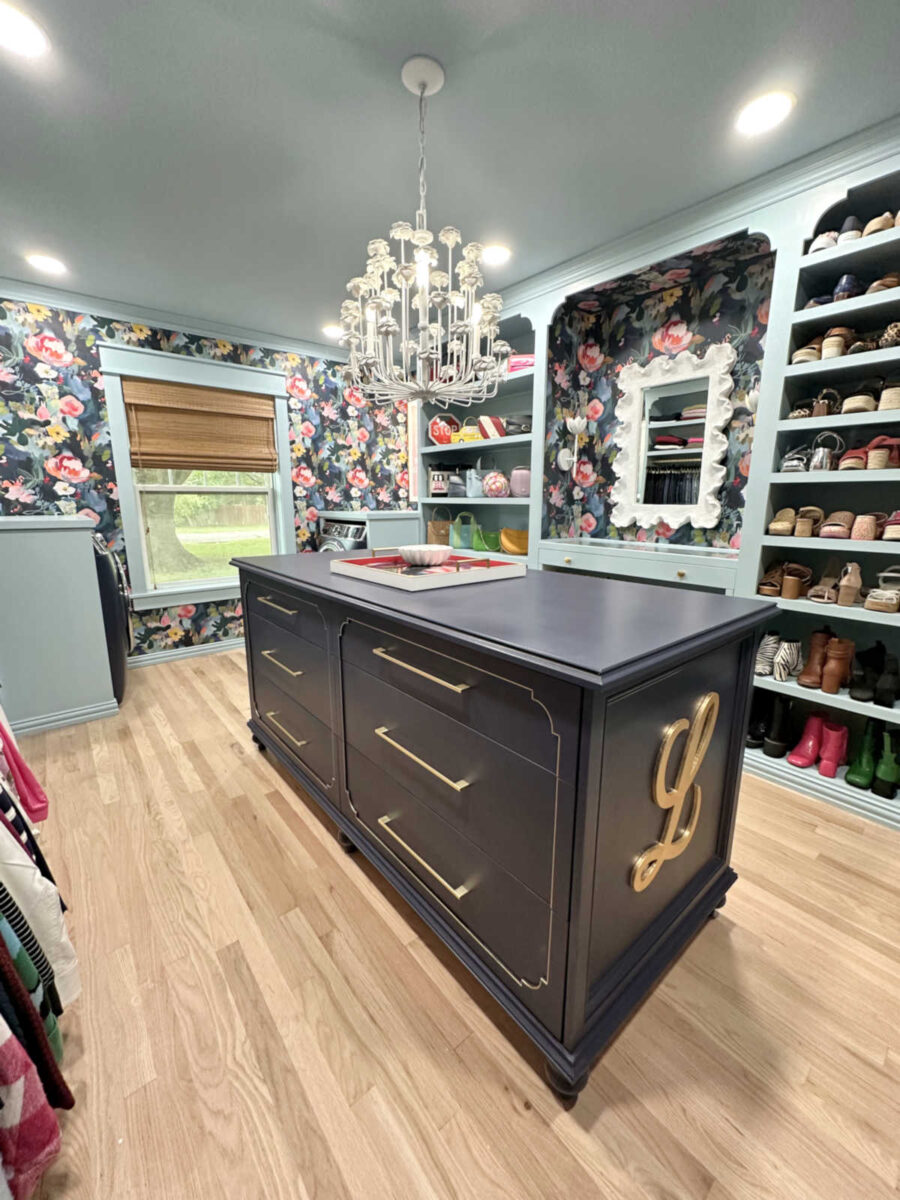
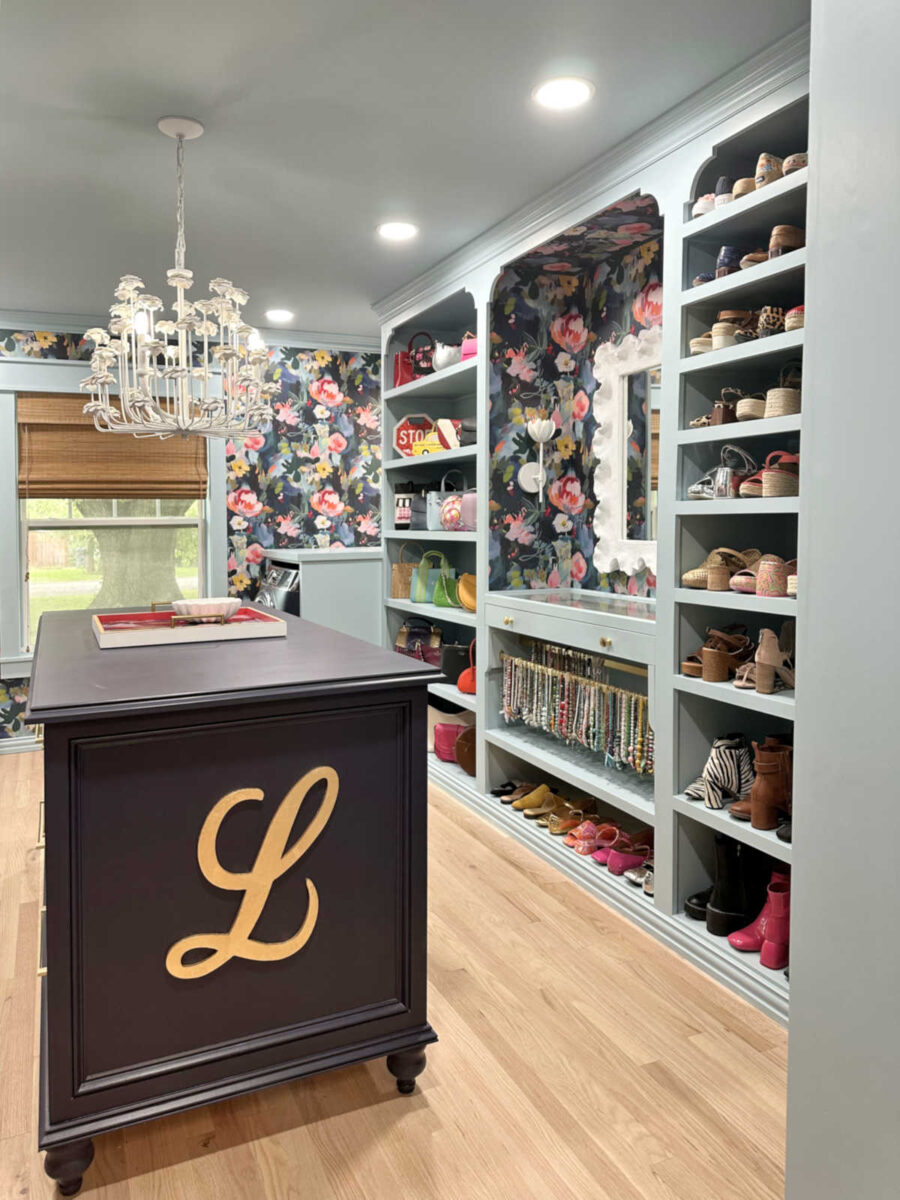
Okay, now we’ve reached the pictures of my favorite part of the room. I’m just so stinkin’ proud of how this area turned out. The glass-top jewelry drawer. The pull-out necklace bars. I really love this whole area. The wallpaper. The mirror. The sconces. It’s my favorite section of the whole closet.

And I just have to brag on myself for a little bit. As y’all know, I’m not the neatest and mot organized person in the world, to say the least. 🤣 And I’ve always had a bad habit of taking off necklaces and earrings and leaving them in random places, like my desk, or in the kitchen, or by the bed. But I have been doing a really good job at keeping my jewelry organized instead of leaving earrings and necklaces strewn all over the house. So having an organization system in place really does help keep me in line.
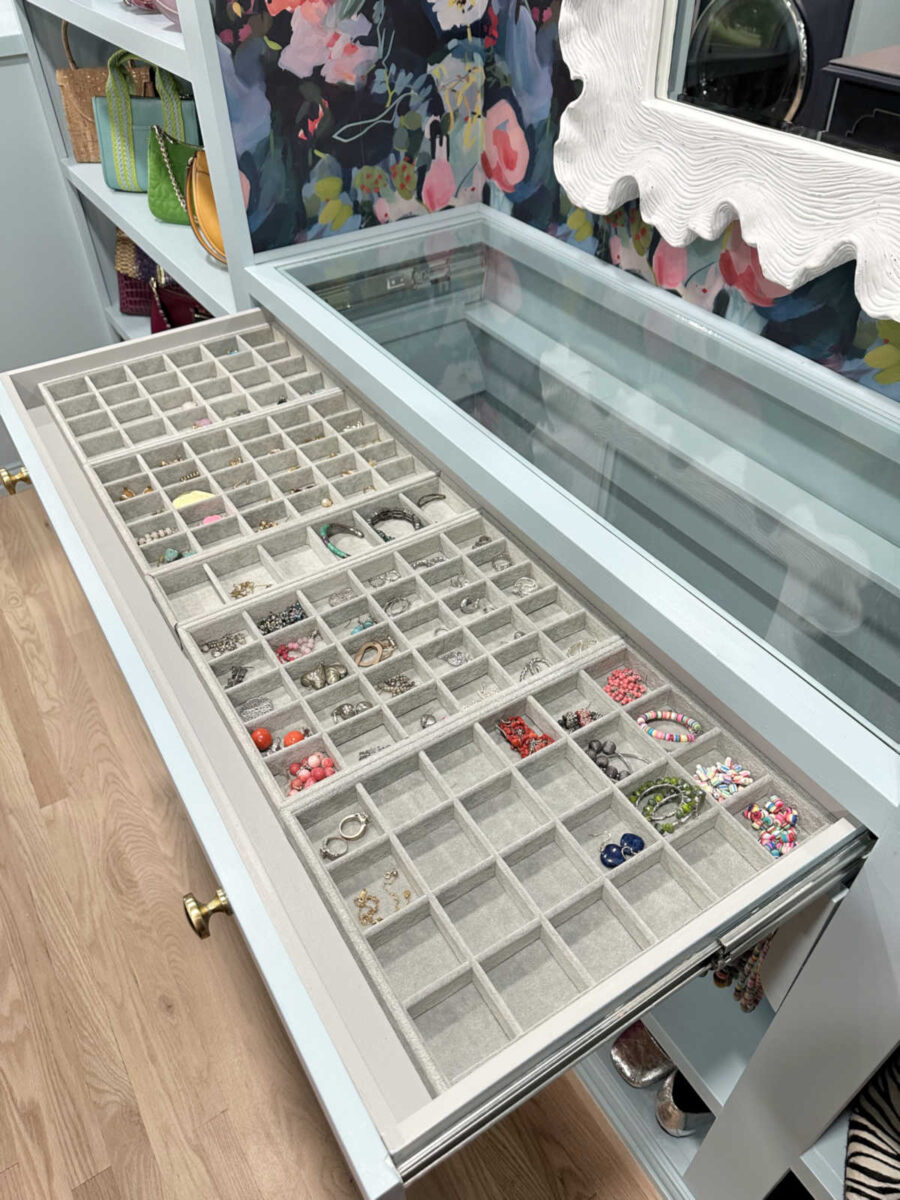
And I know it’s a little detail, but I just love this glass top.
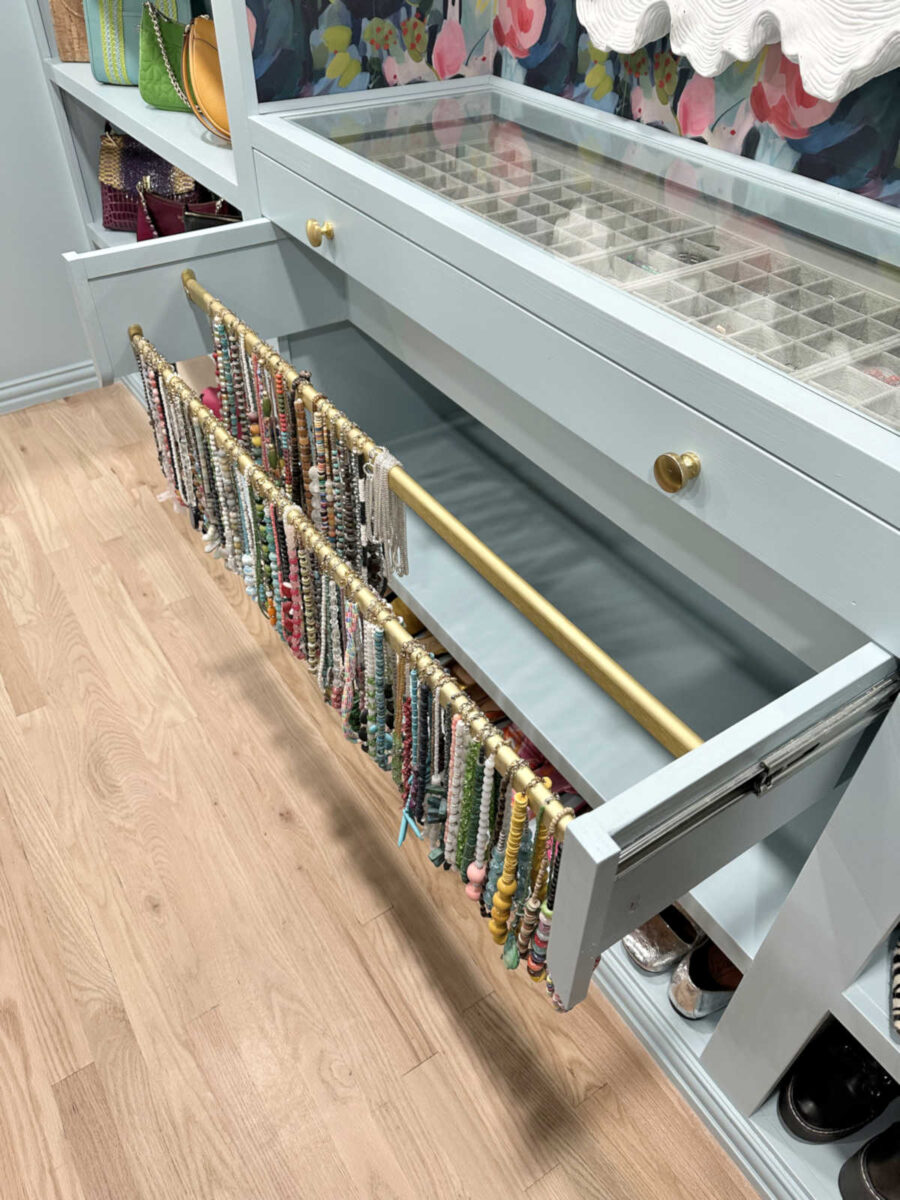
And then there’s the necklace bars. I have so many necklaces that are in progress but I never finished because I had run out of room on my previous necklace storage bar that I kept in the bathroom. But now, I have plenty of room for lots more necklaces, so I can get those “in progress” necklaces finished up. And this storage system has been so handy.
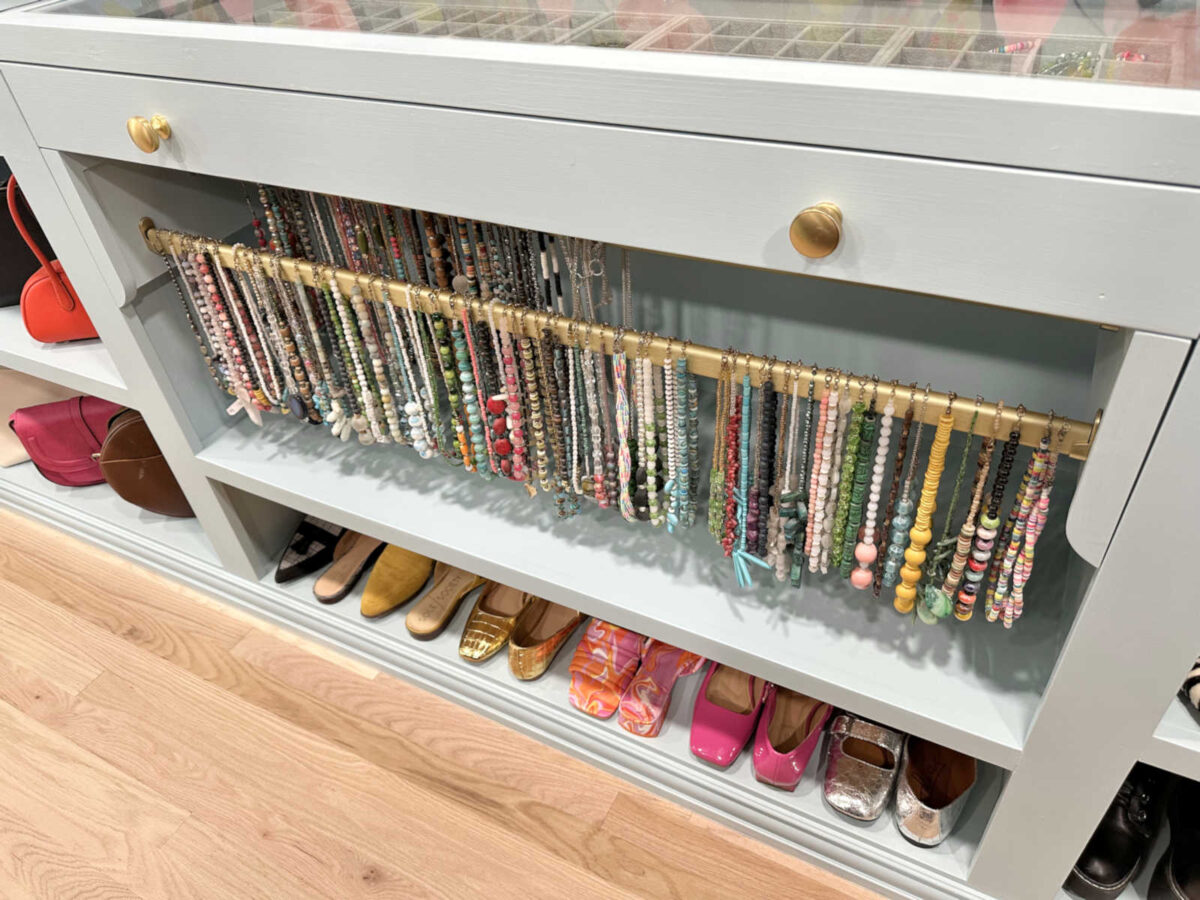
Since I make all of my necklaces myself, I make them the same length, and I put clasps on all of them. If I need a necklace to be longer for a specific outfit, I just use a necklace extender. I have several lengths, and I keep those in the drawer. So using these bars to store the necklaces is very convenient. I have to unclasp them to take them off, so then I just clasp them around the bar for storage. The whole section pulls out like a drawer so that the necklaces on the back bar are easily accessible.
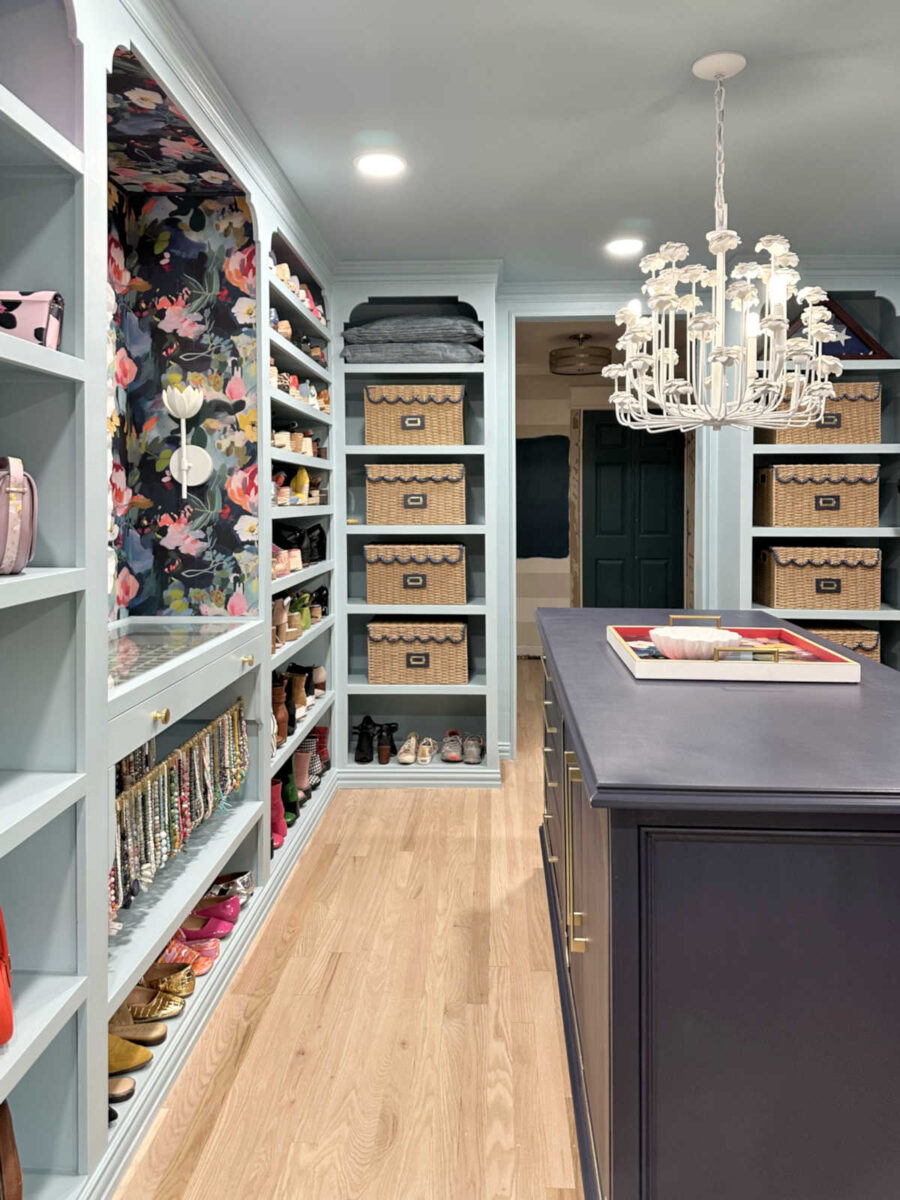
And, of course, another thing I’m so proud of in this room is the chandelier. I still wish that each of you could see it in person because photos just don’t seem to do it justice. In photos, everything is two-dimensional, so the chandelier kind of blends into the wallpaper and other background items.
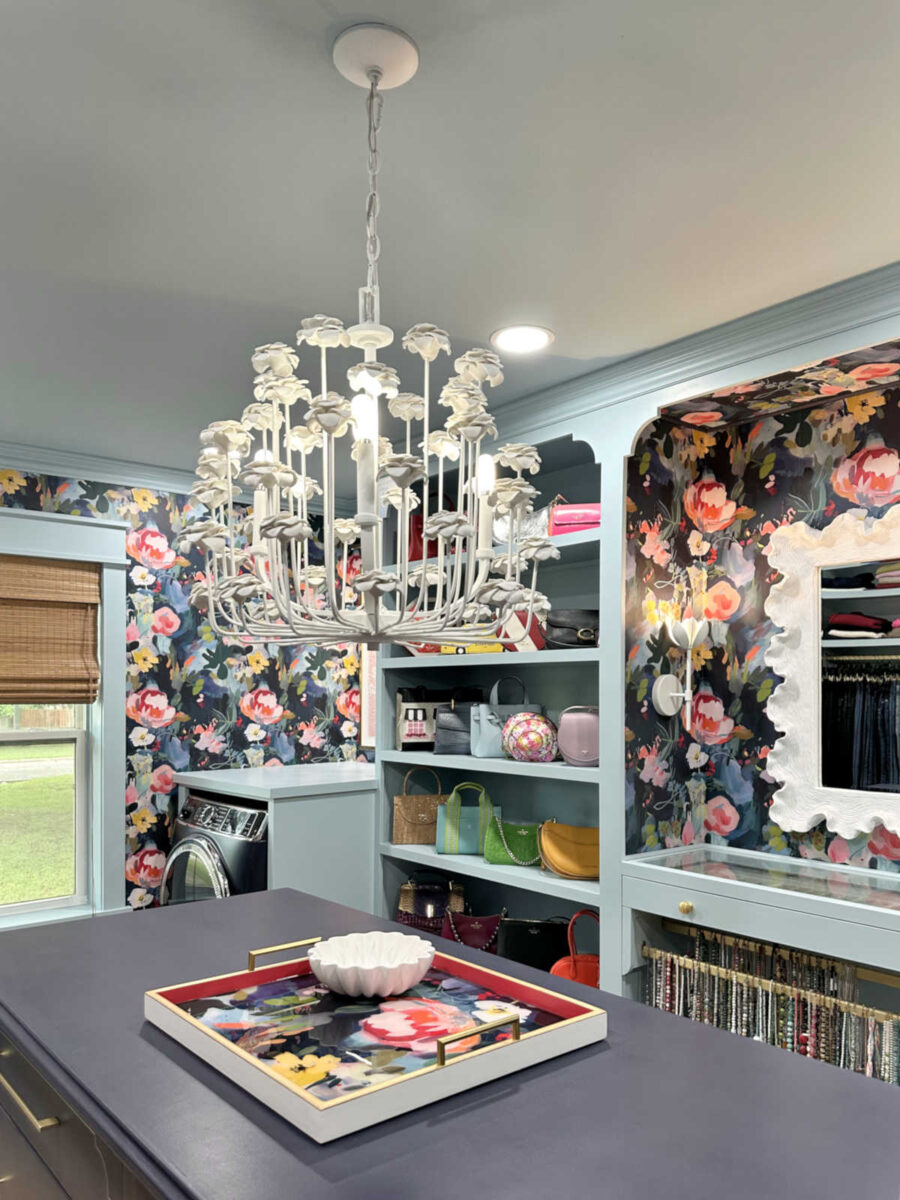
When you see it in person, you don’t have that issue. That third dimension gives it a whole different look and it doesn’t blend into the background at all. But we’ll just have to stick with photos.

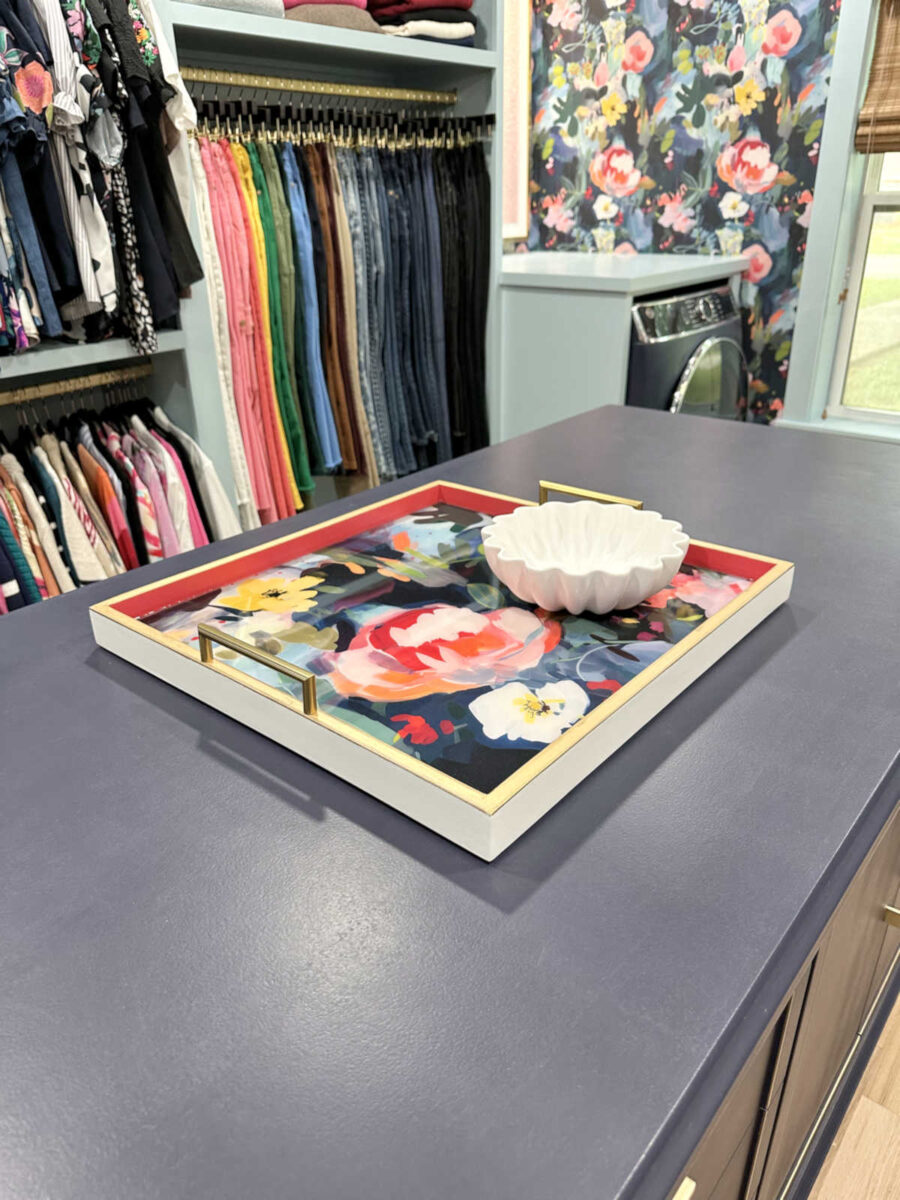
I haven’t figured out exactly how I want to use my tray yet. I’m not really a perfume kind of person. I only have one, and I don’t use it very often. And I don’t want to spray it in the closet anyway because I don’t want that scent getting on everything in my closet. So I keep it in the bathroom.
But I do have a purse bowl. Do you have a purse bowl? I’ve been using this system for about a year now and I love it. I only have a few items that I take with me in a purse — keys, phone, a little zipper pouch with stevia (because I drink iced tea everywhere I go), lip gloss, lip stick, a pen, etc. So I keep those items in the bowl, and then when I’m ready to go somewhere, I grab the purse I want to take, put the items from the purse bowl in the purse, and I’m ready to go. And when I get home, if I’m not planning on going anywhere else that day, I put the items back in the bowl, put the purse away, and they’re ready for next time.
Well, that’s it, y’all. I can hardly believe that this project has actually come to a close.

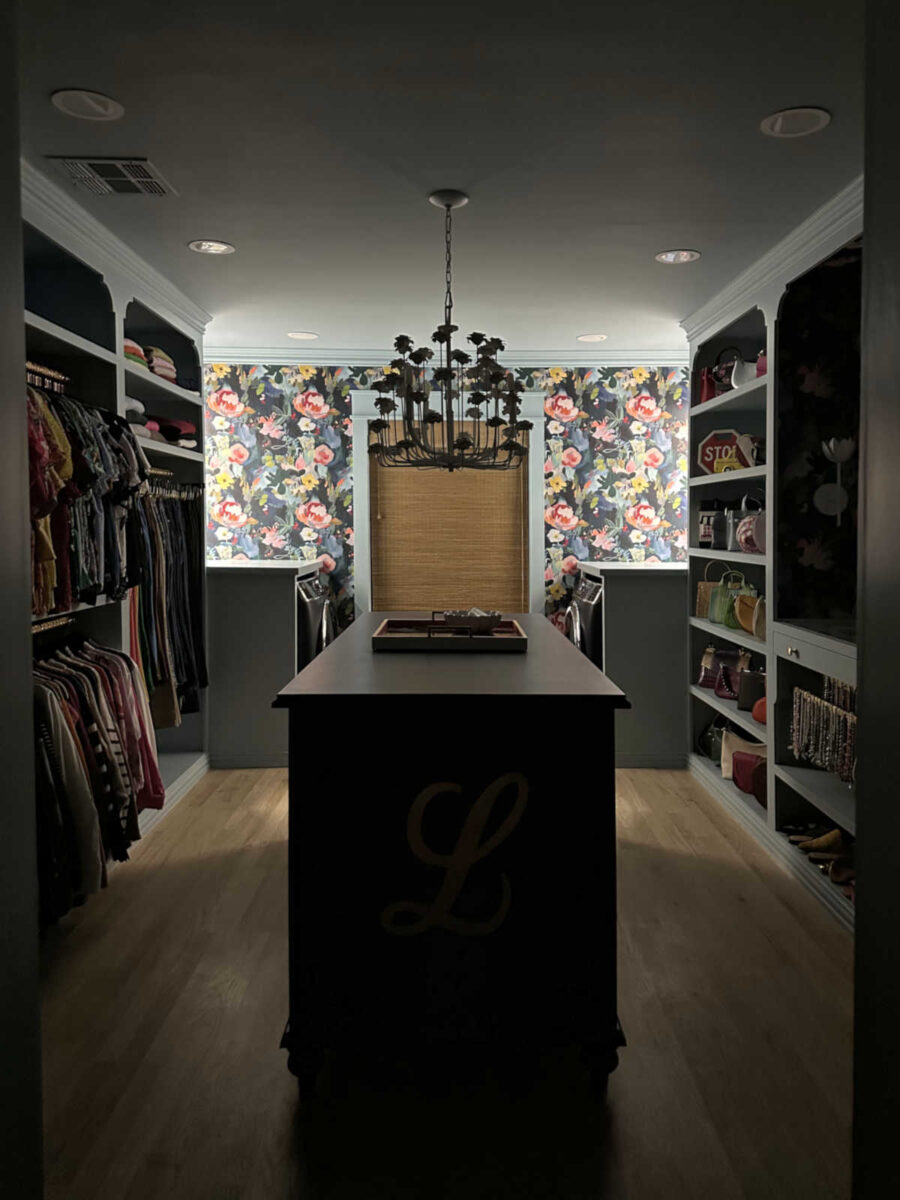
And I can’t close out this tour of my finished closet without giving you a nighttime view. I don’t like bright overhead lights turned on once the sun goes down. So I wanted those picture lights to stay on all the time to give a nightlight effect. And it’s also just enough light if I need to put something in to wash after dark. But mostly, I just wanted them for the nightlight effect. I just love walking by here at night and seeing that soft glow of light at the far end of the room.
And that’s it, folks. Thank you so much for sticking with me through this long, and sometimes very boring, project!! And now we’re on to the foyer and bedroom. These should be fun, and I’m hoping they’ll be much faster since the floors are finished throughout the bedroom suite, and there will be far less building required for those other areas. But we’ll see!
More About My Walk-In Closet/Laundry Room

see all walk-in
closet diy projects

read all walk-in
closet blog posts

Addicted 2 Decorating is where I share my DIY and decorating journey as I remodel and decorate the 1948 fixer upper that my husband, Matt, and I bought in 2013. Matt has M.S. and is unable to do physical work, so I do the majority of the work on the house by myself. You can learn more about me here.


