

Well, y’all, my chandelier isn’t finished, but not for lack of trying. To say that the weather isn’t cooperating would be an understatement. This has been a very strange July with loads of rain and ridiculous humidity, so nothing is drying like it should. My clay flowers are taking forever to dry. The spray paint that I used to paint the chandelier and the flower “stem” frame is taking forever to dry. The whole thing has been so frustrating, but there’s not a whole lot I can do about it. It’ll get done when it gets done. So while I’m waiting for things to dry, I decided to make a very easy DIY decorative tray to go on my closet island using wood scraps and other items I already had on hand. The only items I had to purchase for this tray were the handles.
Decorative trays are such an easy and fun project, so if you’re a beginning and looking for something to build, or you’re wanting to try your hand at crafty things like gold leaf or resin, a tray is a perfect way to start.
I used scrap wood that I already had on hand, and I cut a piece of 1/2-inch plywood to about 17″ x 19″ for the bottom of my tray. Then I cut some 1/2-inch wood, ripped to 1.5 inches wide, for the sides, cut to length on my miter saw. I nailed those in place using 1-inch 18-gauge nails.
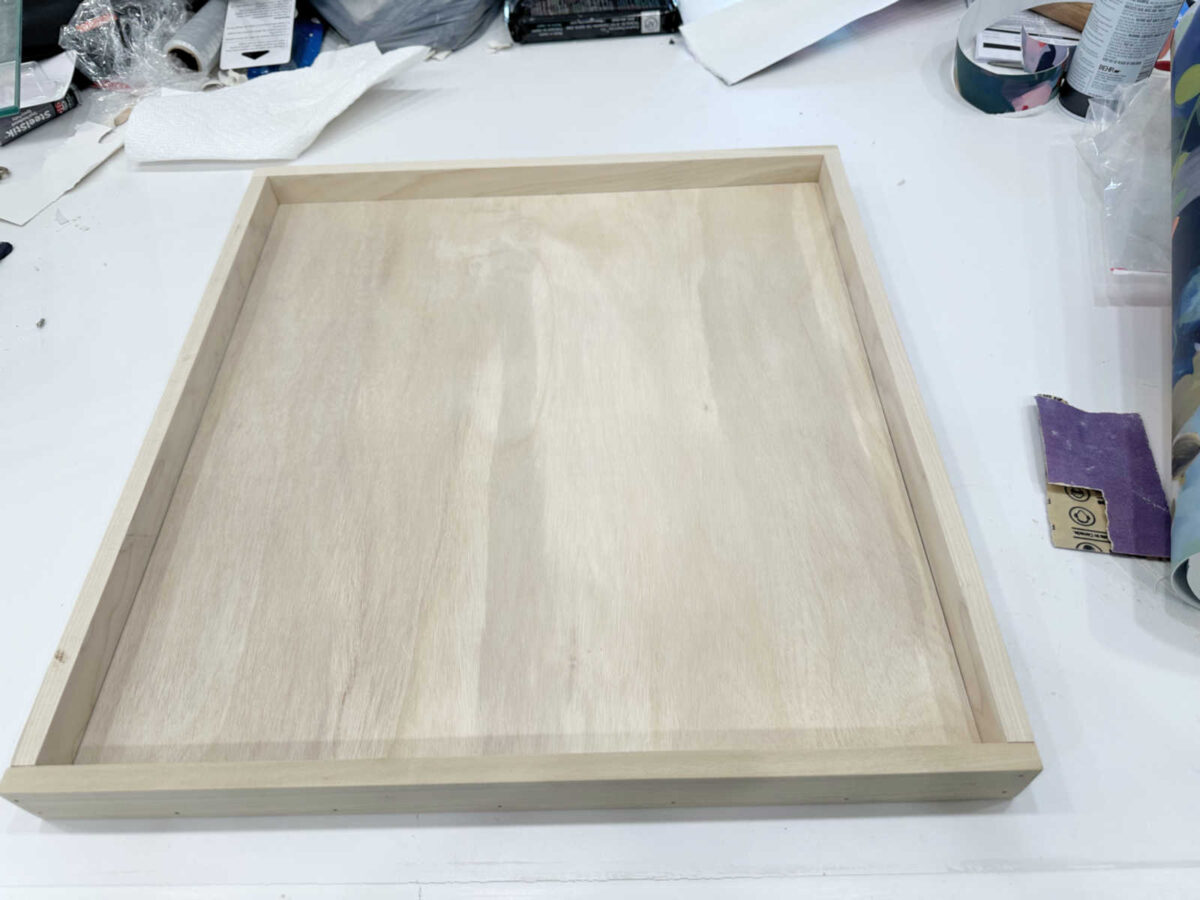
I didn’t even miter the corners because they hold together stronger when they’re not mitered. At least, that has been my experience.

And as you can see, the corners weren’t perfect when I nailed the side pieces on. But I wasn’t worried about that because those corners would be cleaned up in the next steps.
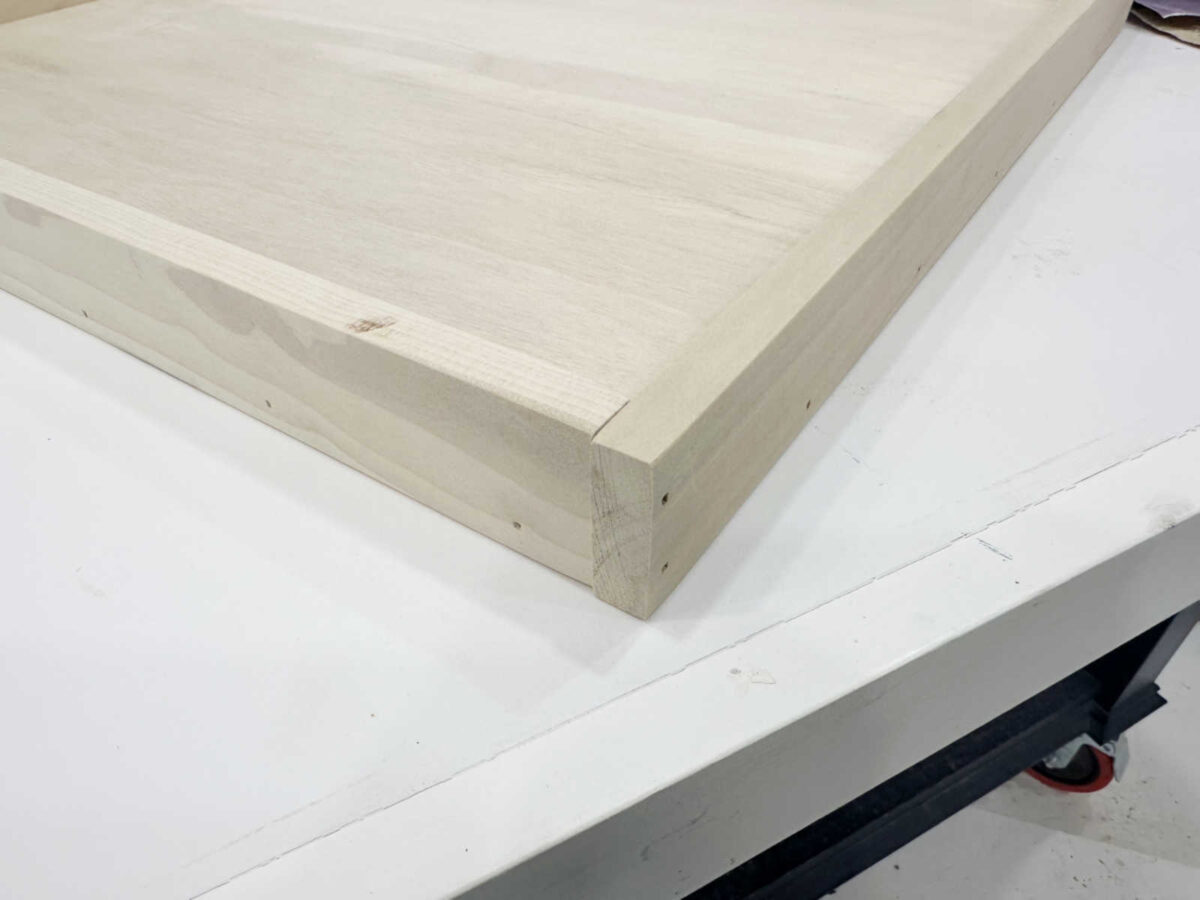
So here’s what it looked like once all of the side pieces were nailed to the bottom piece and to each other on the corners. Then I used wood filler to fill in the nail holes and corner joints.
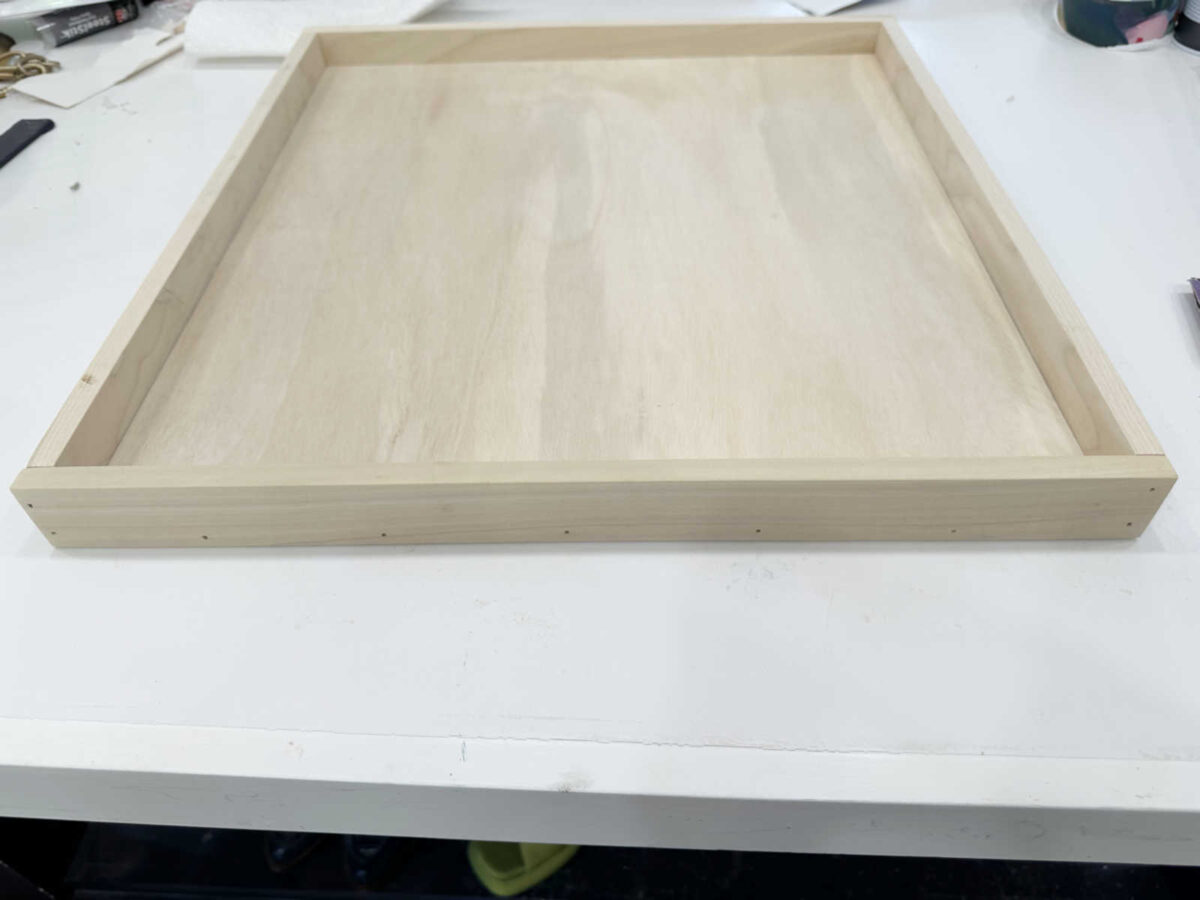
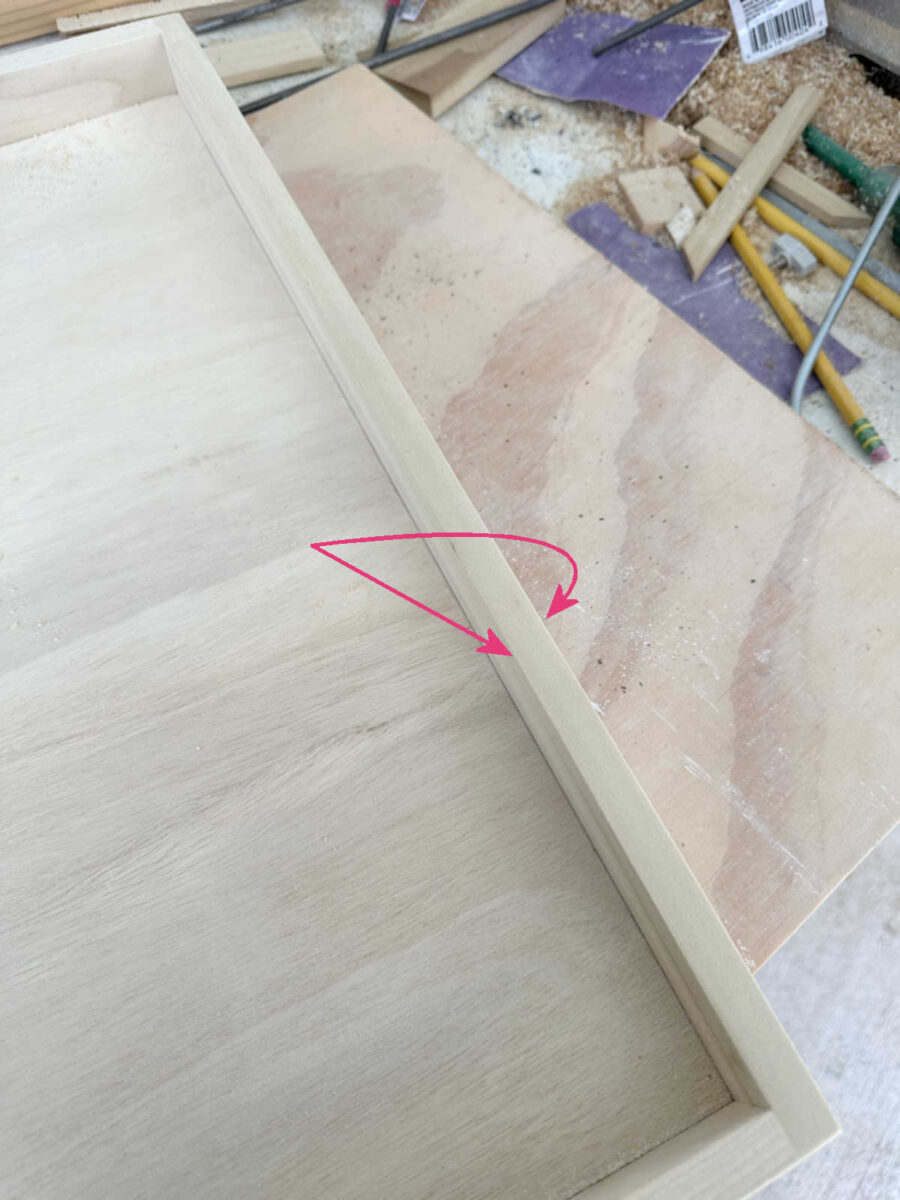
Once the wood filler was dry, I used my rotary sander with a 150-grit sanding disc to sand the sides and the corners. As you can see, the sanding process really cleaned up those corners and made them look really nice. I also sanded the top edges of the side pieces so that they were smooth and flush with each other around the top.
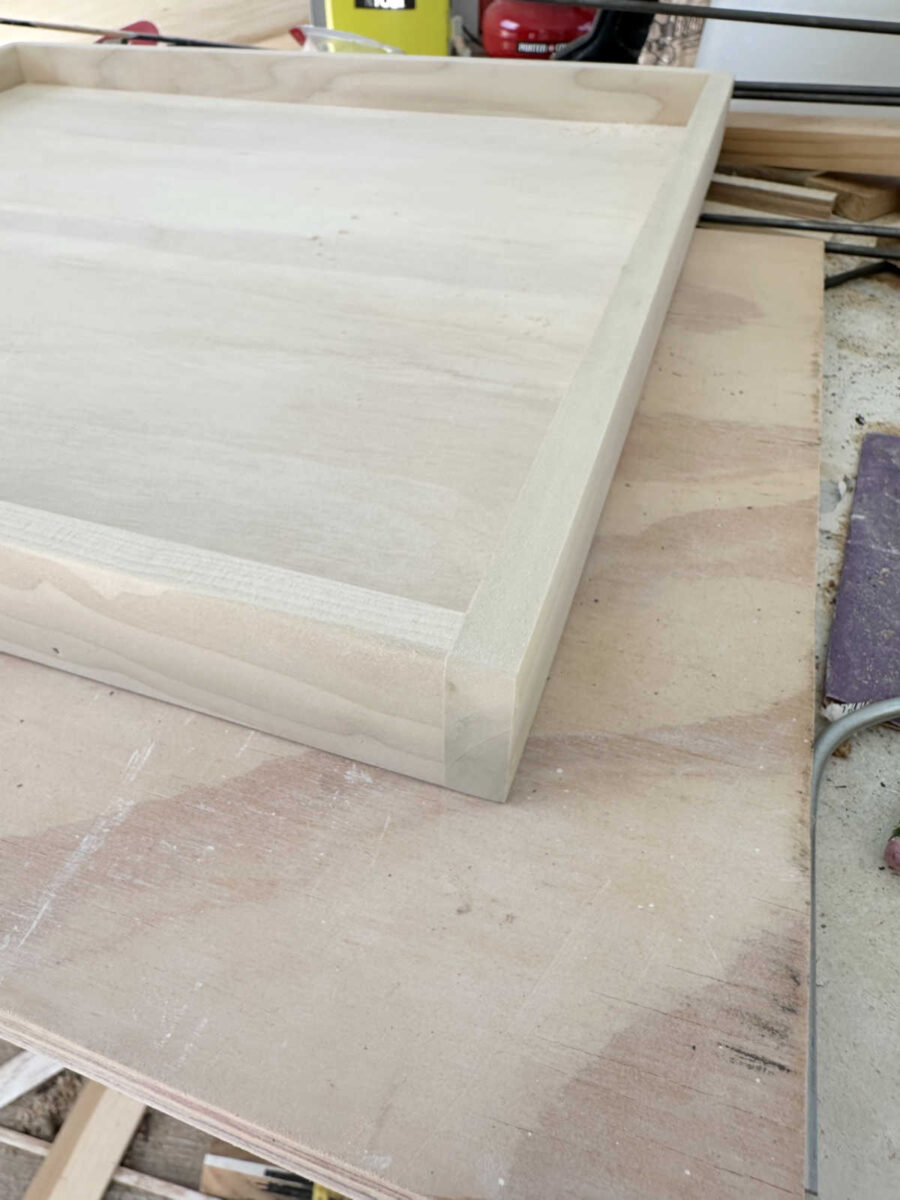
And then, as is my habit, I used 150-grit sandpaper and sanded these corners on each side piece by hand to give the harsh corners a bit of a softer look.
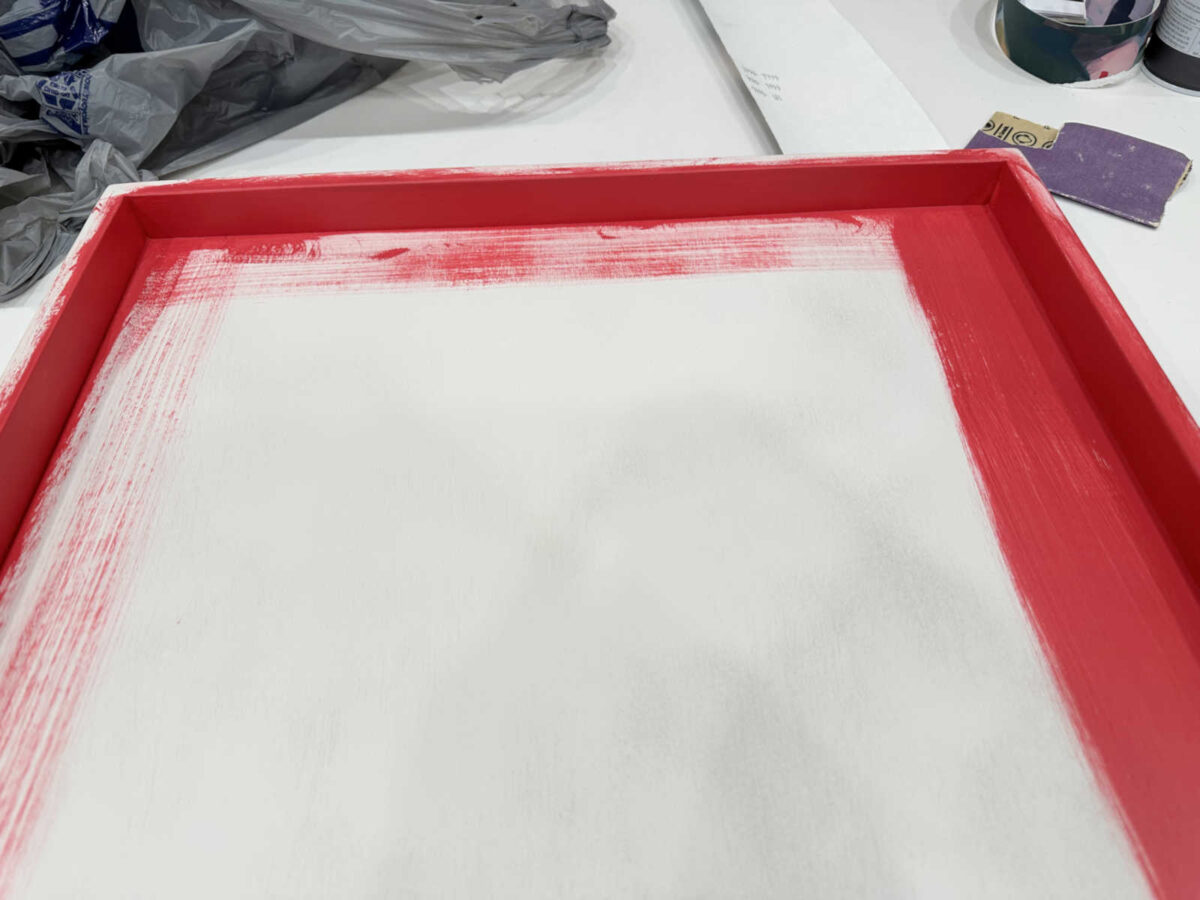
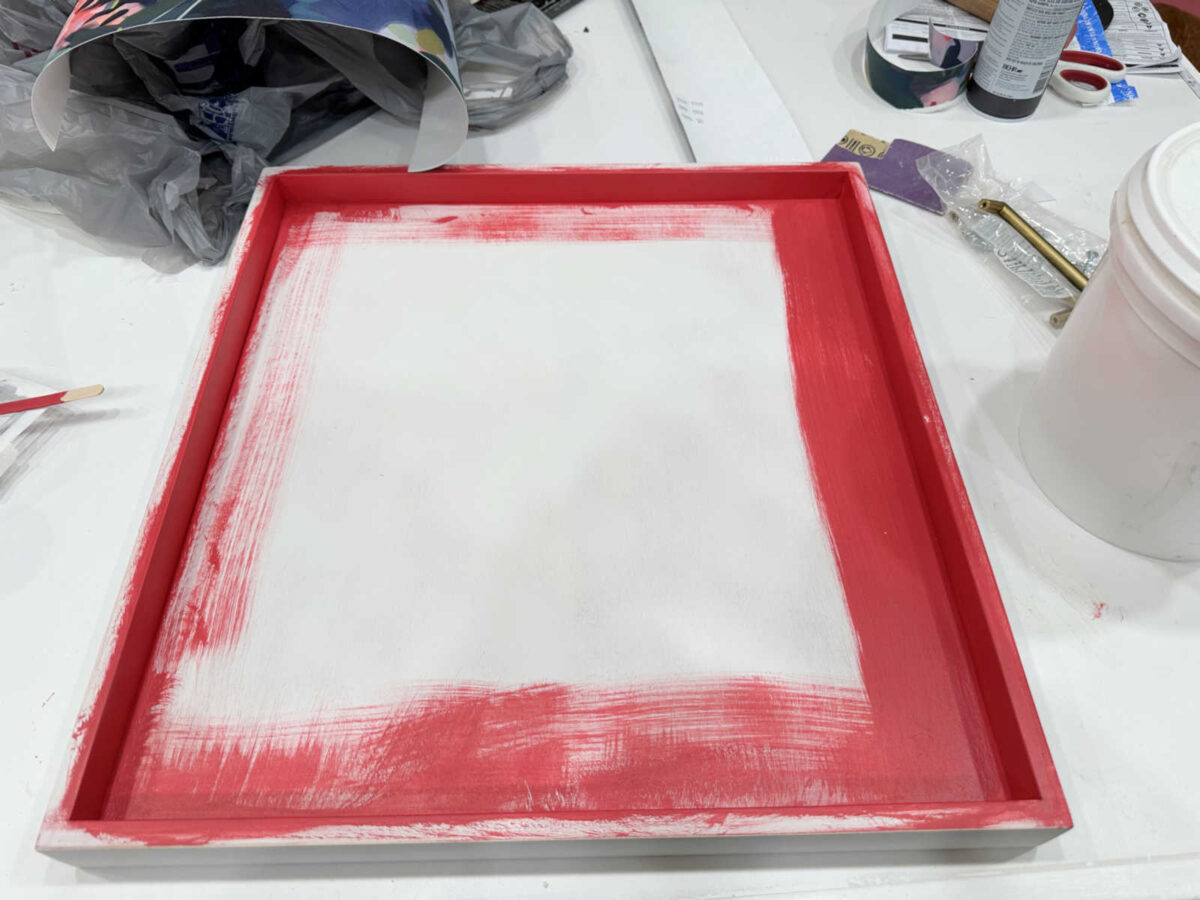
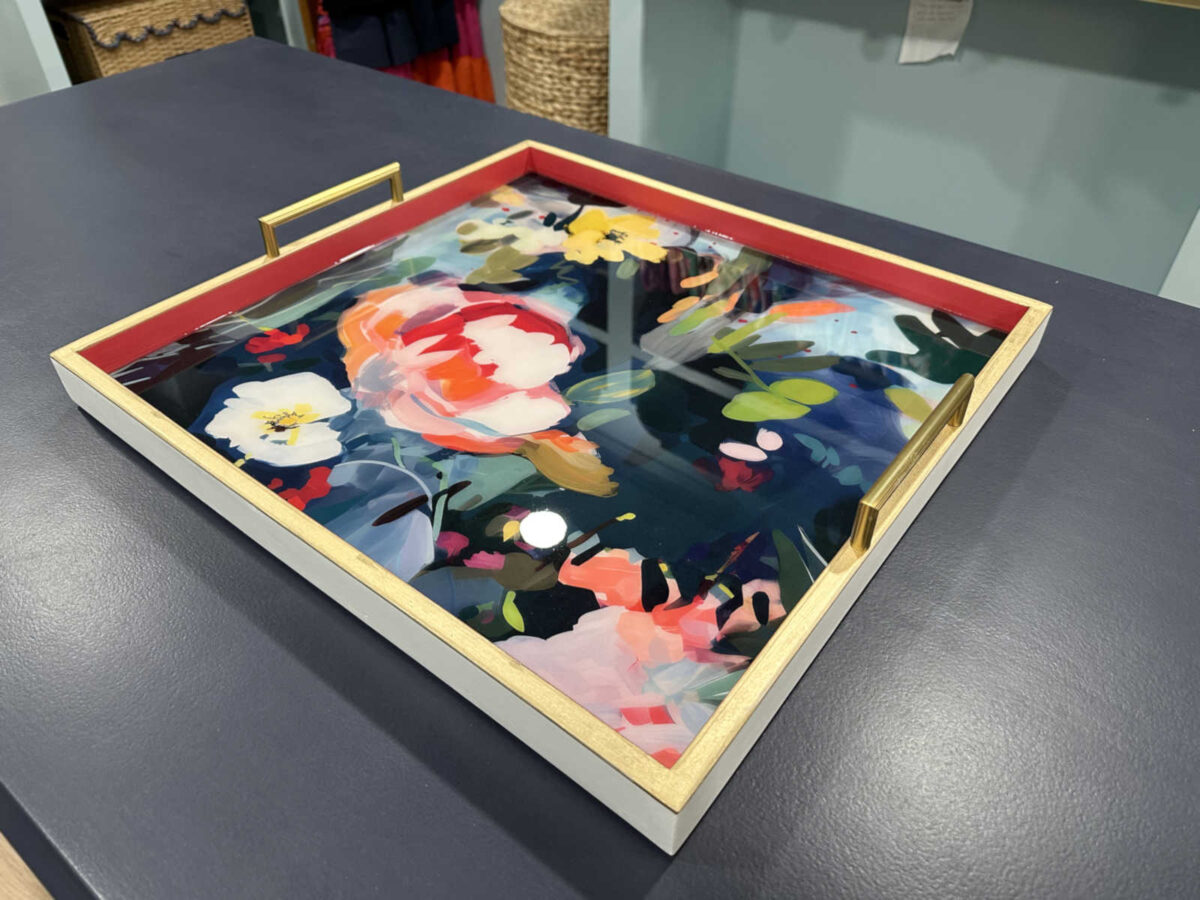
After spray priming the whole thing with my favorite primer — Zinsser B-I-N shellac-based primer, and then sanding the whole thing smooth with 220-grit sandpaper, I was ready to paint. I used a dark pinkish red on the inside of the side pieces to bring some color to the island.
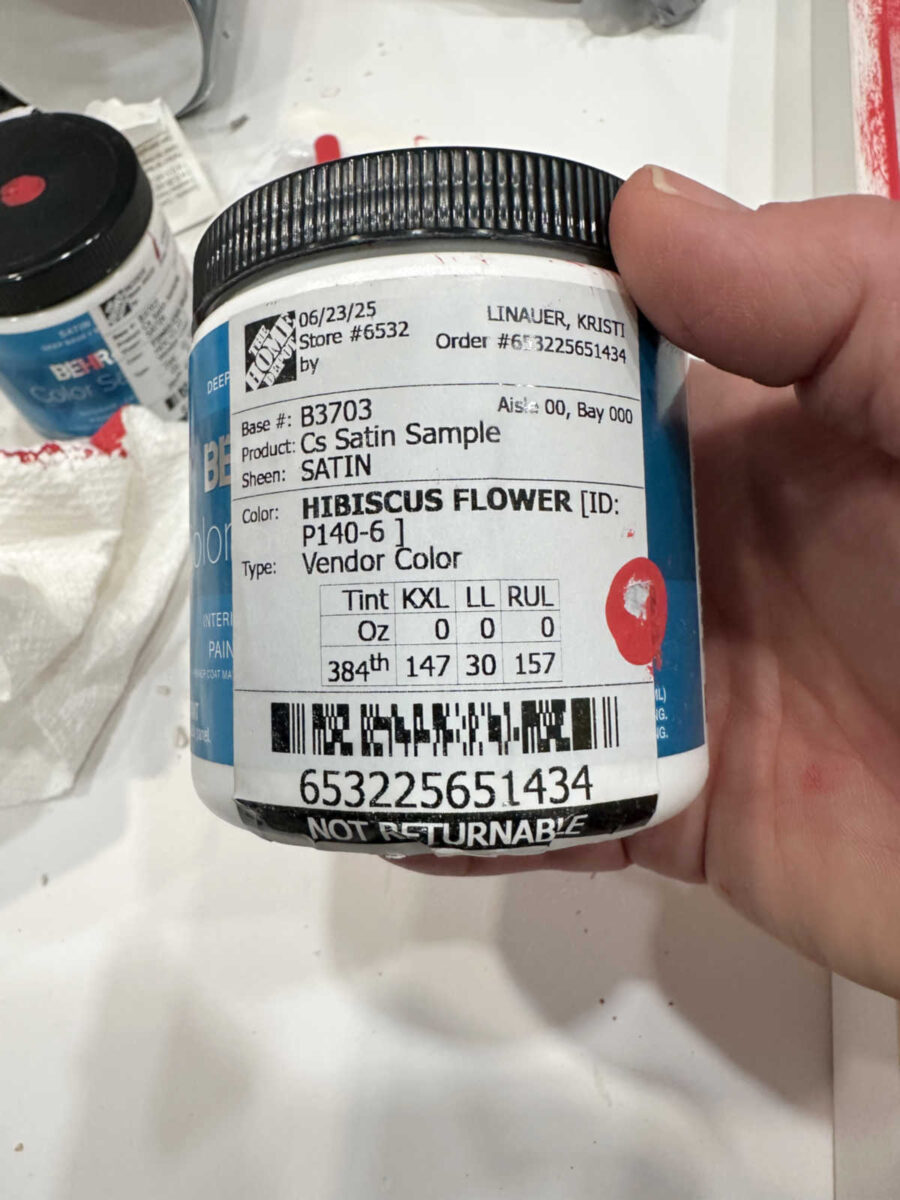
I used to colors for this. The main color is Behr Hibiscus Flower.
But it was a bit too bright on its own, so I added just a little bit (maybe two or three tablespoons) of Timeless Ruby to darken it just a bit.
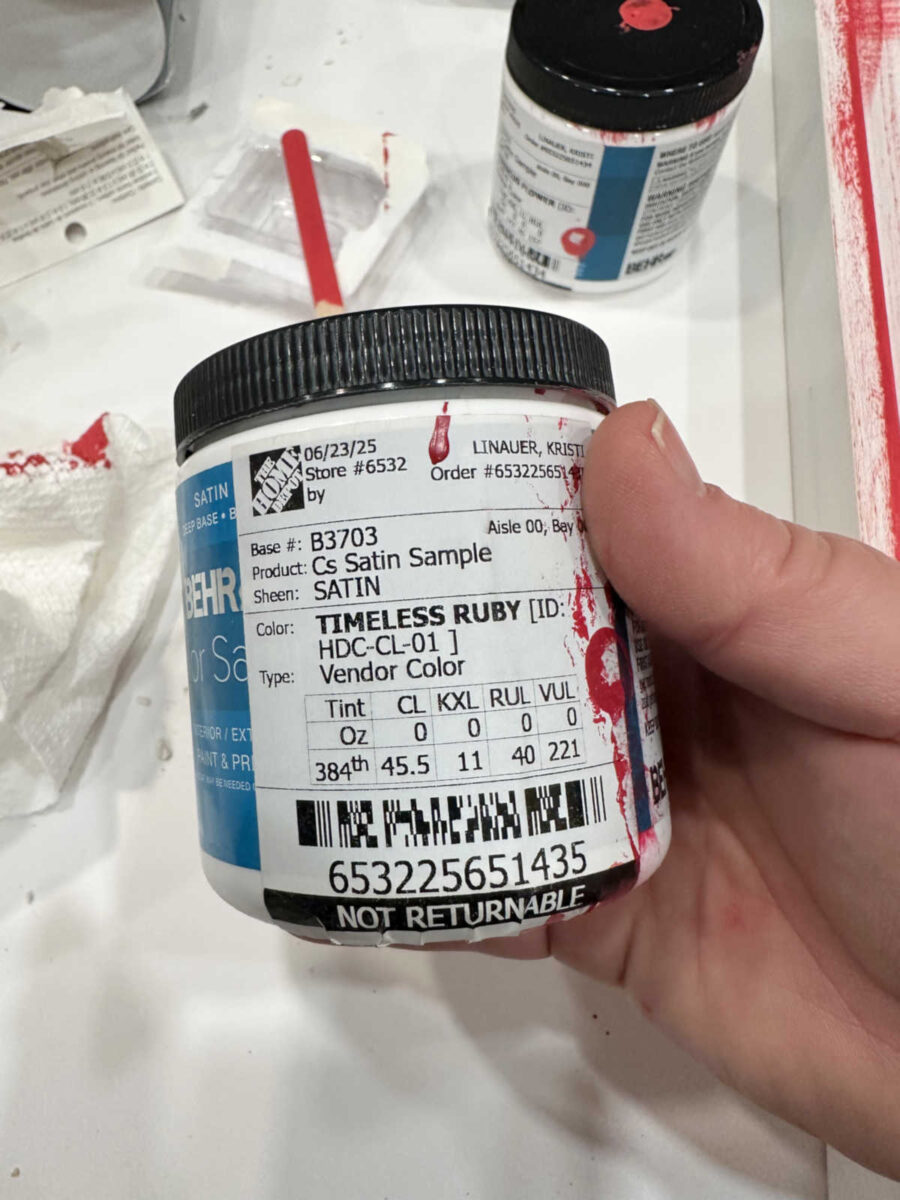
That made the perfect pinkish red color to go with the wallpaper. And then I painted the outside white because I love the white against the dark blue of the island. I used my go-to white — Behr Polar Bear — for the outside of the tray.
Once I had two coats of each color on and let it dry, I then added my wallpaper to the bottom of the tray. I adhered this with wallpaper paste that I had leftover. As that was drying, I went ahead and drilled my holes for the two handles.
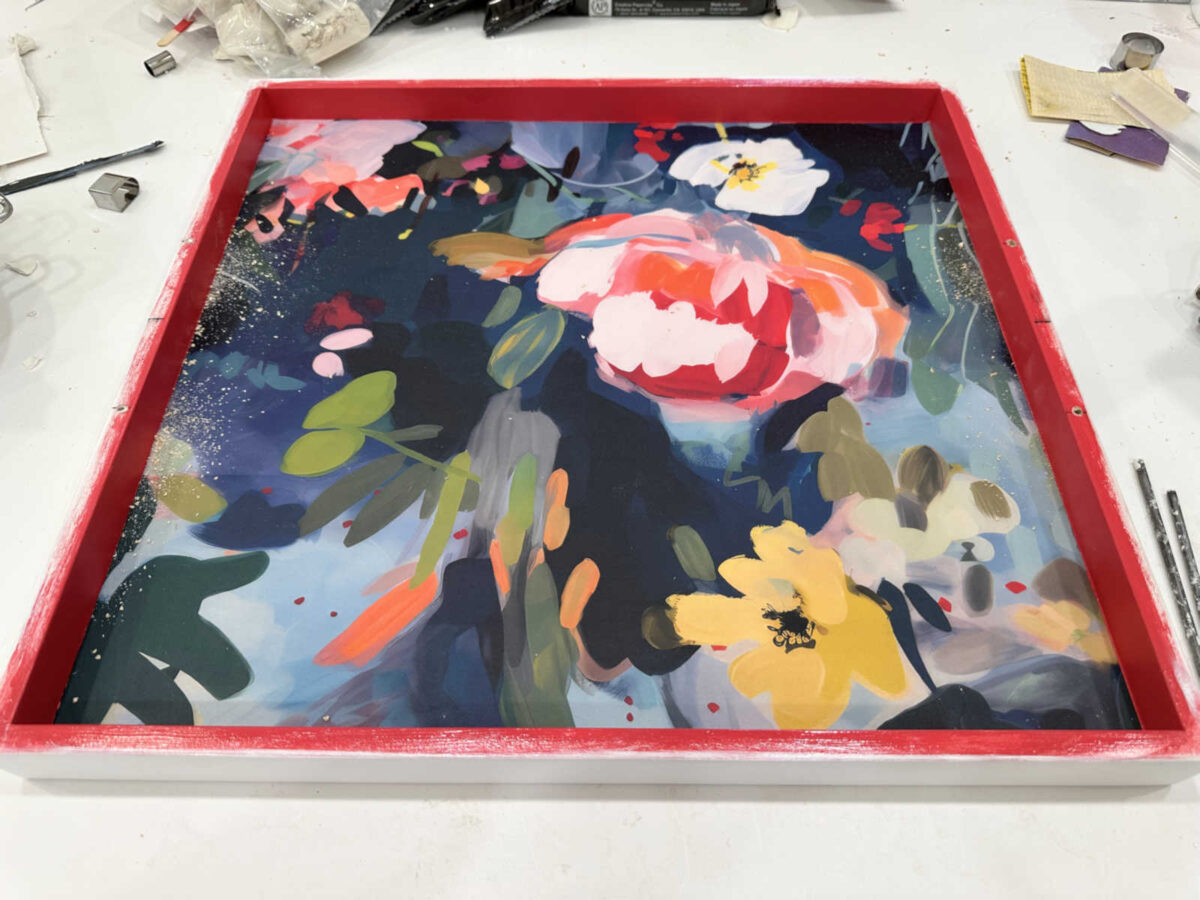
And then I added gold leaf to the top edges of the side pieces. I used a metal leaf glue that I had never used before, and I really liked it!
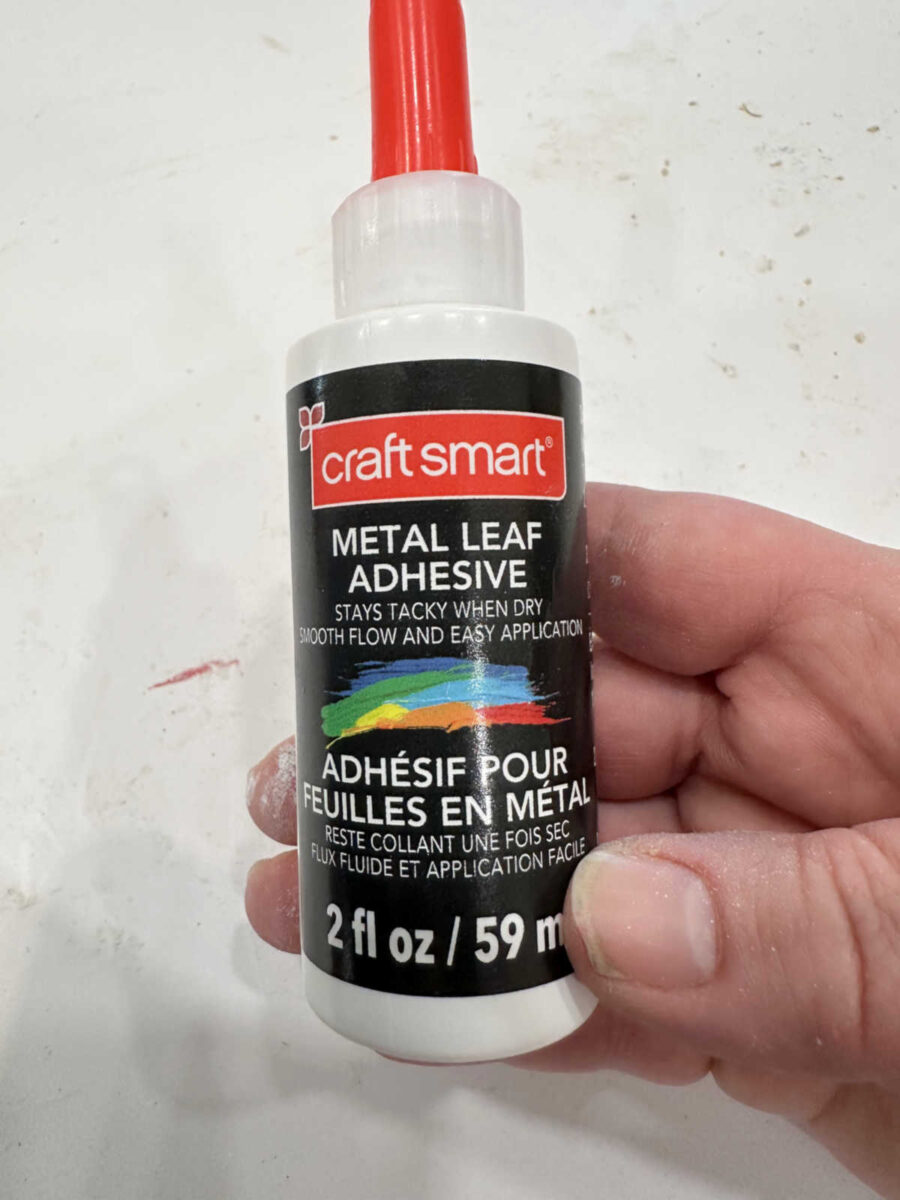
It goes on white and dries clear. Once it’s dry and shiny, you can add the gold leaf.
If forgot to take a picture of the gold leaf process, but y’all have seen me gold leaf things many times in the past. It’s a pretty self-explanatory process. You press the gold leaf onto the adhesive, and then brush away any excess. It’s a pretty messy process once all of those gold leaf bits start flying, but I thoroughly enjoy it. There are metal leaf products that aren’t messy at all. The leaf comes attached to a backing, so you don’t have all of those excess leaf bits flying around. I’ve never tried one of those, but I’d love to!
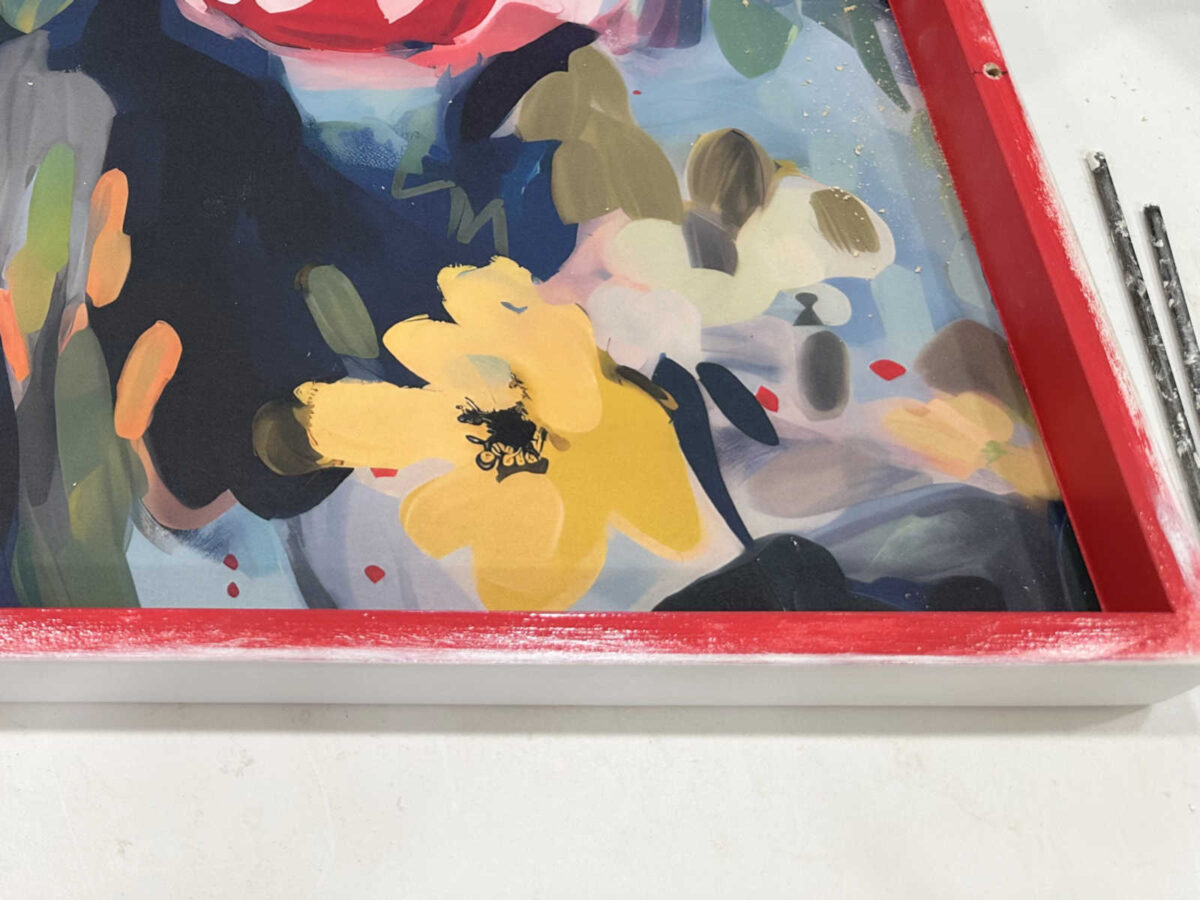
After the gold leaf was on and cleaned up, with all of the excess brushed away, I gave all of the painted and gold leafed areas two coats of General Finishes High Performance Topcoat and let that dry. Then I was ready to finish the wallpapered bottom of the tray with resin. To keep the resin from seeping through the joints where the sides were nailed to the bottom of the tray, I turned the tray over and covered over those joints with metal tape. You can use caulk for this as well, but this seemed faster and easier since I wouldn’t have to wait for caulk to dry.
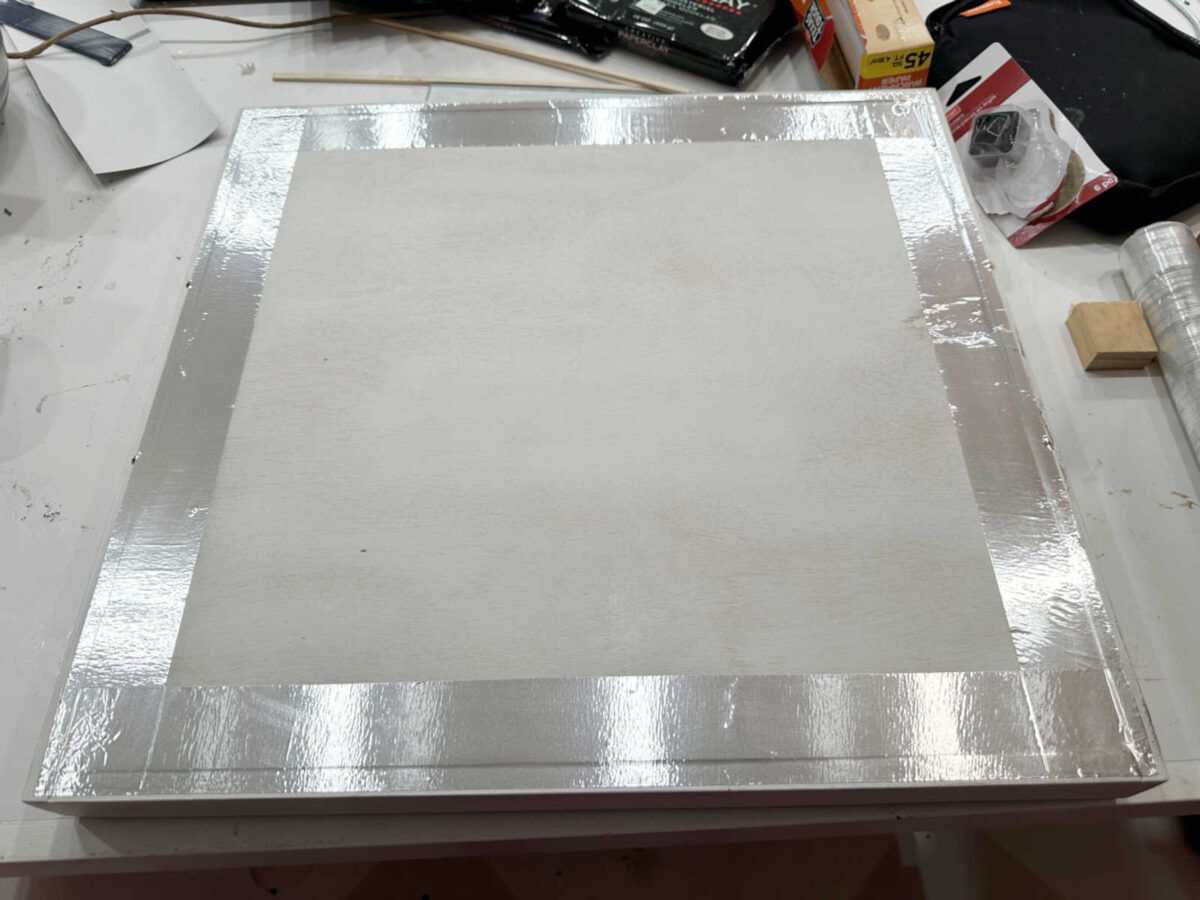
And then I mixed up two cups of my favorite resin — ArtResin. For my 17″ x 19″ tray, I used one cup of resin and one cup of hardener to make two cups of mixed resin.
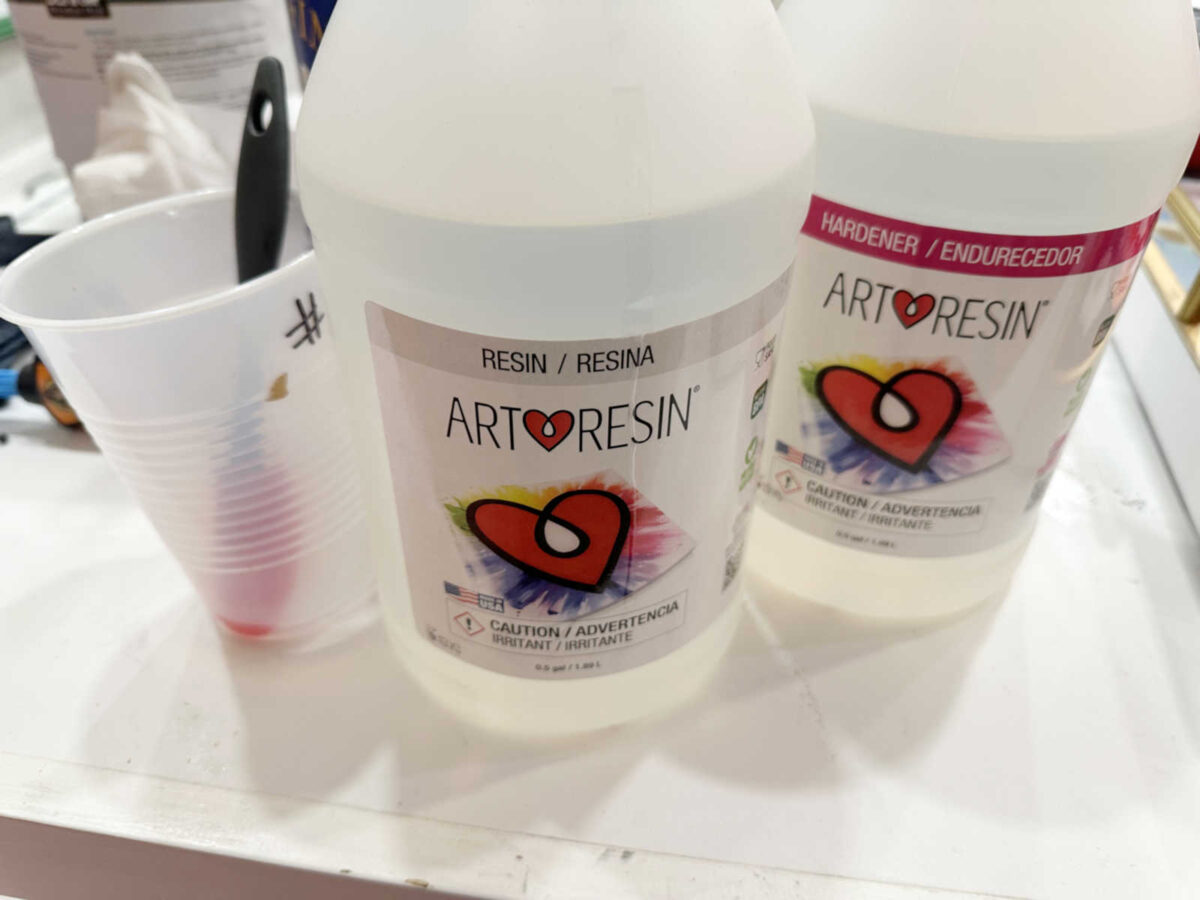
I poured that over the bottom, used a small spatula to smooth it out over the bottom, making sure that it completely covered and met all of the sides and corners, and then used my Bernzomatic propane torch to get rid of all of the bubbles. The key with using a propane torch on something like this is that you want to make very fast movements over the resin. If you move too slowly or hold it in one place too long, you will burn the resin, or worse, catch the wood on fire. So making very short, fast movements over the resin with the flame is key, and you can target any bubbles that you see in the resin. My propane torch is kind of big, but if you’re wanting to try your hand at a resin project, I’d actually recommend one of the little propane torches that are for kitchen use for caramelizing sugar. Those are much easier to control. Also, I generally do the initial torching right after I get the resin spread out, and then I let it sit about 15 minutes and come back and torch it again since a few new air bubbles always seem to appear during those first few minutes.
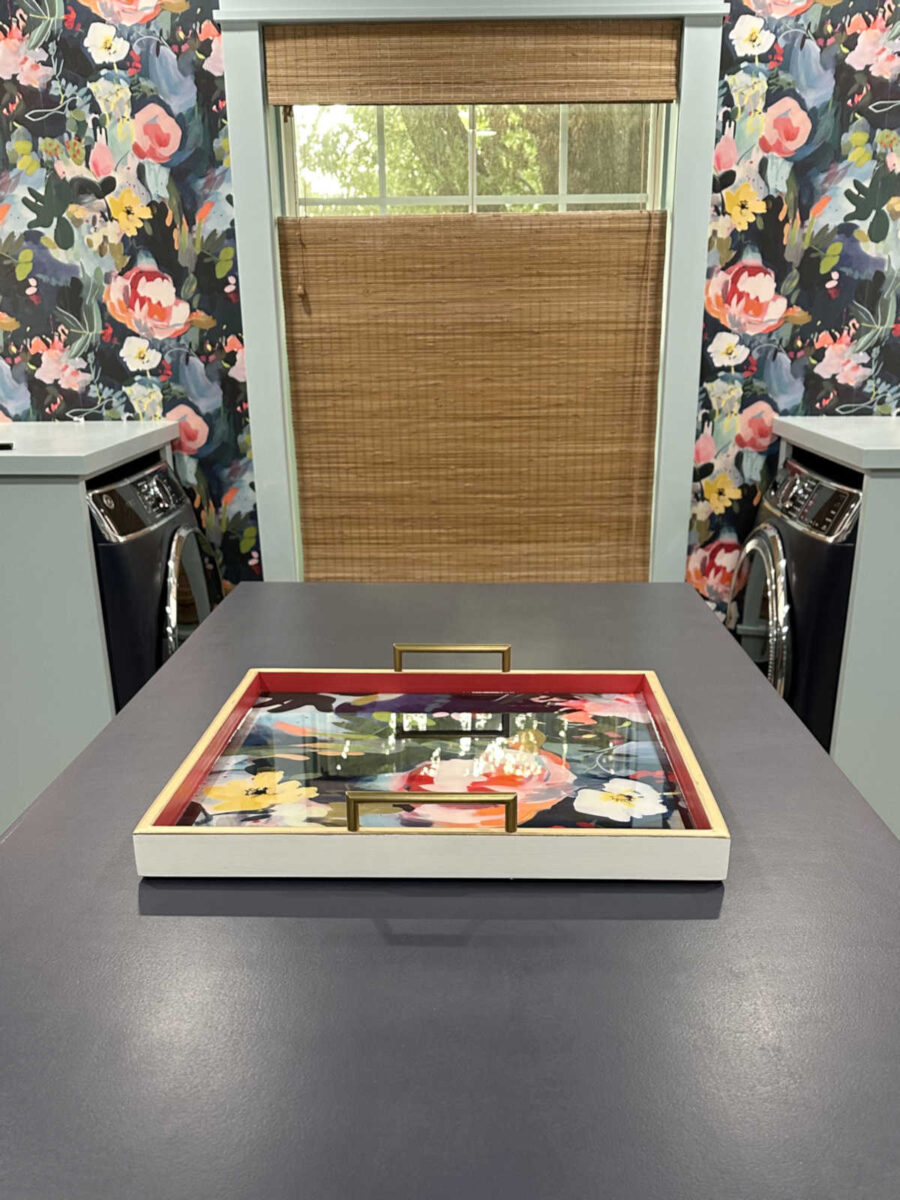
And here is my new decorative tray with the super shiny resin wallpaper bottom, a touch of pinkish red around the inside, the gold leaf accent and gold handles, and the white on the outside.
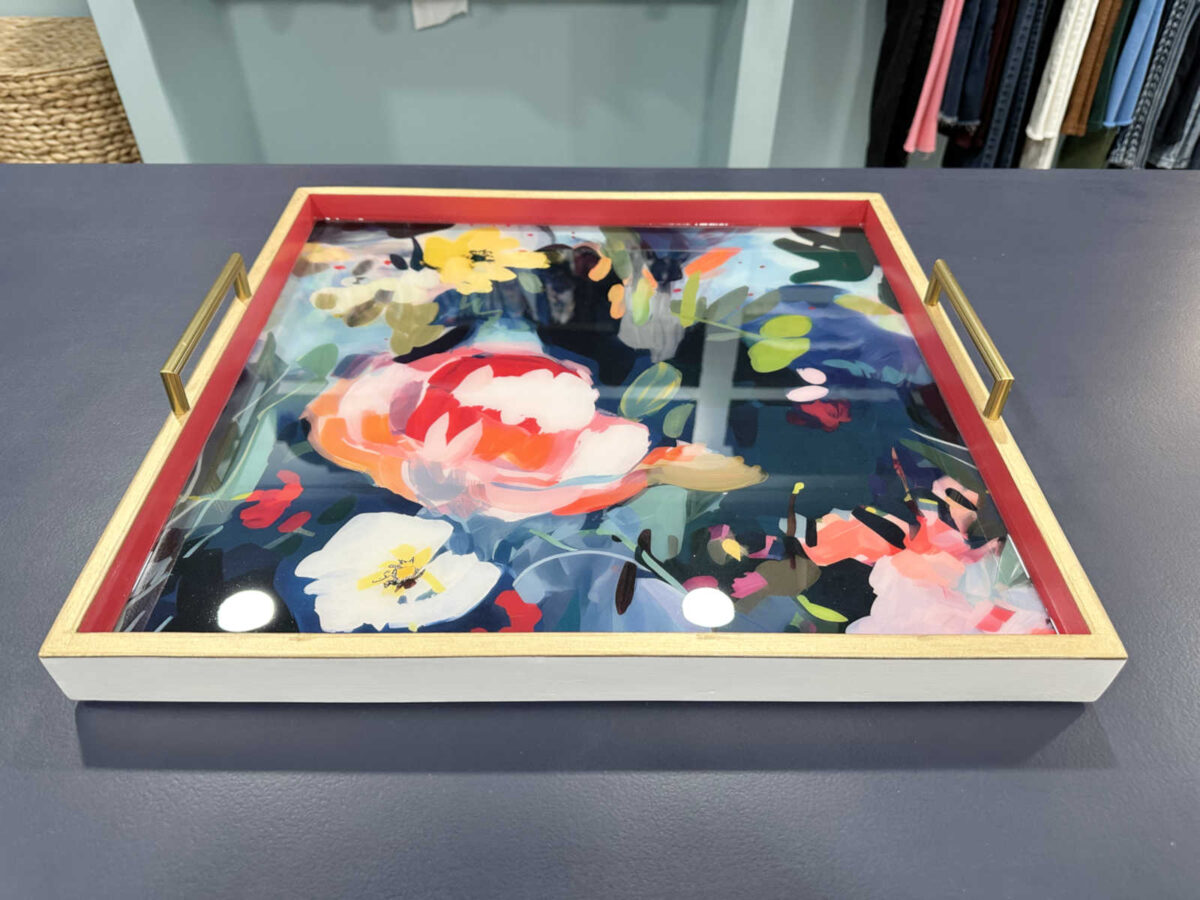
I wanted to bring some pink and some pattern to the island, and I think this is the perfect way to do that.
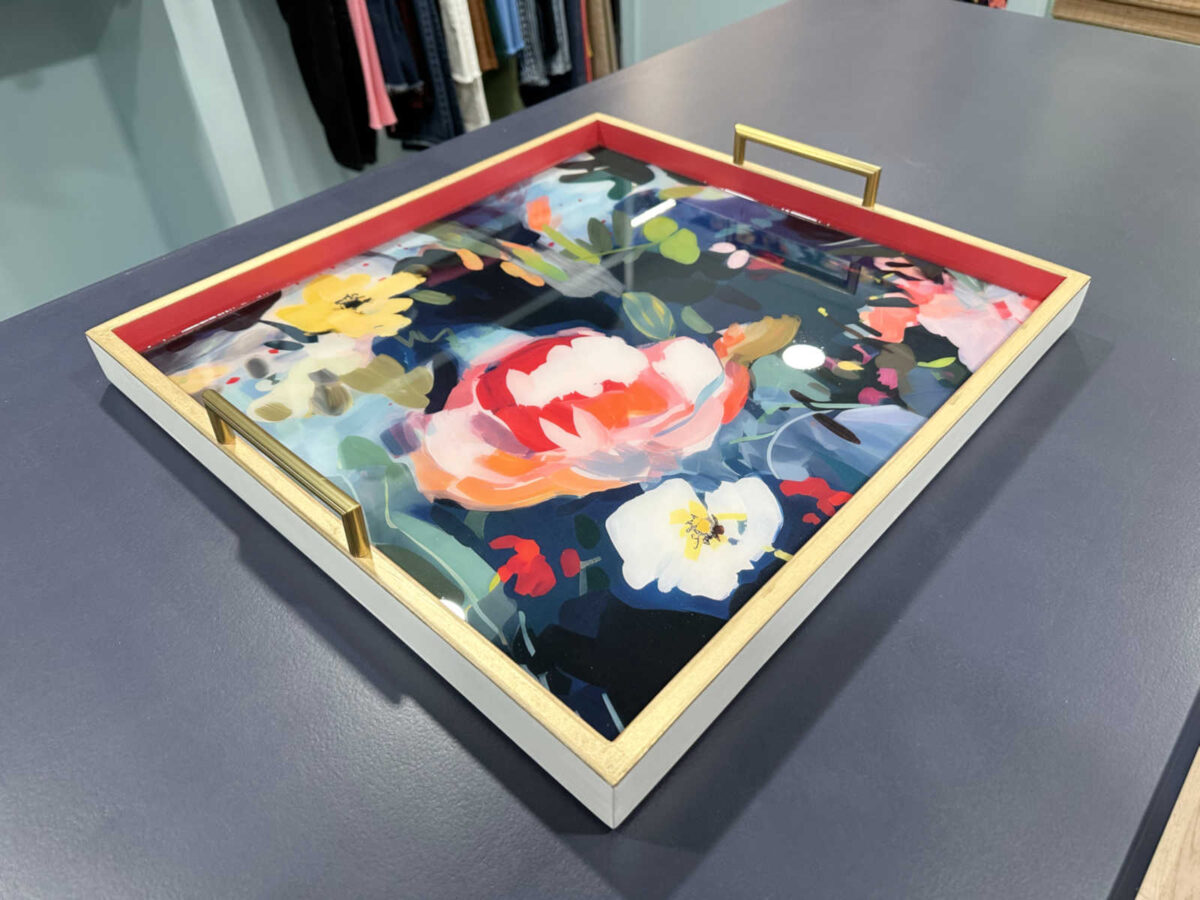
And I love how shiny that resin is. It adds the perfect amount of glimmer and shine to the island without being overbearing.
This project was a fun little diversion while waiting for paint and clay to dry.
I checked on the chandelier and flower stem frame this morning, and I think those are finally dry enough to install them today. But the flowers still aren’t dry enough to prime and paint. If y’all have any tips on how to get air dry clay to dry faster without it cracking, I’d love to hear it!
More About My Walk-In Closet/Laundry Room

see all walk-in
closet diy projects

read all walk-in
closet blog posts

Addicted 2 Decorating is where I share my DIY and decorating journey as I remodel and decorate the 1948 fixer upper that my husband, Matt, and I bought in 2013. Matt has M.S. and is unable to do physical work, so I do the majority of the work on the house by myself. You can learn more about me here.


